Follow Me...

       
Thanks for stopping by! Don't forget to subscribe!

Thursday, May 22, 2014

You Are Loved Layout using Die-Namite Dies

1
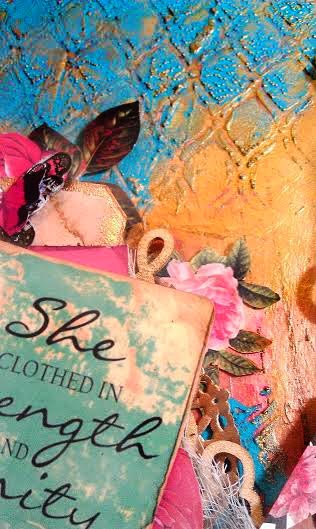
Hi everyone, over on the Die-Namites blog today I'm sharing a layout that I created of me and my daughter Brittany. 


Here are the Die-namties Dies that I used for this layout.

http://www.die-namites.com
 
 
Here is a process video of me making this gorgeous layout.


Supplies Used:
  • Die-Namites Dies
  • Faber-Castell Design Memory Craft PITT Big Brush Artist Pens
    • Medium Flesh  131
    • Green Gold 268
    • Cold Grey VI 235
    • Light Cobalt Turquoise 154
    • May Green 170
    • Phthalo Blue 110
    • Dark Sepia 175
  • Tattered Angels Glimmer Mists
    • Dried Hydrangea
    • Honey Dew Melon
    • Cherub Pink
  • Heidi Swapp
    • Gold Lame Color Shine
    • Heart Lattice Stencil
  • Recollections
    • Microbeads
    • Resin Bird Houses
  • Prima - Shabby Chic Resin Birds
  • Liquitex
    • Gesso Prep Surface
    • Light Modeling Paste
  • Krylon - Gold Metalic Spray Paint
  • Glitz - Giant Roller Doodle Triangles
  • Ranger 
    • Archival Jet Black Ink
    • Tim Holtz Distress Ink - Vintage Photo
  • Stampabilities - Faded Script Stamp
  • EK Success - 1" Circle Punch
  • Tim Holtz Idea-o-logy - Word Plate
  • Fab Scraps -  Flat back Pearls
  • Amy Tangerine - "Yes Please" Roller stamp
  • 7Gypsies  - Library Drawer Naked Tabs


Read More »

Tuesday, May 20, 2014

Bloom Impression Tool Tutorial

0
Hi everyone, I'm so excited to bring you a few tips and techniques for using Marion's new Bloom Impression Tool.  Look at at these beautiful flowers you can make in just a few minutes.


I thought I would share a few tips beyond Marion's already amazing video tutorial. In today's tutorial we will make the flower on the right. However, the flower on the left follows the same steps, just a different petal shape.

Remember these simple things before getting started. 
  • Papers 20lb - 80lb  work best.  The flower being demonstrated below is made from 80lb white cardstock paper with no texture.  The flower above on the left was made from standard 20lb copy paper.    If your paper is too thick then it will be difficult for the paper to shape.
  • Paper should not be too wet!  It simply needs to be lightly misted. Thicker papers may require more moisture than thinner papers.  If the paper is too thin and too wet, it may rip when using the tool.
  • For both flowers above I used Marion's New Bloom Impression Dies  the flower on the right was the Rose Petal die, and the Flower on the left was the Peony Die.


Here are the steps.  Since Marion has already done a video tutorial, I thought I would do a written tutorial with my special tips. 


  1. Start with 5 large petals, 5 small petals, 2 leaves,  7 stamens  (6 colored the desired stamen color and 1 colored the same as your flower color)
  2. Mist your hand with water or your favorite watercolor spray.  By spraying your hand you will avoid excess moisture on your petals. Wetting the paper loosens the starches in the paper and allows the paper to be more pliable. When the paper dries, the starches help to keep the shape of your petal.   Too much moisture will cause the paper to rip.  The petal should be cool to the touch.  If the paper is soaked it will rip in the tool. It may take some practice getting the right ratio.  I have found 1 spray with a fine mist is perfect.   
  3. Pat the petal in you palm rotating it to saturate both sides.
  4. Place the petal over the hole of the bottom of the tool, I made sure mine went all the way to the rim of the acryclic. It is ok if the petal is over the edge a bit. 


  1. Carefully place the top onto the petal pressing it firmly in place.
  2. twist the tool back and forth 2 times is enough.
  3. open the cap to see the bowl shaped petal
  4. This is a look at the smaller petal (You can see a gap around the edges - this ok)  Repeat steps 5-7


  1. Here is the shape of the smaller petal after twisting the tool.
  2. This is a close up of the larger petal after twisting the tool.  You can see a side by side comparison of how the two have different size petals yield a different shape using the same technique.
  3. Repeat steps 2-7 until all 10 petal shapes have been molded.
  4. Use the stamen that is your flower color to build out your first base. I used hot glue for the sake of time, but a quick dry wet glue can be used instead.

  1. Place a small amount of glue on one arm of the stamen, and place your large flower so that the cup barrels outward.
  2. This is how your first flower petal will look.  If you prefer you can place the stamen to the inside of the flower rather the outside.  This would give a cleaner look to the bottom of your flower.  The stamen will be invisible when the flower is complete.
  3. Overlap your next petal gluing it at the base
  4. Continue until all 5 large petals have been glued into place. Slightly overlapping one top of the other. 


  1. To start the inside row, off set your first petal between two petals on the back row. 
  2. Continue layering the next petal slightly overlapping the first until all 5 small petals have been added.
  3. I used Copic marker Y32 to color my remaining stamens, I colored 6 or 7 for the next step. 
  4. Adhere your first stamen flat to the inside of your flower shape.  This will offer a nice base for your stamen cluster. 


  1. Gather the petals of the stamen in the center and apply a small amount of glue to the back of the stamen (BE VERY CAREFULL IF YOU ARE USING HOT GLUE)
  2. Add the Next stamen on top of the glue
  3. Repeat steps 21 - 22 until the desired thickness of your flower center is achieved.
  4. The stamens now look like a cluster.


  1. Add your stamen cluster on top of the flat stamen inside your flower center.
  2. You can leave the center alone, or dress it up a bit more with a pearl, rhinestone, piece of jewelry or a button. Be creative and make your flowers unique.   I used a pale yellow rhinestone (basically because I have tons in my stash that never seem to get used.  I made it match the stamens better by coloring it with the Green Gold PITT Artist Pen #268.
  3. Cup your leaves the same way you did your petals in steps 2 -  9. 
  4. This is how the leaves look when you remove them from the bowl.


  1. Place the cupped shape over the bottom of your flower. Make sure you can see the leaves when the flower is turned over. You may have to glue it close to the edge.  
  2. I like to include a few petals for better composition and have them overlap like we did the flower petals. 


Here is a glimpse at the finished flower.   Top and side view. 
`


It really is super easy to create flowers now using this tool.  I look forward to sharing additional flower tutorials with you soon.   I have a few ideas for different techniques.    


Did you hear that the tool is now available at Scrapbook.com?  Get your's while supplies last!  

If you have this tool, we would love to see the flowers you create   #MarionSmithDesigns or #BloomImpressionTool in your social media outlets. 

If you have any other questions or need more info on this tool, please leave them in the comments, and a DT member will try and get back with you.  

Thanks for stopping in today,

Tonya
Read More »

Monday, May 19, 2014

Joining the Faber-Castell Design Memory Craft Team

0
I am so excited to announce that I have been selected as a Member of the Summer 2014 Guest Design Team for Faber-Castell Design Memory Craft.   I can not wait to begin this creative journey.  I plan to share lots of tutorials on ways to use their amazing Product lines.


Make sure you are following their blog so that you don't miss a single post.  The other members of the team are so talented, and I encourage you to visit their blogs and sub to them also. 
 
My brain is in hyper drive right now with ideas, and I can't wait to get started sharing them with you!
 
Thanks for stopping in today,
 
Tonya
Read More »

Thursday, May 15, 2014

Exciting News About Our Ustreams

0
I'm super excited today to share with you that I have now partnered with Scrapbooking With M.E. Boutique to bring you  Tonya Gibbs Live Ustreams.  We will continue to meet the first Monday of Each Month at 8:30 p.m. EST.  So go through your calendar and save the First Monday!

In addition to our kits, the Boutique has all the latest and greatest products for you to purchase.  They also have a Brick and Mortar store in Alabama.  If you are in the area - make sure you stop by and purchase from them!

https://www.facebook.com/groups/scrapbookingwithmeboutique/


Each month our Ustream will feature a monthly kit as well as various other items from the store. Everyone who purchases a kit will be able to follow along and see various ideas of how to use the items in the kit.  We are trying to keep the base kits under $40 retail.  There may be months where  additional supplies are needed, or extra goodies are not included from the collection, so we will  offer a second add-on kit. The add-on kits will be optional and not necessary to complete the project.  

THEN AS A BONUS - I will post additional projects on my Blog and YouTube to finish off that month's kit.  The Boutique DT will also use the products in their kit to share with you on the Boutique's blog.   This will help you to use all those products you  just purchased!

Kit purchases are not necessary to join in on the Ustream fun!  However, The Boutique will be hosting give-a-ways on each of her live UStream broadcast.  So please come join us in the fun!

Our next class will be June 2, 2014.  Kits have already sold out for this class.  Supplies were limited by the distributor - apparently this collection was HOT everywhere!  Just so you know - we will be using the Urban Market Collection from Teresa Collins.  If you want the kit - just let Edith or Melina know. If supplies become available again, they may be able to accommodate you.


FOR THE 411 - Make sure you are following this blog! And go over to the Boutique's blog  and follow them.  They keep you updated with sales, announcements and BIG GIVE-A-WAY'S.  Their online store is closed Facebook group. Ask to join if you are a new member:  https://www.facebook.com/groups/scrapbookingwithmeboutique/   Kits will also be available on their blog for those who do not participate in Facebook. 

JULY KITS
We are working on the July kit now and details will be available soon -  make sure to check the blogs daily.  You will have your kits prior to the show so that you can follow along!
 
EXTRA SPECIAL THANK YOU!
I want to close with an Extra Special Thank You to FlamingoScraps.com  for their support of this show from the beginning.  I love Suzanne to death! Her friendship, and business support mean the world to me.   I would never have started this journey without her guidance, and continued faith in me.

Thanks for stopping in today,

Tonya

Important links:
Read More »

Monday, May 12, 2014

Birthday Card and Die-Namites May Challenge

0
Happy Mother's Day -  I hope you have an amazing day today!
I've created a card using the sketch from the May Sketch & Dare Challenge.


Have you submitted your project for the Die-Namites May Sketch & Dare challenge?  
Don't let the time get away from you! 


http://www.die-namitesblog.com/2014/05/mays-sketch-challenge-dienamites-dare_5.html

Rules can be found here!  What are you waiting for?  

 You have until the last day of the month to post your creation on your blog,
with mention of the Die~Namites Die used and a link back to the Die~Namites Dies blog.
Link your blog post, using Inlinkz, to the Die~Namites Die blog.

 A random winner will be chosen from eligible participants for a
$25 Gift Certificate to the Die~Namites Dies.


Here is a glimpse at the sketch.


For today's card I used three dies from Die-Namites 


The Spring Doily is so delicate and creates the perfect background for my floral spray.  I used standard weight copy paper to cut the doily so that it would remain soft and light weight. 

Before die-cutting my Winter Bouquet flowers, I Pre-Gessoed the cardstock.  Then used my Faber-Castell Design Memory Craft pens to color them.   I love how they look variegated in yellow, orange and pink.  To smooth the colors together, I spritz them and the focal point flower with the Heidi Swapp Color Shine in Gold Lume!  (YES, I'm still on a midas kick). 


I cut the branches off the Leafy Branch and adhered them around a glue dot in multiple layers to create the flower in the focal point of my card.  To finish off all of my flower centers I added a Webster's Pages Sparkler.


I love how my focal flower mimics the same shape as the sunflowers in the Winter Bouquet Die.
I can't wait to see what you create with this sketch challenge and dare.


Thanks for stopping in today,
Tonya

Read More »

Friday, May 9, 2014

Varsity Layout by Tonya Gibbs - May Challenge

0

Hi everyone, wow can you believe that school is almost out?  Where did the time go? Seriously It was just fall in my mind.   My son, Brighton, is a Jr. this year and I'm going to spend some time in the next year crying - no seriously - documenting his high school story!   I know it is hard to sometimes create Masculine Layouts so I have a few tips to kick start your creative process.

 
First of all GRUNGE makes masculine layouts come together so easily.  And what better way to get grunge then Mixed Media.  Just like little boys - the messier the better! Texture is my next hint!  I think you can't have too much texture on a boy layout!  


Second - stick to masculine colors.  Like Blues, Greens, black, browns.  Since my son's high school colors are Blue, White & Red, I decided to use them for my focal color pallet.


I typically avoid flower clusters and stick to masculine paper elements.  7Gypsies Vintage Varsity line was perfect for this layout - since it offered so many 'sports' themed elements that could be fussy cut and used for layers. 
 
Here is a process video of me making this layout.


I challenge you to post some masculine projects this month in the AA Facebook page.  From little boys, to grown me, it is a challenge sometimes to work with their photos, but they deserve to be documented too!    With Father's Day in a few short weeks, this will kick start your brain into thinking masculine!  
 
 
Thanks for stopping in today,
 
Tonya Gibbs
 
 
Layout Supplies:  
  • Canvas Corp - White smooth Cardstock
  • 7Gypsies - Vintage Varsity 8x8 pad
  • Stamper's Anonymous & Tim Holtz - The Ultimate Grunge
  • Tattered Angels - Silver Glimmer Mist
  • Faber Castell - Design Memory Craft   PITT Big Brush Artist Pens in the following Colors:
    • Black,
    • White,
    • Cold Grey I 230,
    • Cold Grey IV 233,
    • Phthalo Blue 110,
    • Dark Sepia 175,
    • Deep Scarlet Red 219
  • Faber - Castell Design Memory Craft Gelatos in the following colors:
    • Dark Blue
    • Silver
  • Faber-Castell Design Memory Craft Glaze
  • The Crafter's Workshop 6x6 stencils in the following Patterns:
    • Mini Numbers
    • Mini Well Rounded (this is the grunge stencil)
    • Mini Wonky Circles
  • Liquitex - Full Body Gesso
  • Prima - Distress Tool
  • Pearl Ex -  Interference Red
  • Score Tape
  • Scotch - ATG
  • Scotch - Mounting Foam
  • Idea-ology - Tim Holtz - Grunge Board Numbers
  • Idea-ology - Tim Holtz - Sanding Block
  • Ranger Ink - Dyan Reavely Dylusions Sprays White Linen
  • Cosmo Cricket  - Silver Glitter Adhesive Sheets
  • Studio Calico - Wood Veneer Speech Bubbles
  • Studio Calico - Wood Veneer Abroad Cameras
  • Clear Glitter Nail Polish
  • EK Success - Square Binding Edge Punch
  • EK Success - ZIG Wink of Stella Clear
  • Silhouette Cameo - Primitive  Stars
  • Stars - Rhinestone buttons
  • Index Card
Read More »

Thursday, May 8, 2014

Full of Wonder Mixed Media Layout

0

Hi everyone, I hope you're having an awesome week so far.  Today I'm sharing a mixed media layout of my niece Emily. I recently took this photo at Easter and the expression on her face is so precious. She's just oozing with sweetness.   I thought that the tag on the right from Marion's Mad Tea Party Collection said it all "Wonder, For the Curious At Heart the Wanderous Mind, and the Adventurous Soul"


I decided on Marion's Motley Collection  & Junque & Gems, because there are so many elements that can be fussy cut from this collection. The festive color palette was perfect for my sweet Emily! 


I used scraps from recent projects, and took this opportunity to fussy cut the elements that could be used as stand alone pieces  then cut banners from the rest. This is a great way to eliminate scraps.  Individually these small elements seem insignificant, but when clustered together, they really make a statement.


I used a neutral baby blue paper for the background, and then applied a few mixed media techniques to give it texture and depth.   I stuck with the hot pink tones so that my photo would really pop.  


I'm seriously in LOVE with Gold right now, and decided to spray paint some generic paper doilies with Krylon's Metalic Gold Spray Paint.  I love how they look inside my embellishment clusters, and the gold matches this collection perfectly! 


I placed my title in the bottom left hand corner inside another embellishment cluster. Her eyes were so bright in the photo I decided to include that reference in my title   "Blue Eyes Full of Wonder".  The title card was part of Mairon's Scarlet Digital collection.   

We would love to see what you have created with Marion's gorgeous lines. Don't forget to #MarionSmithDesigns when you share your Marion Smith Designs Projects in Social Media.  

Thanks for stopping in today. 

Tonya Gibbs
http://www.psychomoms.com 


DESIGN TEAM CALL REMINDER:   - deadline for submissions is May 30, 2014. Here is the link with all the details!


Read More »

Tuesday, May 6, 2014

May Ustream Follow up

0
Thank you to everyone who came out to support the show last night - we had a few technical difficulties but we got through them, and look at this super fab canvas we finished! 


Thank you to the Team at Scrapbooking With M.E. Boutique for sponsoring this event and all they did to make the kits happen.  We sold out in less like 5 mins.  WOW that was so crazy.  You can get more information about their store and awesome ideas from their design team from their blog: 


For some reason Ustream was hating on my show last night.  I'm having difficulty getting Video 3 to YouTube so I'm including links to the show on Ustream to lessen the confusion.    All three are in great working order on Ustream.  

Video 1   |    Video 2  |    Video 3


Supply List: 
  • Marion Smith Designs - Motley Paper Collections in 12x12
  • Marion Smith Designs - Junque & Gems - Filigree Doily
  • Marion Smith Designs - Junque & Gems - Filigree Flower
  • Marion Smith Designs - Junque & Gems - Filigree Butterfly
  • Marion Smith Design - Printable Life Journal 
  • McCalls - Vintage Pattern
  • Liquitex - Fluid Matt Medium
  • Liquitex - Light Modeling Paste
  • Plaid - Bimini Blue Paint Apple Barrel
  • Folk Art  - Metalic Gold Paint
  • Krylon - Metallic Gold Spray Paint 
  • Doily - 6 inches
  • Recollections - Microbeads Beads
  • Splash of Color - Mist Irish Blue
  • Ranger Ink - Archival Ink Coffee
  • Ranger Ink - Tim Holtz Distress Ink Vintage Photo
  • Ranger Ink - Gold Utee
  • Ranger Ink - Queen's Gold Embossing Powder
  • Prima - Distress Tool
  • Michael's Wood Filigree 
  • Fiskars Jenni Bowlin  Punch - Blue Ribbon
  • Marvy Jumbo Punch - Pennant
  • Lace
  • Recollections White Daisy Flowers
  • Heidi Swapp - Color Shine Prim Rose
  • Heidi Swapp - Color Shine Gold Lume
  • Heidi Swapp - Layer Stencil - Heart Lattice 
  • Sizzix Alterations - Tim Holtz Movers and Shapers  Tag/Book Plates Die
  • Cheese Cloth
  • Burlap
  • Pearls


Save the Date - Our next Ustream will be June 2!

Thanks again, 

Tonya Gibbs

Read More »

Monday, May 5, 2014

Ustream Tonight - May 5

0
I hope you can join me live tonight, May 5, 2014,  on Ustream at 8:30 p.m. EST.

Link:  http://www.ustream.tv/channel/gibbst


We are going to create a mixed media canvas using Marion Smith Designs Motely collection.


This event has been sponsored by: 


They have these gorgeous papers on sale right now...

Visit their Facebook Group for details. 

As always  I will do my best to record! 
Tonya Gibbs


Read More »

Friday, May 2, 2014

Family Stories Mixed Media Layout

1

Hi everyone,  Mother's Day is around the corner, and today I thought I would share a layout of my family. My kids are turning into young adults right in front of my eyes. They are both in serious relationships and I thought it would be nice to document the time we have spent with them. I love spending time with all of them. For those of you who know me personally you know that Family is everything to me.  I wanted this layout to show them all how much I love them!  It is the highlight of my day when I can see all their faces! 

My friend pinned this layout sketch from PageDrafts.com yesterday and it totally inspired me. 


I selected Teresa Collin's Family Stories collection for my layout. I loved the soft aquas pinks and Navy blues in this collection and thought it would be great with my photos.

I also used the Teresa Collins Stencil 


Tattered Angel's Bubbles Glimmer Mist and little Modeling paste added the perfect texture to my background. 


I decided to use some Cosmo Cricket Glitter paper for my flags and wanted them to match my layout colors. I grabbed my Faber-Castell Design Memory Craft PITT Artist Pens and colored over the silver glitter. I think I'm falling in love with glitter thanks to Cosmo Cricket and their shed proof sheets!  


I had a few extra Bloom Sparklers from Webster's Pages on a card. You guys know how much I love to use extra piece here and there.  I decided they were perfect for the centers of my flowers.  I also spritzed the flower clusters with the Tattered Angel's Bubbles Glimmer Mist. This is the perfect minty blue color with silver glimmer.


Die-Namites Dies Leafy Branch die was the perfect addition to finish off my cluster.  Since my family is my anchor, I decided to nestle the Anchor charm from the ephemera pack into the flower cluster. 


I used one of the note cards in the collection to die-cut butterflies using a Martha Stewart Punch, and the Tim Holtz mover's and shapers die.   My photo was matted on the Spring Doily from Die-namites to give it a nice petite scallop border  then double matted onto a pastry doily for added texture and depth.  I used lots of the snippet titles from the Teresa Collins Ephemera pack around the page as my title, and used the title area of the sketch for my journaling. 

My kids are growing so fast and I know they are going to start leaving the nest soon. I want them to spread their wings and fly, but when they do this Momma is going to probably fall apart. No matter where life takes them, or who they pick as their life partner,  I hope they always treasure family time, and remember how much they are loved! 

Thanks for stopping in today, 

Tonya Gibbs
http://www.psychomoms.com 
Read More »
I love seeing things you create using my tutorials or project shares. Please use the following handles/tags in social media to insure that I get to see your creations:

INSTAGRAM: #FollowingTonyaGibbs    |   TWITTER:  @gibbst    #FollowingTonyaGibbs   |      FACEBOOK:Tag  Tonya Gibbs   #FollowingTonyaGibbs

I Design for:

    http://www.yvonneblair.com

Guest Artist: Click icon to see post!

http://www.teresacollinsdesignteam.blogspot.com/2013/10/family-stories-layout-and-video-by.html#comment-form   http://canvascorp.com/2013/03/21/easter-treat-baskets/


Past Teams

http://www.die-namites.com/     marion