Follow Me...

       
Thanks for stopping by! Don't forget to subscribe!
Showing posts with label Stamp. Show all posts

Monday, January 9, 2017

Making Waves for Yvonne Blair Designs

0
Happy New Year everyone! I got to bring my New Year  in on the beach, and felt inspired to create a
journal page from this great stamp from Yvonne's collection.


http://www.iostamps.com/mm5/merchant.mvc?Screen=PROD&Product_Code=C17134&Store_Code=IOSTAMPS&search=waves&searchoffset=&filter_cat=&PowerSearch_Begin_Only=&sort=&range_low=&range_high=

For today's post, I'm using Yvonne's special Journal in 4x8.


Here is a quick 15 minute video on how I created this page:


I wanted to keep this page simple, and let the quote speak for itself.  So I printed a moon image from the internet, and painted myself  a giant wave!  Here you can see the texture left behind by the thick paint and the variations of paint color.  I love the contrast of the copper embossing powder on the sea foam greens.

 Here is a final glimpse at the Journal Page.   You can see the moon peek-a-booing out of the far left corner.  It is hard to tell what it is at first glance, but I know what it is.


I really believe that you have to sometime make a few waves to make a difference in your life every now and then.  If we move through life afraid to shake things up, then we never seem to get anywhere.  This page will serve as my reminder to not be afraid to ride one of those waves and see where it takes me! I hope you enjoyed this page. Thanks for hanging out with me today, I hope you had fun, and learned a few new techniques.
Read More »

Tuesday, December 13, 2016

Wooden Ornaments for Yvonne Blair Designs

0

 
Oh I love home crafted Christmas ornaments. Every year I try and make a few new ornaments for my tree. This has become a tradition that my family looks forward to each year. Today, I would like to share with you one of  this year's new designs using Yvonne's Compass stamp from Impression Obsession. 


http://www.iostamps.com/mm5/merchant.mvc?Screen=PROD&Product_Code=C17123&Store_Code=IOSTAMPS&search=Compass&searchoffset=&filter_cat=&PowerSearch_Begin_Only=&sort=&range_low=&range_high=

You can also use several of Yvonne's other stamps, I give you some ideas in the video link below.
 
For the base of the ornament I'm using these wooden shapes I grabbed at a local craft shop. This bag was under $5 and as you can see we will be able to make lot of ornaments.


I filled in the knots on the wood with Modeling paste so that I can get a smooth surface  for stamping.  You can leave these natural with  a white wash of gesso or you can paint them if you like.
In the video below, I will share with you two versions that I created, so that you can decide which technique you like best.   But both are gorgeous.


It was easier to add the foiling  on the chalkboard version because the paint helped to make the surface smooth.  But if natural look is what you like, I think it turned it nice as well. It is just harder to see the foiling.  If you decided to go with this technique, I suggest bold and heavy designs for your stamping. Thick and large fonts will show up better.


Here is the video sharing how I did the technique.


Watch on YouTube
Wasn't that fun?   I want to make a bunch these. They would be great to add to packages, and share with your friends and family.  Or create a set and give them as a gift.  Thank you so much for hanging out with me today. 
Read More »

Monday, October 10, 2016

Blessing Watercolor Cards for Yvonne Blair

0
Watercolor Card Tutorial by Tonya Gibbs for Yvonne Blair Designs

After a weekend of torment created by Hurricane Matthew up and down the south eastern coast line,  I thought I would spend some time reflecting on how grateful I am for the many blessings I have in my life.  During my extra time off, I spent a little time in studio while the storm raged outside with my watercolors and a few of Yvonne's stamps.  Today I would like to share with you a few cards I created during this time of reflection.

I reached for these two stamps sets that Yvonne Designs for Impression Obsession Stamps to create these cards:

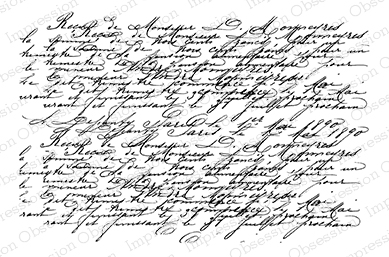
French Script


http://www.iostamps.com/mm5/merchant.mvc?Screen=PROD&Product_Code=3172-XL&Store_Code=IOSTAMPS&search=3172-xl&searchoffset=&filter_cat=&PowerSearch_Begin_Only=&sort=&range_low=&range_high=

I'm going to create two cards in today's share the first is using the "Count Your Blessings" from the Words of Art stamp set.  This set has so many amazing sayings in it. Perfect for card makers!


Tonya Gibbs Watercolor Blessing Card for Yvonne Blair Designs

In the video below, I share with you a technique for creating watercolor flowers using kitchen plastic wrap!  You allow the paint to dry on the paper and then follow the text that is left behind with watercolor pencils to give more details to your flowers.  It is so simple and perfect if you don't know how to draw flower shapes. You literally let the plastic wrap and wet paint do the work for you!


Tonya Gibbs Watercolor Grateful Heart  for Yvonne Blair Designs

I struggled a bit more with this flower shape as the colors seemed to blend more in and I really wasn't feeling it when I added the colored pencils.  In hindsight  I probably should have left it alone when I removed the plastic wrap. I really liked the abstract of the dried paint.  But oh well, this is creative play, and sometimes you just have to follow the journey that the art takes you.  To fix my painted mess I reached for Yvonne's French Script stamp and the Heidi Swap Navy Blue ink (which is my new favorite over black!), and started stamping.   After assembling the card I realized the only thing missing was flower centers on both cards and my flowers came to life!

The paper stacks that I used were found in Target's dollar bin, and I fell in love with the copper foiling.  I decided to duplicate this with copper embossing for Yvonne's Stamps.

Here is the video showing my process.


I'm so grateful that my family survived this terrible storm. I know so many that sustained damage to their homes, and several communities are still without power.  Some have lost their lives and I pray for their families to find peace.  My heart is saddened for the country of Haiti and for the Residents along the coast of Florida, Georgia, North Carolina, South Carolina, and Virginia many of these communities will never be the same.   If you are inclined, and have the capacity to do so, I encourage you to give to the American Red Cross.  I know there is a need for relief both at home and in Haiti where so much life has been lost. 


Supplies Used in these two Cards: 

  • Impression Obsession - Yvonne Blair Designs - Words for Art Stamp
  • Impression Obsession - Yvonne Blair Designs - French Script Stamp
  • Canson Watercolor Paper 140lb 
  • Artist Loft - Watercolor
  • Royal Langnickel - Brush Value pack   #3 Round, #10 Flat
  • Wheat Jute Twine
  • My Mind's Eye On Trend Cardstock 6x6 
  • Halloween Cardstock 6x6 Target Dollar Bin 375772
  • Fall Cardstock 6x6 Target Dollar Bin Kraft Copper Foil 375773 
  • Faber-Castell Design Memory Craft - Stamper's Big Brush Artist Pen Cadmium Yellow 107
  • Faber-Castell Design Memory Craft - Stamper's Big Brush Artist Pen Scarlet Red 118
  • Faber-Castell Design Memory Craft - Stamper's Big Brush artist Pen Caput Mortuum #169
  • Zing Copper Embossing Poweder
  • EK Success Powder Embossing Buddy
  • Versa Ink Pad
  • Marvy Embossing Heat Gun
  • Heidi Swapp Navy Ink 
  • Ranger Multi Medium
  • Scotch Double Sided Foam Tape
  • Scotch ATG Adhesive
  • Kraft Cardstock 


Read More »

Monday, January 4, 2016

Yvonne Blair Designs Art Girls

2


Happy New Year everyone! I hope your year is off to a great start. I have some exciting news to share with you to kick start the year in the right direction! My great friend Yvonne Blair, whom I met several years ago when hanging out at my Local Scrapbook Store, She Scrapbooks, contacted me over Christmas break and told me she was releasing her second line of art journal stamps this week with Impression Obsession. She then asked me to be one of her Art Girls! A lot of SQUEALS took place, as I'm sure you can imagine. I'm so very excited for her, she is so sweet and talented, and I know my sweet followers are going to love her stamps and journaling products.

http://www.yvonneblair.com/2016/01/very-very-exciting-news.html

I'm so excited to be along talented group of ladies. Yvonne Blair in the top left, then Lynne Forsythe, and bottom right Bobbie Smith. Get to know all of these wonderful ladies here...

Yvonne's collections will be perfect quotes and doodle art drawings for all your art journals, Bible journal pages, cards, and mixed media projects. I can't wait to share more with you! Here is a little sneak peek at two of the stamps that Yvonne is releasing this week at CHA.


Her pieces are painted with turquoise on the tag so that they "shine" against the warm colors of pink and gold on the tag. The Shine Your Light Stamp says "Shine The Unique Light That is Only Yours To Shine." I added the sentiment onto a piece of acetate (recycled packaging) with gold foil, then painted the back with turquoise paint to make it pop. I just love the hand Sketch Butterfly Stamp was foiled onto a piece of cardstock painted turquoise, then I added doodled white lines with a gel pen to fill in the negative spaces. I love that the areas of the butterfly are left open so that you can doodle inside the wings, giving it a unique look every time you use it.

To find out more about Yvonne and her stamps, please visit her blog at: http://www.yvonneblair.com/

Her stamps can be purchased at: http://www.iostamps.com/

Thanks for stopping in today! Happy New Year!

Tonya

Tag Supplies:
  • Impression Obsession - Yvonne Blair - Shine Your Light Stamp CHA 2016 Release
  • Impression Obsession - Yvonne Blair - Sketch Butterfly Stamp CHA 2016 Release
  • Advantus - Tim Holtz - Idea-ology Collection - Baubles
  • Advantus - Tim Holtz - Idea-ology Collection - Loop Pins
  • Tombow - The Craft Collection - Mono Gel Pen - White
  • Lindy's Stamp Gang - Flat Fabio - Color Mist Spray Set - Caribbean Cruise
  • Lindy's Stamp Gang - Starburst Glitz Spray - Blazing Sun
  • Maya Road - Chipboard Collection - Chipboard Mini Set - Love
  • Martha Stewart Crafts - Crafter's Clay Collection - Silicone Mold - Flower Garden
  • Martha Stewart Crafts - Crafter's Clay Collection - Silicone Mold - Romantic
  • Martha Stewart Crafts - Crafter's Clay Collection - Silicone Mold - Birds  
  • Ranger Ink - Dina Wakley Media - Heavy Body Acrylic Paint - Turquoise
  • Stampers Anonymous - Tim Holtz - Layering Stencil - Rays
  • Ranger Ink - Tim Holtz - Distress Glitter - Picked Raspberry
  • Prima - Fairytale Roses Collection - Miniature Mulberry Flower Embellishments - French White
  • Prima - Fairytale Roses Collection - Miniature Mulberry Flower Embellishments - Baby Pink
  • Prima - Trinket Collection - Fabric Flower Embellishments - Reflections
  • Studio Calico - Snippets Collection - Wood Veneer Pieces - Chevron
  • Sizzix - Tim Holtz - Alterations Collection - Movers and Shapers Die - Tag and Bookplates
  • Sizzix - Tim Holtz - Alterations Collection - Bigz Die - Tiny Tabs and Tags
  • IndigoBlue - Flitterbox - Gold Foil 

Read More »

Wednesday, April 1, 2015

Ustream Follow Up - March 31

0
Wow what a great show last night on Limor's Ustream Channel.  I met some new friends, and we had a lot of fun creating these cute little Mini Canvas Bags...


In the show I used  Limor's Signature products from Lindy's Stamp Gang and IndigoBlu to create these adorable treat bags.   Here is a link to the recording in case you couldn't make it to the show live.


Be sure to watch the show for a coupon code worth 20% off at LimorWebber.com sale ends Friday, April 3rd.   Reminder - coupon code must be entered in ALL CAPS.

If you decide to create these bags, please make sure you #LimorWebberDesigns  in social media so that we can find it.  You can also #FollowingTonyaGibbs.

Supplies used for the bags: 

Canvas Bags
IndigoBlu - Limor Webber Designs - A6 Ink Splat Butterfly
IndigoBlu - Limor Webber Designs - Splattered Heart
IndigoBlu - Limor Webber Designs - Limor Circles
Lindy's Stamp Gang - Flat Fabios - Tres Chic
Lindy's Stamp Gang - Flat Fabios - Under The Boardwalk
Lindy's Stamp Gang - Embossing Powder - Tres Chic
Tim Holtz  Stencil - Bubbles
Faber-Castell Design Memory Craft® - Stamper's Big Brush Artist Pen - Black 199
Faber-Castell Design Memory Craft® - Stamper's Big Brush Artist Pen - Light Blue
Beacon Fabri-Tac
Water Bottle
White Acrylic Paint
Trims
Rhinestones

Thanks again for your support and for hanging out with us. I hope you have been inspired today!

Tonya


SAVE THE DATE - MONDAY APRIL 6, 8:30 PM EST 
My next Broadcast on My Ustream Channel will be Monday, April 6.  We will be creating a layout using those brand new Easter pictures.   I hope you can make it to the show at 8:30 p.m. EST  on http://www.ustream.tv/channel/gibbst 


Read More »

Saturday, February 8, 2014

Embellishment Tutorial Part 2 by Tonya Gibbs

0
Hi everyone, I hope your weekend is off to a great start. A few weeks ago I shared with you a project on making wooden ticket embellishments that coordinate with your paper collections.  Today I want to share with you another idea for embellishing your projects. 


Remember playing with Shrink plastic when you were kid?  I think I made charms in Vacation Bible School for 5 straight years (LOL).  Well here is a grown up project you can make using Marion's super awesome Curious Stamp Set.

I started with Poly Shrink Plastic by the Lucky Squirrel. You can use any brand just make sure it is clear if you want your roses to appear like glass. 


I used the rose & butterfly stamps from the from the Curios set. Stamp them using a permanent ink like Staz-on, or Archival Jet Black Ink from Ranger.


On the OPPOSITE side that you stamped, color the image with a permanent marker. Don't color on the side that you stamped or it will ruin your marker nib.  I used my Copic markers, but no need to worry about shading. The color becomes concentrated when they shrink, so the shading disappears.
 
 
Cut out your Shape.  Remove all negative space, but make sure you keep a thick border in the delicate stem area.   Here is what my Rose looks like when I cut it out. Notice that I colored outside the lines and made my stems a bit thicker.
 
 
Now grab a pair of tweezers, a heat source and start shrinking.  (The plastic will curl as it shrinks, but no worries, keep shrinking it will straighten out). 
 
 
The image shrinks to a 1/3 of the original size.  Once the image is cool enough to touch, I molded the leaves to give them some interest.


Use Glossy Accents or E6000 to adhere the charms to your projects. 
 
 
To show you how beautiful they are on a project,  I created this layout of my amazing parents using Marion's Garment District collection.  I love how tiny the butterflies turned out, and think the roses appear like glass and offer a nice touch of elegance to the layout.  


Here are the supplies from Marion's Garment District that were used to create this layout.
 
 
For more awesome projects using Marion's designs make sure to visit the Design Team's blog at http://www.marionsmithdesigns.blogspot.com 
 
Thanks for stopping in today,
 
Tonya Gibbs

Read More »
I love seeing things you create using my tutorials or project shares. Please use the following handles/tags in social media to insure that I get to see your creations:

INSTAGRAM: #FollowingTonyaGibbs    |   TWITTER:  @gibbst    #FollowingTonyaGibbs   |      FACEBOOK:Tag  Tonya Gibbs   #FollowingTonyaGibbs

I Design for:

    http://www.yvonneblair.com

Guest Artist: Click icon to see post!

http://www.teresacollinsdesignteam.blogspot.com/2013/10/family-stories-layout-and-video-by.html#comment-form   http://canvascorp.com/2013/03/21/easter-treat-baskets/


Past Teams

http://www.die-namites.com/     marion