Hi everyone, with Mother's Day right around the corner, I thought I would do a layout this week paying respect to this lovely woman who recently went on to be the Lord! She is my husband's Grandmother, and I have had the pleasure of loving her for over thirty years!
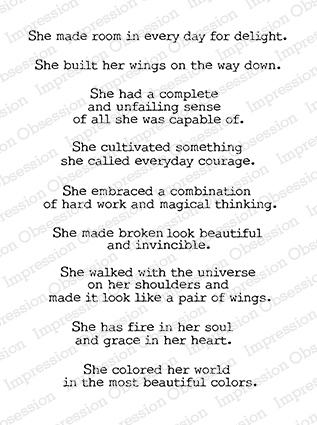
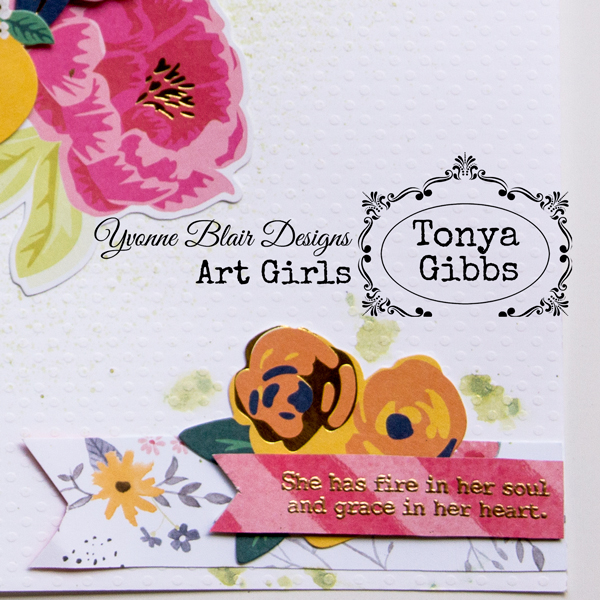
I picked one of the sentiments from Yvonne's Everyday Quotes 1 sets "She has fire in her soul and grace in her heart" to Title this layout, as it is the perfect way to describe Grandma May. She spent everyday of her life motivating those around her, but the words on her tongue were always singing the praises of our Lord Jesus Christ.
The sentiment was added with gold embossing powder so that it shines bright on the layout. The gold also works nicely with the foiling accents in the ephemera from the paper collection.
I wanted my layout to remain simple. So I chose a dot embossed white texture paper from Bazzill for the background. Then I lightly spritzed it with Lindy's Stamp Gang, Edelweiss Moss Green. This is a nice green with gold shimmer. It gives a bokken effect around my garden cluster.
Granny loved her flower gardens, and she was laid to rest on Earth Day this year. I wanted lots of flowers to frame her photograph.
I used papers and ephemera from American Crafts. The ephemera is Jen Hadfield, Home Made, and the papers are Dear Lizzy's Saturday collections Central Park and Skyline.
Here is a quick video sharing how I created the layout.
When we lose someone we love, it can be difficult. But I am always thankful that I have photos to reflect back on those happy memories that we have shared with them in the past. Thank you all for sharing this moment with me today. I encourage you to hug someone special, and snap a photo of them. Then pull out a paper collection, and create a layout.
Hi everyone happy Spring! I hope my friends in the North are ready to thaw out and start thinking of warmer days. Today I want to share with you another idea for busting up that scrap pile, and creating a few wonderful cards in the process.
I stumbled upon this wonderful watercolor artist on YouTube Jay Lee and followed a beginner tutorial for creating tulips. Here is the tutorial.
Reaching into my scrap bin, I pulled out a few scraps of watercolor paper that are left over when I trim down my large pad to create card panels. These smaller pieces are great to practice techniques such as brush strokes. I followed Jay Lee's tutorial and created some of my own tulips. I have to admit that mine are not as wonderful as Jay Lee's, but I will keep practicing. The practice panels that I decided to keep, I wanted to create cards to showcase them.
I used the Card Sentiment stamp set by Yvonne Blair and Impression Obsession. As always I have linked it to the IO store, but check with your local retailers first.
After these beauties had a chance to dry, I reached into my stash and found an old paper collection from Webster's Pages. This was a set of 6x6 papers from 2004 called Perfect Motifs. I recommend going through your own collection of papers and finding something similar. I chose a floral pattern, and coordinating solid that matched one of the colors in my flowers. Then paired it with a soft blue cardstock that has been in my stash for a long time.
Since each floral pattern has a different look, switching up the sentiment and patterned papers helps make the cards look unique while maintaining consistency as a group.
To keep the card making part simple and fast, I chose one card layout for all my cards. I wanted my cards to stay somewhat simple and flat so that they could easily be mailed. I spent all that time watercoloring so my flowers needed to be the main focus of the card.
Here is a process video of me walking you through the process of me painting the panels and making one of the cards.
These would make a great gift set, or awesome cards for the spring. You could also substitute out the sentiment for a Mother's Day sentiment if you would like to get a jump start on Mother's Day.
Thanks for hanging out with me today, I hope I have inspired you to pull out your watercolors and practice a few brush strokes. Jay Lee has inspired me, and I encourage you to check out this awesome channel for great watercolor tutorials. Then burn through a stash of scrapbook paper, and make a few cards to share with your friends and family. Share what you make with me in social me using the #YBArtGirlFun so that we can see what you have made.
Seriously, this man has been my "Forever Always" since the day I put my eyes on him in 1985. He walked into my computer class in high school, and this shy sophomore was instantly swept away by this obnoxious fast talking senior. Five years later, we were married and three years later we had our first child. Here we are, after thirty years, still so much in love, and I can not imagine my life without him. He is literally my world! OK enough mushy stuff.
Well, this was the first year that we actually went out for New Year's Eve in decades! Bonus was this was also the year that I fit into a SIZE 12! YEP - confession last year I was in a size 18 so I wanted to step out on the town in my high heels looking HOT! Irony - we were all caught up in the moment, NO ONE EVER SNAPPED A SHOT of my outfit except the one above. LOL, sometimes we just have to go with what we have, right! It is ok, I have the moment in my head, and at least I have a photo of that smile on my face!
For my layout today - I chose to use these awesome stamps from Yvonne Blair and Impression Obsession. As Always, check with your local retailers first, but I've linked them up on the IO Stamps site for your convenience.
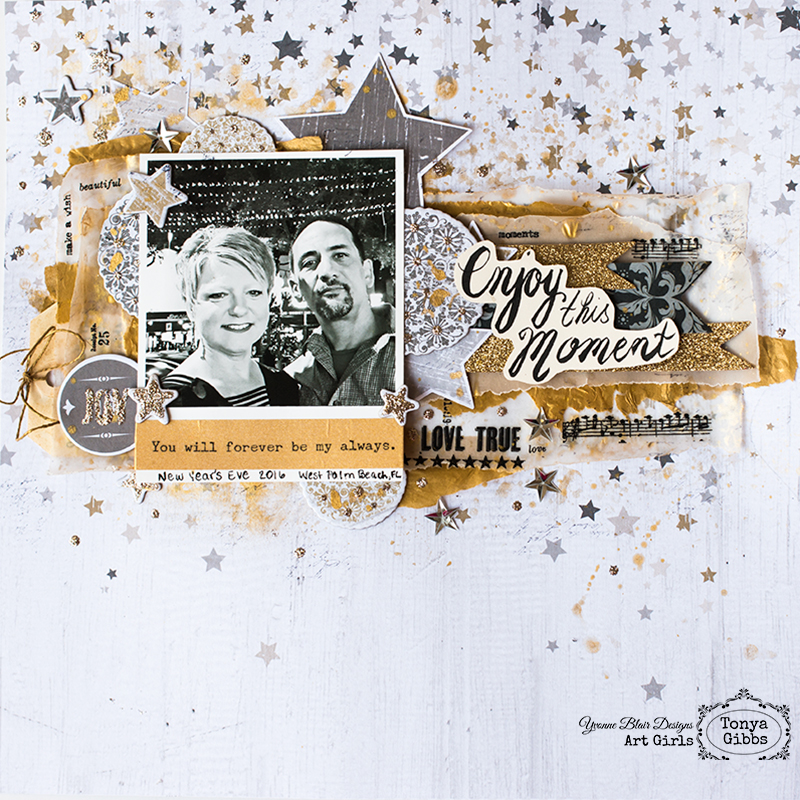
I dug into my hoard vault and pulled out Teresa Collins' Tinsel & Co. Collection Stars Paper for my Layout base. I used the Chipboard stars, and the stars from the Ephemera pack as well. Then I used some of her boarder strips from the Memorabilia line since they were glittery. I encourage you to go into your hoard vault, and see if you have products that you have been storing up that could be used for some of your layout designs. We did after all purchase them for a reason, right! The best way to hoard them is to use them for a project for ourselves.
When printing my photo, I left a bit of a border so I could cut it Polaroid style. In the video below, I will share with you how I stamped Yvonne's image onto washi tape. Allowed it to dry, then placed it directly onto my photo. I love how clean this looks on my photo. I will be using this technique again. You do need to be careful when stamping since the washi has a slick surface and the stamp will slide if you press too hard. Also, be sure to use a permanent ink like staz-on or archival by Ranger.
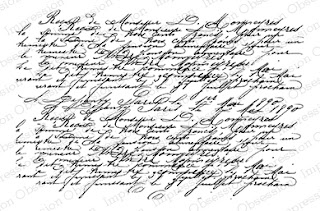
In the photo above, you can see how the French Script stamp was used to lightly add texture around the layout on the ephemera pieces and velum edges. You can click the photo to enlarge them and see greater detail. I also scattered a few rub-ons from the Tim Holtz botanical collection to add more visual interest to the vellum and create the illusion of printed paper.
I started to use paint to create the gold effect, but I'm so glad I reached for the recycled gold tissue paper instead. It was left over from packaging that I had received at Christmas, and I love how delicate it looks peek-a-booing out from around my vellum layers. I'm glad I saved it. Also, I love that the French Script stamp added life to the flat ephemera stars. A little bit of platinum Stickles also gave a little life to those chipboard pieces, and a sprinkle of confetti stars add sparkle, as well, to this flat layout. To finish it off, a few splatters of Heidi Swapp's Gold Color Shine was just what this layout needed to call it finished.
I wrote my journaling on the tag that is tucked into the left hand side and slipped it behind the photo. It talks about our evening. There was no need for it to be visible. The title was one that I had hand drawn in a previous video, and was in my bucket of one hit wonders. It seemed to fit my theme so I added it over the border flags. I drew it with a brush pen. The ink was not permanent so I didn't add splatters of gold to it. Here is a view of the finished layout.
This layout reminds me so much of the glitzy downtown streets of West Palm Beach where we spent New Year's Eve. I had such a great time that night and it was fun to create this layout. I guess I was holding on to this paper for just the perfect time, and I'm glad I finally found used it. I love the richness that the monochromatic color pallet adds to this layout. If you are hoarding a paper collection, I encourage you to use my layout as inspiration to create something this week!
Hello mixed media crafty peeps how are you today? With all the uncertainty in the world today, I decided to create a Blessings journal to help me focus on all the wonderful things that happen in my daily life. It helps to center me, and serves as a daily reminder that God is in control of all things!
Let me walk you through my process for creating this journal using these awesome stamps from Yvonne and Impression Obsessions! As always I've linked them up to the Impression Obsessions' online store, but shop your local retailers if you have one!
Inspiring this entire project was Yvonne's stamp! Thank You God. Have you ever been doing something in your life and just knew God had his hand in that moment in your life? When I saw this stamp I knew I wanted to create this journal.
I have a few of these dollar bin journals laying around my craft room that I keep on hand for note taking and decided to use these for my base. They come in handy for these types of projects and are very inexpensive. NOTE: I usually pick them up at the end of the season when they clearance them out since I generally alter the covers anyway!
To give the outside of my journal a nice rich color and feel, I used created a mono-print to create the background image, on a piece of bleached muslin fabric, once everything was dry I did some sewing on around the edge of journal. This keeps everything in place over time, but it also adds texture. Dropping gold Liquitex Acrylic Ink, and spraying the entire journal with Heidi Swapp's Gold Color Shine adds a richness to the final journal. I encourage you to pull out your stamps, stencils, inks, and paints and enjoy a little creative play. This was so much!
This next step you can do after the book is filled with memories or before, or before. I love how it inspires me! I went into my little bucket of left overs and created a beautiful cluster. Sprinkled a little seed beads and sequins to add sparkle, and topped my sentiment with a prima clay cherub piece. Isn't this just a beautiful book. It would make a great Secret Sister gift or Prayer Partner book. You could also switch out the sentiment and use the book for a number of other occasions as well.
Thanks for stopping in and hanging out with me today! I hope I have inspired you to a create a Blessings Journal to remind yourself of the tiny little miracles that happen in your own daily life.
Hi crafty friends, I hope you have lots of inspiring ideas after the sneak peeks from Creativation 2017. I know my head is SPINNING AROUND! Yvonne has released some fancy new word stamps along with a few cute little sketch stamps. Here are a few of my favorites from this release I picked to feature in today's post. I have linked them up for you to purchase from Impression Obsessions Website, but I also encourage you to support your local retailers if they carry Yvonne's stamps.
It is sometimes difficult to create masculine cards. With Valentine's Day around the corner, I thought I would use these stamps to create a few cards that could be used for multiple purposes. Either simple "I love you cards", "Happy Birthday", "Thinking of You" or you could even add "Happy Father's Day" to the inside of these cards to use all year long. The concept for both cards are the same; however, one card is flat for mailing, and the other is dimensional in case you are sharing face to face.
This is the flat design:
Both cards are top folding A2 sized cards. The background cardstock is measured at:
4.25 in. wide x 11 in. long (scored at 5.5 in.)
Then I used a pieces of Canson 140lb white watercolor paper as my base (Smooth side)
cut to 3.75 in. x 5 in. (this leaves a 1/4 inch border)
Using watercolor paper insures that it will hold up
to the wet mediums and won't buckle or peel.
For my background I used:
Prima's Finnebar White Crackle Texture Paste
with a Tim Holtz Burlap stencil
allow this to dry
To apply color to my background I used
Lindy's Stamp Gang Starburst Stains:
Tibetan Poppy Teal
Edelweiss Moss Green
Rudolph's Nose Red
This is the dimensional card:
Here is a quick video showing the process of how these cards came together:
I love the dragonflies, and now I have lots more to use in different posts, and other mixed media projects. It is hard to see in the photos, but they are super shiny. While they are primarily the same cards, they do have distinctly different looks.
Stay tuned in the coming weeks as my fellow Art Girls share more from the Winter 2017 Collection. You are going to want them all! Thanks for hanging out with me today.
I wanted to keep this page simple, and let the quote speak for itself. So I printed a moon image from the internet, and painted myself a giant wave! Here you can see the texture left behind by the thick paint and the variations of paint color. I love the contrast of the copper embossing powder on the sea foam greens.
Here is a final glimpse at the Journal Page. You can see the moon peek-a-booing out of the far left corner. It is hard to tell what it is at first glance, but I know what it is.
I really believe that you have to sometime make a few waves to make a difference in your life every now and then. If we move through life afraid to shake things up, then we never seem to get anywhere. This page will serve as my reminder to not be afraid to ride one of those waves and see where it takes me! I hope you enjoyed this page. Thanks for hanging out with me today, I hope you had fun, and learned a few new techniques.
Oh I love home crafted Christmas ornaments. Every year I try and make a few new ornaments for my tree. This has become a tradition that my family looks forward to each year. Today, I would like to share with you one of this year's new designs using Yvonne's Compass stamp from Impression Obsession.
You can also use several of Yvonne's other stamps, I give you some ideas in the video link below.
For the base of the ornament I'm using these wooden shapes I grabbed at a local craft shop. This bag was under $5 and as you can see we will be able to make lot of ornaments.
I filled in the knots on the wood with Modeling paste so that I can get a smooth surface for stamping. You can leave these natural with a white wash of gesso or you can paint them if you like.
In the video below, I will share with you two versions that I created, so that you can decide which technique you like best. But both are gorgeous.
It was easier to add the foiling on the chalkboard version because the paint helped to make the surface smooth. But if natural look is what you like, I think it turned it nice as well. It is just harder to see the foiling. If you decided to go with this technique, I suggest bold and heavy designs for your stamping. Thick and large fonts will show up better.
Here is the video sharing how I did the technique.
Wasn't that fun? I want to make a bunch these. They would be great to add to packages, and share with your friends and family. Or create a set and give them as a gift. Thank you so much for hanging out with me today.
Oh imagine the possibilities when you say I'll try instead of I can't. Well today I have a fun little project for you to try. A little doodle art. I'm using these great stamps from Yvonne Blair, to finish off my project, to create the perfect card!
These little doodle projects are easy to do and I find them very therapeutic. You can easily complete one in a matter of minutes, and look at how fabulous they look on cards.
You can keep them black and white or watercolor them like I did here to give them more interest. The possibilities are endless. I think these little guys would be fabulous on Christmas cards, Birthday cards, and even Holiday Tags. If you only filled in part of the circle they would even be interesting.
Wasn't that easy as pie? Ok I want to start seeing the internet filled with doodle wreaths. If you decide to do one, make sure you #YBArtGirlFun in social media so I can see what you did!
I love seeing things you create using my tutorials or project shares. Please use the following handles/tags in social media to insure that I get to see your creations: