Follow Me...

       
Thanks for stopping by! Don't forget to subscribe!
Showing posts with label Die-versions. Show all posts

Sunday, July 19, 2015

Love Summer Art - Flip Flop Card

0

Hey bloggers - welcome to day 3 of the #LoveSummerArt collaborative project with YouTube Artists around the WORLD!  The event runs from July 17 - 20th.  To find these artist,  just type #LoveSummerArt  in your YouTube search bar. 


This is a super fun way for you to discover new artists on YouTube, and be inspired by their work. All genres of art are participating - Exciting Right!     

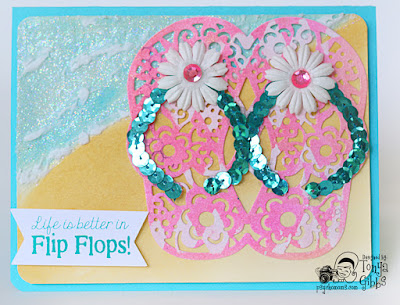
Today I would like to share with you a mixed media card. This design is super simple, and could easily be duplicated to create a colorful set of cards for a gift.  


Doesn't this ocean remind you of summer and walking the beach in Flip Flops?  I used mediums from Faber-Castell Design Memory Craft® to achieve this look.  I'll show you how in the video tutorial below.


This is also a great way to use those Gelli Arts®  Gelli Prints® that we have been doing the last few months in our Ustream classes.  I used one for die-cutting out the Fancy Flip Flops Die from Die-Versions.Isn't it just adorable as the center piece for my card?

 
 I typed the sentiment in a word processor and cut it into a fish tail banner.  The fonts that were used were:  KG Only Human Reg  (Life is better in ) & SA Cinta Normal (Flip Flops).   

Here is a quick process video showing how I created the card.


Don't forget to head over to YouTube and see what other artists are doing with #LoveSummerArt.    Check back tomorrow I will have a Mixed Media Canvas to share.

Thanks,
Tonya Gibbs

Save The Date:  Our next Ustream is scheduled for August 3, 2015 at 8:30 p.m. EST 

Supplies:
  • Faber-Castell Design Memory Craft®  -  Glass Bead Glitter Gel
  • Faber-Castell Design Memory Craft®  - Whipped Spackle
  • Faber-Castell Design Memory Craft®  - Gelatos® - Snow Cone
  • Faber-Castell Design Memory Craft®  - Gelatos® - Aqua Dolce
  • Faber-Castell Design Memory Craft®  - Gelatos® - Butterscotch
  • Scrap of Background Paper from Mono Printing
  • Lindy's Stamp Gang - Glitz Spritz - Blazing Sun
  • Sequins
  • Prima - Daisy flowers
  • Rhinestones
  • Manila Cardstock
  • Bazzill Canvas Texture Cardstock - Peacock
  • Die-Versions Dies - Flowering Flip Flops
  • We R Memory Keepers - Crop-A-Dile Corner Chomper
  • Fonts: KG Only Human Reg & SA Cinta Normal
  • Silhouette Pick Me Up Tool


Read More »

Saturday, July 18, 2015

Love Summer Art - Layout Splish Splash

0


Hey bloggers - welcome to day 2 of the #LoveSummerArt collaborative project with YouTube Artists around the WORLD!  The event runs from July 17 - 20th.  To find these artist,  just type #LoveSummerArt  in your YouTube search bar. 


This is a super fun way for you to discover new artists on YouTube, and be inspired by their work. All genres of art are participating - Exciting Right!     

Today  I wanted to share with you a layout that I created from some of the Prints we pulled in the July Ustream.   Remember these...  If you missed the ustream, it is linked up in the right bar. 


I decided to create a layout and use these guys as my frame around my photo, and as part of my ephemera in my embellishment clusters. 


I have shared many times in the past few months, I'm falling in love with hand lettering.  I love the look of the painted imperfect title that I did with watercolors then fussy cut around the.  Isn't this just a fun way to add a title to this wonderfully splashy layout?  


I also tucked in several of the die-cuts that I've been using to pull prints with in the last few months. Their interesting patterns keep my layout looking fresh, and unique. 


I used Faber-Castell Design Memory Crafts® Glaze Medium, Prima's Bubble stencil and little Lindy's Stamp Gang Magicals to create the splashed background.  I love customizing my layouts this way. 

To see how I did this, I've prepared a process video


Thank you for stopping in today.  I hope I have inspired you to create a fun summer layout.  Don't forget to check back tomorrow. I have a Mixed Media card for you.  

Also don't forget to check out the #LoveSummerArt  over on YouTube.  I've been inspired by so many wonderful artists this week, and have found some new people to stalk (I mean follow).   

Have a great weekend, 

Tonya 

Save the Date -  Our next Ustream is scheduled for August 3, at 8:30 pm est. 

Supplies:
  • Lindy's Stamp Gang - Limor Webber Designs Signature Tres Chic - Magicals - Merci Beaucoup Mint
  • Lindy's Stamp Gang - Glitz Spritz - Pearlescents
  • Ranger Ink - Dyan Reaveley - Dylusions Ink Spray - Lemon Zest
  • Marvy Reminisce - Gel Pen
  • Scotch Quick Dry Adhesive
  • Score Tape
  • Faber-Castell Design Memory Craft® - Gelatos® - Tangarine
  • Faber-Castell Design Memory Craft® - Gelatos® - Banana
  • Faber-Castell Design Memory Craft® - Gelatos® - Watermelon
  • Faber-Castell Design Memory Craft® - Glaze
  • Faber-Castell Design Memory Craft® - Gesso
  • Faber-Castell Design Memory Craft® - Stamper's Big Brush Artist Pen - Manganese Violet #160
  • Geli Arts® Gelli Plate® 8x10.
  • Prima Marketing - Zephyr - Say It In Crystals
  • Prima Marketing - Wild Flowers Pillar Pack White
  • Prima Marketing - Finnabair - Stencil - Bubbles
  • Prima Marketing - Flower Centers - Monarch Diamond
  • Foam Adhesive
  • Artist Loft - Watercolors
  • Gold Thread
  • IndigoBlu - Limor Webber Designs - Rugged Edges Stamp
  • The Crafter's Workshop - Mini Harlequin Stencil
  • Die-Versions - Hexagons Background
  • Die-Versions - Pretty Paisley
  • Teresa Collins - Urban Market - Wood Veneer (3)
  • Studio Calico - Wood Veneer - Camera
  • Rhinestone  (Center of Camera)

Read More »

Friday, June 19, 2015

Father's Day Card Tutorial

0

Hi everyone, today is my day over on Limor Webber Designs' DT Inspiration Blog.    I hope you get a chance to stop in and take a look at this deliciously grungy Father's Day Card that I have created using the Limor's Signature products with Lindy's Stamp Gang and IndigoBlu.   


Thanks for stopping in today! 
Tonya 


Read More »

Tuesday, June 2, 2015

June 1 Ustream Follow up Gelli Prints

9

Hi everyone, thank you so much for those of you who came to watch the show live last night.  I had a lot of fun playing with my Gelli Plate. It was a great night of total creative freedom!  


In the promo, I promised a night of inky finger fun, and  from this photo of my hands, looks like Mission Accomplished. My husband thought I was becoming a Smurf (LOL). 

I used the 8x10 Gelli Plate to pull prints on Hymnal Pages, Cardstock, Printer Paper, Muslin, Kraft Paper, Index Cards and even Canon Warranty Newsprint.


Here is a link where you can purchase a Gelli Arts® plate.   I recommend biting the bullet and just getting the 8x10. However, if that is too overwhelming,  then I would say the 5x7 is great beginner size. Then your prints can be used for cards and tags.   Anything smaller can become frustrating.  (In my opinion). 


Paints -  I used an assortment of Apple Barrel Acrylic Craft Paints (list of colors used are in the supplies below).  Anything goes, pick your favs, just don't forget a white, and black to go with your selections.   You can really use any type of ink or paint (fluid or full bodied) that you wish. Even spray color mists work great.  I would avoid permanent inks since they may stain your Gelli® Plate. 

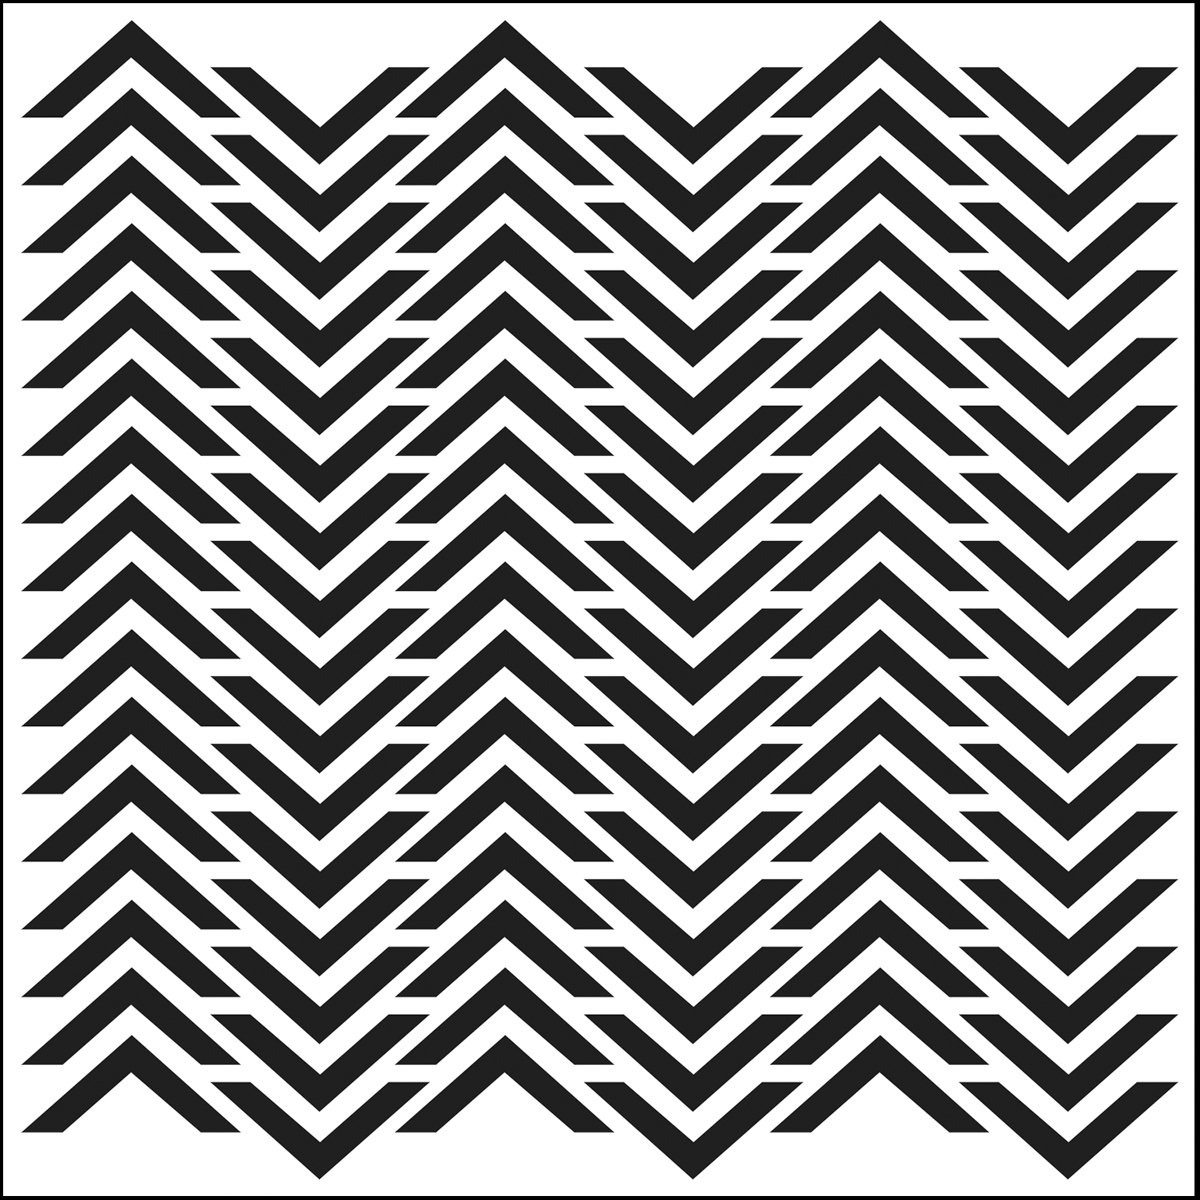
Now gather up some house hold times to add texture.  I used String, and disposable cups to create interesting shapes.  I also used The Crafter's Workshop Cheveron 12x12 stencil to create an interesting pattern. 


I also used die-cuts to create patterns on my prints

My go to backgrounds are:


You can print on most any surface.  I pulled a print onto a piece of muslin, that I later used to cover my little journal.  Our finished journal size was 4x4.  


I used a butterfly stamp and archival jet black ink on one of the prints to create butterflies.  Don't be afraid to stamp and fussy cut or use your print with your die-cuts to create interesting elements for your journal pages and collages.   Another print was used for the background of the first spread. Look at how they contrast of the ghosted print on the hymnal page looks against the 1st generation print used in the background.  SOOOOO FUN! 


Then I used an Uni-ball  Jetstream Bold Point 1.0 mm Black Pen to add my title and a few doodles.  This pen didn't even hesitate on this gel covered page.  It flowed so smooth and silky.  Highly recommend this!  I picked mine up at Target.


I also added a few splashes of color in the white spaces, and some shadows around my butterflies \ with my Faber-Castell Design Memory Craft® Stamper's Big Brush Artist Pens in Cold Grey, and May Green


In case you missed the class live, here is the recording: 


Since I couldn't finish up each page of the book in the allotted time for the class, I decided to use the remaining prints to create the other spreads throughout the month.  Visit this blog weekly in June, to see my new entries.  I will also continue to build one existing pages as the mood strikes me.  So it will be fun to see how everything evolves.

Thanks again for hanging out with me.  It was so much fun. Our next class is scheduled for July 6.  But I may do a Saturday Ustream again, sometime in the middle of June. I'll try and give a heads up if I do.

Tonya

Supplies:
  • 8x10 Gelli Arts® Plate
  • Plaid  Apple Barrel Acrylic Paint Various Colors, Kiwi, Yellow Fame, Pink Parfait, Jack O'Lantern, Bimini Blue. White, Black
  • Brayer
  • The Crafter's Workshop - Balzer Designs Chevron Stencil 12x12
  • String
  • Various Disposable Cups (in different sizes)
  • Die-Versions Whispers Background - Hexagons   
  • Die-Versions Whispers Background - Morocco
  • Cosmetic Sponge
  • Martha Stewart Butterfly Stamp
  • Faber-Castell Design Memory Craft® - Gel Medium
  • Faber-Castell Design Memory Craft® - Stamper's Big Brush Artist Pen - May Green
  • Faber-Castell Design Memory Craft® - Stamper's Big Brush Artist Pen - Cold Grey
  • Uni-ball Jetstream Bold 1.0 mm
  • White Geli Roll Pen
  • Various papers with patterns, textures and weights. I used hymnal pages, index cards, copy paper, book text, paper bag, newsprint (warranty printed paper), cardstock.  The variety gives interest to your prints. 
  • Tim Holtz - Sizzix  Block Talk Alphabet Upper Case
  • Tim Holtz - Stamper's Anonymous - Ultimate Grunge Stamp 
  • Ranger Ink, Archival Ink Pad - Jet Black
Read More »
I love seeing things you create using my tutorials or project shares. Please use the following handles/tags in social media to insure that I get to see your creations:

INSTAGRAM: #FollowingTonyaGibbs    |   TWITTER:  @gibbst    #FollowingTonyaGibbs   |      FACEBOOK:Tag  Tonya Gibbs   #FollowingTonyaGibbs

I Design for:

    http://www.yvonneblair.com

Guest Artist: Click icon to see post!

http://www.teresacollinsdesignteam.blogspot.com/2013/10/family-stories-layout-and-video-by.html#comment-form   http://canvascorp.com/2013/03/21/easter-treat-baskets/


Past Teams

http://www.die-namites.com/     marion