Pink Paislee's new Hope Chest collection has inspired today's post. I'm working on a project with the papers for my next Ustream, May 6 at 8:30 p.m. EST, and wanted to try some techniques out on a tag before the class. Today, I would like to share with you the techniques used to create the background and blue flowers.
Here is a glimpse at the products that I used when making the tag.
Ranger: Archival Ink in Black & Vermillion, Distress ink Evergreen Bough, Rusty Hinge, Glue & Seal, Tag; Prima: Distress Tool; Hampton Arts: Remember This Background stamp, Tattered Angels: Wheatfields Glimmer Mist, True Turquoise (optional substitute more blue than green), Island Spring Glimmer Glam, Vintage Pattern Paper, Paint Brush.
Cover the tag with Glue & Seal or Matt Medium, then cut interesting pattern strips from the pattern paper, and use the glue and seal over the top to adhere it to the tag's service. Let the tag dry completely then trim the extra paper from the edges.
Shake up the bottle of Island Spring Glimmer Glam really well, then splatter it around the tag. Let it dry completely before going to the next step. The Glam is like a glaze and will leave glossy splatters. You can use a heat tool to speed up this process. Using a heat gun will also cause the glam to bubble offering a different texture.
Use the Gathered Twigs Distress Ink to darken the edges and the creases on the top of the tag. Really work the distress ink into the tag. Use your heat tool to set the distress ink into the tag, as it will take longer to dry on its own due to the glue & seal.
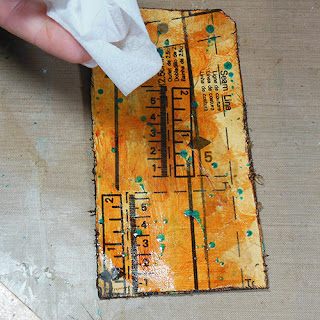
Completely saturate the top of the tag with the Rusty Hinge Distress ink, then use a baby wipe or paper towel to gently wipe down the surface. The Rusty Hinge will give the tag an aged color. Again, use your heat tool to set the distress ink.
Use a butterfly stamp with Jet Black Archival Ink to stamp the images around the tag. be sure to rotate your stamp so that your butterflies are coming from different directions. Leaving some white space is important - Don't over do it.
Use a text based stamp like this one from Hampton Arts with some Vermillion Archival Ink. Again be sure to rotate your stamp to add interest. I love how this stamp says "LOVE TODAY!" So I wanted to make sure it was stamped in the upper right hand corner so that I didn't cover those words up.
Since distress is reactive with water, and Glimmer Mist is water based, I used the Wheatfields Glimmer Mist to fill in the white spaces tone down the brightness of the blue/green. Dry the flower with a heat gun until it is completely dry. Using your heat gun, will also singe the edges making them appear more natural.
Fold the flower in half and apply hot glue to the inside to hold it in place as demonstrated above.
Fold in half from left to right one more time, applying glue to the inside of this fold and pinch together at the bottom. These flowers will be tucked into the floral spray on the right of the tag.
To finish the tag off, I used scrap parts from a Prima Valentine Spray, Metal Trinkets, and a clock from Prima. The floral spray was white so I used the Wheatfield Glimmer Mist to color the heart and flowers. The charm quote at the top is from the Girl's Paperie. The butterfly I showed you guys how to make a few weeks ago in a previous post.
Thanks for stopping in today,
Tonya Gibbs


No comments:
Post a Comment