Follow Me...

       
Thanks for stopping by! Don't forget to subscribe!

Thursday, June 5, 2014

July Ustream Kit Available

0

Authentique's Harmony Collection for the July Ustream kit. It is available for purchase at the Scrapbooking With M.E. Boutique store, and is ready to ship!  


July Kit - Authentique Harmony Collection $46.84
 (includes USA shipping, international shipping will be adjusted and billed on separate inv)

It will be aired on July 7th at 8:30pm EST. Here is the link to my Ustream Channel: http://www.ustream.tv/channel/gibbst


Kit includes one of each ~ 
  • Authentique Collection Kit ~ Harmony 12"X12" Collection Kit Includes: 12 double-sided patterned papers, Details stickers, Petite Type alpha stickers, Petite Diction stickers and Components die-cuts. 
  • Texture Clear Stamp 36
  • Fabscraps Wire Border, 6.25"X7" 
  • Fabscraps Flying Bird 3/Pkg (1) 3.25" & (2) 2" 
  • Laser-Cut Wood Veneer Shapes 35/Pkg - Hearts, Leaves, Lemons, Butterflies 
  • Textured Elements Burlap Blossoms Flowers/Butterflies 10/Pkg 
  • 2 yrds Light Pink seam binding 

Click Here to Order Your Kit!


Read More »

Wednesday, June 4, 2014

Urban Market Mini Album FAQ

0
WOW -  the response to this mini album has been super overwhelming. Everyone is really enjoying playing along with me.   I have had a lot of fun myself.


We had some great questions on the last follow up post.  SO I hope I can answer them here!

  1. Julie asked:    Thank you for class last night. The photos here are lovely - shows the colors up so much better than the live broadcast. Each page has its own beauty. You mentioned in the video and on here that you would discuss alternatives to binding (although I do have the cinch I am open to other suggestions too) but I think we must have run out of time. Maybe you are thinking of doing that in your update posts. Anyway - thanks again.
I'm SOOOO SORRY  I didn't bring this up that night. I think my brain was so overwhelmed, and  I JUMPED right into creating the pages.   
Solution 1:  I found this awesome video by my Friend Tracy - From Tracy's Treasures 24 on YT.   Called "NO BIND IT ALL - NO PROBLEM!" 
Solution 2:   Use your hole punch and just use jump rings.  Here is a quick 5 hole cutting guide that I created for you! 


  1. Claire aka zanysisters  asked:   Tonya, As I said in my comment on Scrapbooking with ME, last night's class was fabulous. I do have a question. I don't have have any kind of large die cut to use on the Dots paper. I can make do with border punches for the other bracket pieces. I am kind of at a loss for a solution. Any suggestions? Thank you so much 
Solution:    There are lots of options for achieving this look,  Cricut has some, as well as the Silhouette.  But if you don't have an kind of electronic cutting systems, then I have prepared this PDF with a comparable shape.   You can Download it here!    Print this out and cut along the black lines,  then use this shape as a guide for cutting your paper.  
  1. If you missed the live class - you can watch the videos here.   Remember that you don't have to purchase a kit to follow along.  You can substitute these products for things that are in your stash.  I always encourage you to use what you have.  Look in your supplies and see if you can find things that are comparable! 

Part 1 of the Ustream

Part 2 of the Ustream


If you are playing along with us, please make sure you post pictures to the Scrapbooking With M.E. Boutique Members Facebook group so we can see your version of the album.  #TonyaGibbsJuneUstream in other social media outlets so I will be able to find it! Check back on Friday for a follow up post with additional page embellishments.
Thanks for stopping in today,Tonya
Read More »

Tuesday, June 3, 2014

Urban Market - Mini Album June 2 Ustream Re-cap

6

Thank you to everyone who came to the show last night.  I thought I would share with you guys still photos of the pages we completed in the book.  Each Friday this month I will share an updated post until this little mini is finished! 


Here is how the cover of the book looks at the moment.  Keep in mind everything you see here is subject to change until I feel like the book is finished.  With each week's post if I change something, I will let you know.  


After the show I added this little Remember This piece from the Ephemera Pack to the back of our paper clip.


After the show I decided to add the giant feather that was in the Teresa Collins wooden embellishments pack. I painted it with the Wink of Stella Pen.  I love how you can see the feather peeking out of the pages before it! 


After the show ended I found this "The Story" sticker on the sticker sheet and thought it would be perfect for the center of that little frame.  This page will most likely get a little more love before the book is finished.  


Don't you just love how you can see all the other pages, behind these short pieces? 


Here is a close up of the camera paper clip that is stuck to the side of the transparency in front of the pocket page.  Above is the front and below the back.  The camera on the front was from the collage paper that we cut apart, and the camera below was from the ephemera pack. 


I added this Recorded sign from the collage page to the top edge of the pocket page.  And the Documented from the Wooden pieces on the waterfall page.  


Don't forget if you haven't started the book, to review Yesterday's post with the Cutting guide, and the video walk through.   Here are the links to the Videos from last night's show.

Part 1 -  Prep Video and Cutting Guide
Part 1 - POST with Cutting guide pdf link 
Part 2 - Ustream - Part 1 of the show before Ustream kicked me out. 
Part 3 - Ustream - Part 2 of the show


If you are playing along with us, please make sure you post pictures to the Scrapbooking With M.E. Boutique Members Facebook group so we can see your version of the album.  #TonyaGibbsJuneUstream in other social media outlets so I will be able to find it!

Check back on Friday for a follow up post with additional page embellishments.

Thanks for stopping in today,

Tonya


Read More »

Monday, June 2, 2014

Ustream Tonight - June 2 PREP GUIDE

2
Oh I'm so excited about tonight's class at 8:30 p.m. EST.  We are using Teresa Collin's Urban Market Collection. Tonight's show is sponsored by Scrapbooking With M.E. Boutique.  I hope you can join us live the Boutique is planning to host a give away! You do not need to purchase a kit to come enjoy the class.  We have lots of fun chatting with friends, and learning new tricks and techniques.  What a fun way to kick off the first Monday of the month.  If you can't join us live - never fear -  you can catch up on the recording.  A recap post will be posted later in the week. 


This kit had so many yummy goodies, that I decided to create a little mini book.  Since we only have 1.5 hours live - I decided to go ahead and give you guys some homework! 


Here is a walk through video of the mini book. 


As an added note -  I went ahead an bound my book with my Cinch.  If you don't have a Cinch, or Bind It All, We will discuss other options for binding in the class.  In the video I said Don't bind, but you can if you wish!


I hope you guys can join me. It is going to be so much fun! 

Thanks 
Tonya 
Read More »

Saturday, May 31, 2014

Ustream Monday - June 2

0
Where has this month gone?  It is already the first of the month again, and you know what that means!  Come hang out with me Monday night, June 2 at 8:30 p.m. EST on Ustream.   The channel name is:   http://www.ustream.tv/channel/gibbst

This month we will be working with the new Teresa Collins Urban Market Collection. 

 
Thank you to Scrapbooking With M.E. Boutique
for sponsoring this event.


This month's kit included
 
 
We also offered an add on kit


I thinking of doing a Mini Album this month since there is so many yummy products to work with!
 
Keep in mind that I have NO IDEA what I'm making at this point. Just been brain storming some things.  However, I will give a follow up post after the show with a detailed product list.   I like to have the following things within arms reach just in case..
  1. A basic tool kit
    • Paper Trimmer
    • Scissors
    • Adhesive (I use  Hot glue, Score tape, Tombo Mono Adhesive, Matt Medium and ATG the most)
    • A writing pen in black and white ink
    • Archival Ink Pad in Jet Black
  2. For this project I'm thinking of using standard 6x9 envelopes in white (you can find them most anywhere), or you can make them with paper.
  3. Some kind of binding system. I'm going to use a Cinch, but you could use Bind It All, or even Jump Rings.
  4. I like to have a selection of punches (just use what you have in your stash)  border punches, shape punches.  If I use something that you don't have then let the Boutique know and they can order it for you. 
  5. I like to use my dies to add interesting shapes to my albums (although this may be rare).  I will list the ones I use after the show.
  6. Mists -  Suggestions  Heidi Swapp - Navy Color Shine,  Gold Lame Color Shine, or Tattered Angel's Silver Glimmer Mist are my suggestions.
 
The Boutique's design team will be creating with this kit all month to give extra ideas on fabulous ways to use the left over product.  I hope you can join us live, but we will do our best to record! 
 
Thanks for stopping in today,
 
Tonya
Read More »

Friday, May 30, 2014

Masculine Layout Tips

0
 
 
Well this is my last post of the month, and I issued everyone a challenge to create masculine  projects. The scrapbooking industry is full of products for feminine designs and it is sometimes a challenge to create for the men in your life. All month Peggy and I have been sharing some great projects over on the Artsy Addicts blog, that I hope have inspired you. Today I thought I would recap some tips on how I set out to create Masculine layouts.


1)  Dig around in your stash for items that have a neutral theme and color.   I like to select colors that are blue, red, neutrals (grey, tan, brown, black, white) and green.  Not that there is any kind of rule to sticking to a color, I just find that these colors help my focus stay masculine.
 
2)  Look for embellishments in your stash that are not gender specific, like the Dictionary Tissue Tape from Tim Holtz, Star Sequins, and chevron designs, notebook paper, cameras, arrows, tickets, labels, wood veneers and tags. Metal accents are awesome for Masculine projects.
 
 
3) Select papers that lean more on the masculine side.  Like the Heidi Swapp No Limits papers - which were actually travel papers, but you can't tell after it was used and the Echo Park Note to Self (which has a lot of things you can fussy cut to add interest to your layout).


 Here is a process video of me making the layout!
 
 
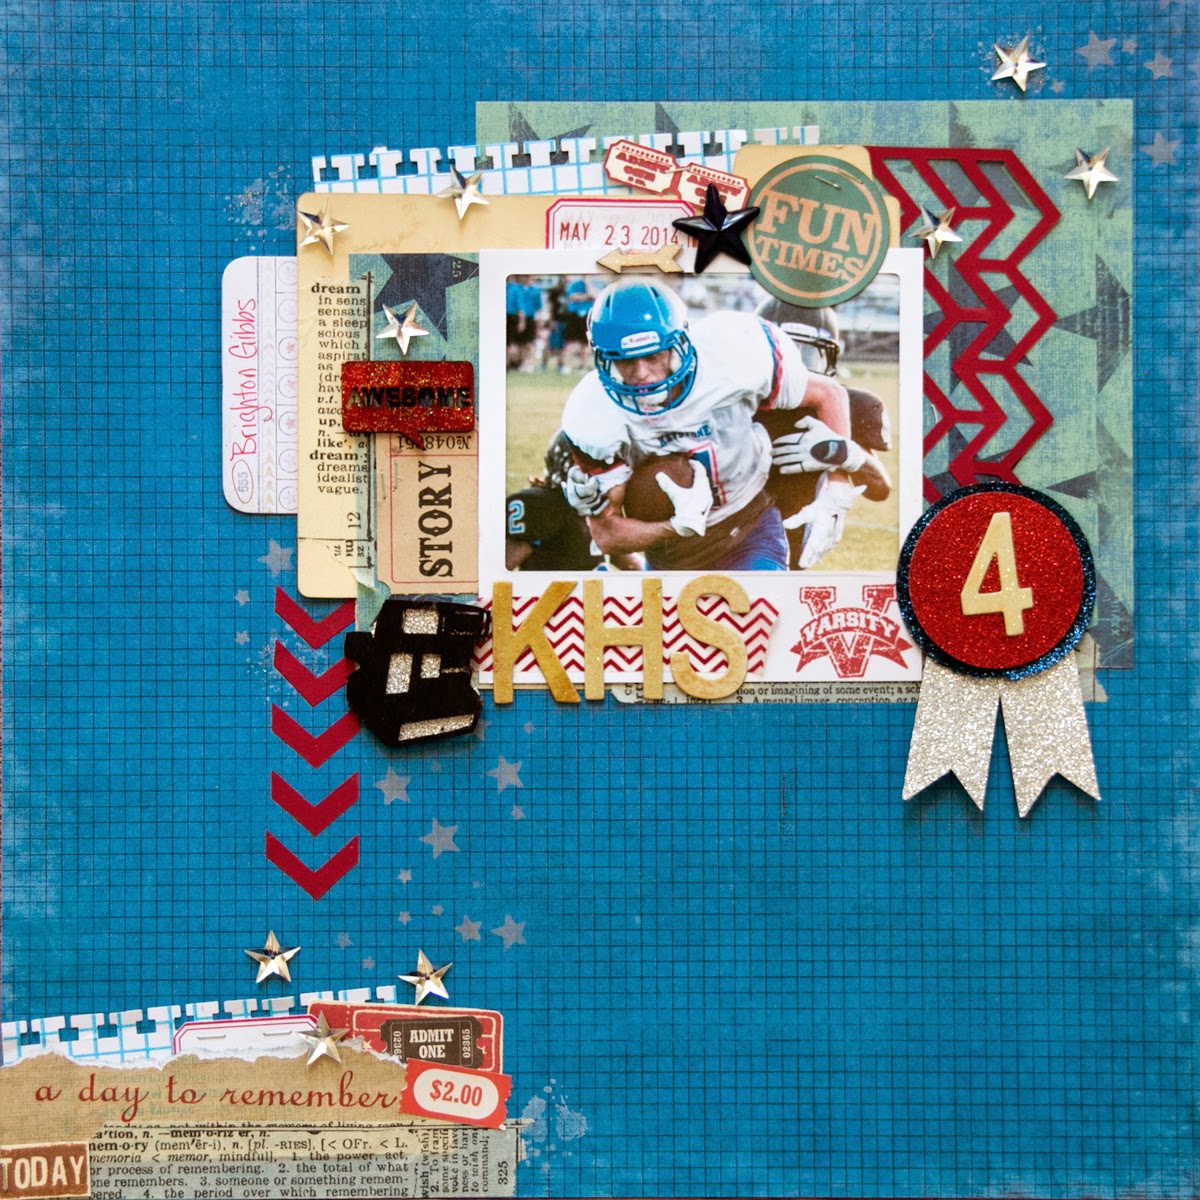
Here is the finished layout. 


My son's girlfriend said to me yesterday "I like that this layout is very masculine, but still has a lot of sparkle!"   Don't be afraid to use sparkle elements or even flowers on a masculine layout - just don't over do it!  
 
 
I hope this post has helped you with ideas on creating masculine projects.
 
Thanks for stopping in today,
 
Tonya Gibbs


Resources: 

Heidi Swapp  - No Limits Paper collection
Heidi Swapp - Confetti Stencil 6x6
7 Gypsies Paddington clear stamp
7 Gypsies - Postale Index Cards7 Gypsies - Naked Index Cards
7 Gypsies - Library Drawer - Tabbed Dividers - Naked Tabs
My Mind's Eye - Everyday Funday kraft - Everyday Fun stamps
My Mind's Eye - Find Your Wings & Fly - Stamps
Tim Holtz - Idea-ology - dictionary tissue tape
Tim Holtz - Idea-ology - Tiny Attacher
Sizzix - Tim Holtz - Alterations Frameworks Border Die Chevron
Studio Calico - Wood Veneer Hearts & Arrows
Studio Calico - Wood Veneer School Days Speech Bubbles
Ranger Ink - Archival Ink Vermillion
Cosmo Cricket - Glitter Adhesive Sheets  Red, Blue, Silver
Fiskars Circle Punch - 1.75 Inches
Marvy Circle Punch - 2 Inches
Washi - Red Chevron
Prima Wood Veneer Camera
Black Sharpie
EK-Success-Notebook-Border-Punch
EK Success Zig Writer
Clear Glitter Nail Polish
Star Sequins
Grid Line Index Cards
Labels
Color Box Pigment Stamp Ink Silver
Color Smart Pigment Stamp Ink White
Hampton Art - 7 Gypsies - Clear Acrylic Stamps - Varsity
Hampton Art Rubber Stamp A Day To Remember Numbers
Echo Park  Note to Self

Read More »

Wednesday, May 28, 2014

Nirvana Mini Album by Tonya Gibbs

0
 
 
WOW this mini is jammed tight with lots of Marion Smith Design Products, and tons of techniques.  Yep - I'm still on a gold kick and wait until you see how these gold accents really bring this album to life.  I used the Nirvana Collection, scraps from several digital kits, Junque & Gems, all of  Marion's stamps, Marion's Dies, Bloom Impression Tool and some of the resin pieces on this mini.


Over the last few months, I've shared several tutorials that have led to the making of this mini.
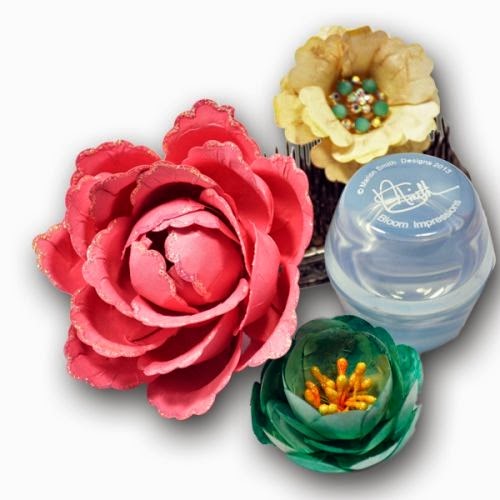
Last week  I shared a tutorial on creating flowers with Marion's new Bloom Impression Tool.  This flower uses the Bloom Tool & Marion's Large Rose Petal Die, and Leaves & Stamens Die.  


A few weeks ago,  I shared how I made a Garden Mother's Day card, and used that same technique to create the section hinges.  and the pockets on the inside cover.

Here are a few of my favorite spreads


In January I shared with you  Wooden Ticket tutorial. I think these little tickets look awesome with your embellishment clusters.


Here is a complete walk through video of this little mini so you can see each page!


If you missed those other posts, I hope you  get to take a peek soon.

Thanks for stopping in today
Tonya Gibbs
Read More »

Friday, May 23, 2014

Quick Baby Shower Card

1

Hi everyone, I have a simple little card to share with you today.  Our theme this month is masculine. So I thought I would share a simple little baby shower card that I created using the scraps from the "Spread Your Wings and Fly" kit to create a card.

 
This is the outside of the card.  I only used scraps from the paper collection. Small pieces of scraps when torn on the edge, create a nice washi tape look.  


I decided to decorate the inside of the card with the remaining scraps.  You could easily make this for any occasion or gender by just changing out the sentiment.  
 
Don't forget to post your masculine projects in the Artsy Addicts Facebook page.  I can't wait to see what you create! 
 
Thanks for stopping in today. 
 
Tonya Gibbs.
Read More »
I love seeing things you create using my tutorials or project shares. Please use the following handles/tags in social media to insure that I get to see your creations:

INSTAGRAM: #FollowingTonyaGibbs    |   TWITTER:  @gibbst    #FollowingTonyaGibbs   |      FACEBOOK:Tag  Tonya Gibbs   #FollowingTonyaGibbs

I Design for:

    http://www.yvonneblair.com

Guest Artist: Click icon to see post!

http://www.teresacollinsdesignteam.blogspot.com/2013/10/family-stories-layout-and-video-by.html#comment-form   http://canvascorp.com/2013/03/21/easter-treat-baskets/


Past Teams

http://www.die-namites.com/     marion