Follow Me...

       
Thanks for stopping by! Don't forget to subscribe!

Sunday, April 27, 2014

Garden Mother's Day Card - by Tonya Gibbs

0


Hi everyone, I hope you're having a great weekend.  Mother's Day is in a few weeks, and I thought it would be fun to inspire you with a Mixed Media  Mother's Day card tutorial using Marion's new Bloom Impression Dies and her amazing Curiosity, Texture, and Garden Rose Stamp sets.    


I coffee stained some card stock, then folded it in half. I wanted my card to have a shape to it, so I used my Grand Calibur  and placed the fold just inside the edge of the die so that it wouldn't cut along the spine of the card. 


Now the fun can begin.   I folded down the flap because I plan to create a pocket card.  Then using Marion's new Texture fade stamps  I used heat embossed the design with Queen's Gold Embossing Powder by Ranger.    I love the texture that was left behind and the card is starting to look RICH!


Now for a little more texture.  I used Gesso and texture with the lines found on this Crafter's Workshop "Well Rounded" 6x6 Stencil. 


I still felt that the card was a bit naked in the bottom, so I used Marion's Curiosity Stamp and the Queen's Gold embossing powder to add the giant rose at the bottom of the card.  


Now for  a Splash of color.  I used water color paints to paint the rose.  I love how the Gold foiled outline pops against the vibrant watercolor.  Also note that the embossing helped keep the watercolors from fading. 


A little more texture was needed at the top of the card.  So I reached for my Archival Ink and Mairon's newest Stamp "Garden Rose"  to apply the Chicken Wire design on the flap. 


I then stamped the bee from the same stamp set directly onto the card.  He looked a bit flat.  So I stamped him again onto a piece of scrap.  And used a Versa Ink Pen in the negative areas and the Queen's Gold embossing powder to give him a bit of shine.  I also only glued him down int he center so that his wings were elevated.  (He symbolizes - my Mom being the "Queen Bee"  (HAA - SHHHH don't tell her!).   I used the same Versa Pen to trace the edges of the card and gilded them with the Queen's Gold powder as well.  I love the fact that the powder was not uniformly applied. It gives the card a nice grungy feel.  


Now for the top of the card.    I wanted to create a dimensional spray at the top using Marion's Bloom Impression Dies.   Last post I shared with you how to make the flower.    The only thing I did different was spray the flower Tutti Fruity Glimmer Mist so that it matches my water colored flower.   I also used the same Gold powder on Marion's Junque and Gems Filigree flower and added a gold button from my stash for the center. 


With all this gold I wanted the leaves to really pop,  so I used drawing paper to cut them out, and sprayed them with Tattered Angels Grass Plain Jane Baseboard Spray and the Mantis Chalkboard Spray (These are my go to leaf colors LOVE THEM!  The Mantis has a nice Gold shimmer which nicely complimented by Gold Embossing.   All that was left was to use the Versa pen to apply gold embossing powder to the tips of the leaves.   


The tag topper was finished off with a Jute bow. 


The Sentiment was added across the flap, and finished off this card.  I have plenty of room on the tag to write a message.    I love the overall finished look of this card.  


My Mother loves to garden, so I know she is really going to cherish this card.  If you have these dies and stamps, please make sure you share photos of your projects with us on Instagram and Facebook.  Don't forget to use the   #MarionSmithDesigns  so that we can find your creations easily. 

Thanks for stopping in today.  I hope you have a creative week! 


Tonya Gibbs
http://www.psychomoms.com

Reference:   Here is the link to the Post where I made the flower...
http://www.marionsmithdesigns.blogspot.com/2014/04/shabby-fabric-flower-tutorial-by-tonya.html


Read More »

Friday, April 25, 2014

Masculine Card using April Challenge by Tonya Gibbs

0


  Today I thought I would share with you a masculine card using the April Sketch Challenge.  By making a few extra adjustments, I was able to convert this feminine sketch into a masculine card. 


For today's card  I used a combo of washi tapes from Teresa Collins Designs Memorabilia and You Are My Happy Collections.   Since my washi tape selection had a horizontal pattern, I decided to change the orientation of the card from the original sketch. TIP:  Rotating a sketch can give the sketch a new look! 


I created clusters that combine the sequins from the Teresa Collins' Family Stories and Memorabilia Collections with the Tiny Stars Wood Veneers from Studio Calico. Substituting the star shapes instead of the heart offered a more "masculine" touch to the card.   The sentiment was a stamp from Fiskars' All Year Cheer Cling Mount Stamps, and Teresa Collins Designs' Memorabilia Enamel Dots in black nicely filled in the negative space under the sentiment.  


Another substitution that offered a more masculine feel was replacing the doily with a few nesting cuts from the Spellbinder's Labels 18 die.  I tried to find a labels die in my stash that best matched the pattern in the washi tape.  In this layer cluster, the background was cut from a scrap piece of 7Gypsies corrugated paper. For the next layer,  I covered a scrap of cardstock with the blue washi tape before die-cutting. All these layers offered a beautiful depth of field for my sentiment. 


I hope I have given you a few ideas of how you can multipurpose sketches to fit your masculine needs. 

I hope you guys have time to participate in the April Sketch Challenge.  There are only a few extra days left. There have been a few submission.  To see them check out the LinkZ app at the bottom of this linked post.  

Thanks for stopping in today, 

Tonya Gibbs
http://www.psychomoms.com 


Read More »

Thursday, April 24, 2014

Die-Namites Celebrate Mom Blog Hop

24
Howdy Die~Namites Fan!
We WELCOME you to our CELEBRATE MOM Blog Hop


Mom, when thoughts of you are in our hearts, we are never far from home. ~Author Unknown

Did you know Die~Namites Dies are Made in America, and are compatible with most die-cutting machines on the market today?

Die~Namites dies will cut cardstock, patterned paper, fun foam, wool blend felts, craft foils handmade papers and more! Shimming may be required for some thicker materials, just add one at a time and test frequently.

Do you want to keep updated on the latest releases and creations made with our FABULOUS DIES!

You can do so by..... "LIKE"ing us on Facebook, and also, by becoming a Follower of our blog!

Die-Namites on Facebook     Follow Die-Namites' Blog


As you are hoppin’, make sure to leave a comment on each of the Design Team Member’s blogs...several of our Randomly chosen Gift Certificates  will be chosen from your comments on their blogs.

You will have until Midnight EST on April 26 
to leave your comments and to be eligible for our
Grand Prize of a $50 Gift Certificate to
www.Die-Namites.com
additionally 5 - $10 Gift Certificates


Are you ready to see what our Design Team has created for you? 

If you have arrived here from Dunja Dücker's blog, 
your are in the right place, 
if not head back to
 the Die~Namites' blog to begin the hop
.


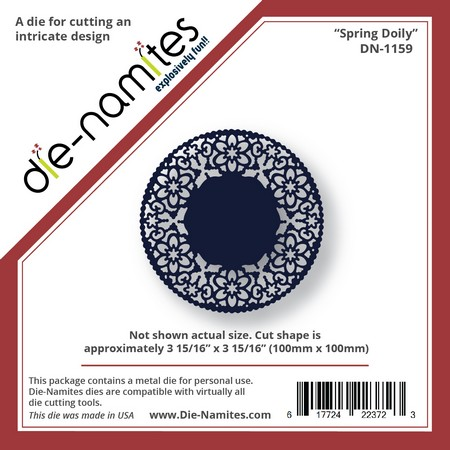
Today I wanted to share with you a mixed media Mother's Day card I created using these fabulous dies from Die-Namites Dies.  The Spring Doily & the Leafy Branch die


I added Gold Embossing Powder to the Leafy Branch dies to give them more texture and sparkle.  I love how they stand out against the background and give a royal feeling to my floral spray. 


Here is the finished card.  


I have prepared a start to finish video of me making the card.


Now, head on over to  Lynne Forsythe’s blog  to continue the hop.


Thank you for joining our blog hop!

Tonya Gibbs


Card Supply list.  
  • Die-Namites Dies -  Spring Doily and  Leafy Branch
  • Tattered Angels - Plum Raisin and Wheat Fields
  • Ranger Ink - Distress Ink  Antique Linen, Mowed Lawn and Picked Raspberries 
  • Ranger Ink - Matt Medium 
  • Ranger Ink - Archival Ink Coffee
  • Ranger Ink - Queen's Gold Embossing Powder
  • Tsukineko - Versamark Ink 
  • Crafter's Workshop -  Well Rounded 6x6
  • Stampers Anonymous - Tim Holtz Cling Rubber Stamp Ultimate Grunge
  • Jolee's - Flower 
  • Liquitex - Surface Prep Gesso
  • Prima Distress tool
  • Cardstock - Ivory
  • Studio G - Mother's Day Stamps
  • Tulle 
  • Pearls
  • Scotch ATG tape
  • Scotch Foam Tape
  • Hymnal Pages
  • Tag/Twine
  • Marion Smith Designs - Ephemera Stamp


Read More »

Friday, April 18, 2014

Mixed Media Masculine Card

2
 
I've been sharing a lot of pretty cards lately, and today thought it would be fun to share with you a masculine card.  Lately I've abandoned my art journal for pieces of 4.25 x 5.5 inch sheets of mixed media paper.  I try out new mediums, play with techniques, and then recycle these panels into card backgrounds.  I find that mixed media techniques make masculine cards come together much easier!  And you could always keep the card 1 layer and display your art rather than lots of layers.
 
Here are the steps I took to create the background
 
 
  1. Apply modeling paste to your card with stencil of choice (I used Heidi Swapps Honeycomb)
  2. Use A Faber-Castell Design Memory Craft Pitt Pen to apply color around the image. 
  3. Use your finger to smooth out the ink.
  4. Select a texture Stamp (I used Marion Smith Designs' Texture Stamp)  Apply ink to the stamp with a contrasting PITT Pen 
 
  1. Apply archival ink around the image to give a distressed look. NOTE: you can use distress inks, but if you add water, they will react with that water.  Archival ink is permanent when dry.) 
  2. Spray a wet medium onto a pallet.  I used Lindy's Stamp Gang Moon Shadow Mist in Gossamer Gold  
  3. Stamp a round object into the ink and apply it to your card
  4. You will see a water ring just like it were left from coffee or tea. 
To finish off the background I added pieces of tissue tape with matt medium.   I added the panel to a piece of black cardstock and created this card for my nephew's birthday.


He loves photography, so I took advantage of using up some scraps to create this photo layers.   The Camera and Polaroid Frame were a Spellbinder's Die.  I then added the Tim Holtz Film Strip Ribbon, and Marion Smith's Washi Tape from her Romance Novel Prima line.   Happy Birthday stamp was from Studio G.  My nephew was turning 13 so I added a few school aged elements like notebook paper, music tape, geometrical shapes, tag and paper clip.  
 
Don't forget about the Artsy Addicts Sketch Challenge through out the month.  You can get details here!
 
 
Thanks for stopping in today,
 
Tonya Gibbs
 
 
Read More »

Tuesday, April 15, 2014

Shabby Fabric Flower Tutorial by Tonya Gibbs

0

Hi everyone HAPPY IRS day if you are here in the US (LOL - GRUMBLE GRUMBLE)   Here is a post that will help you get over those tax day blues!


I'm sharing with you a simple tutorial for creating these beautiful Shabby Flowers using Marion Smith Designs Rose Petal Die (the one in the center of the photo below). Oh and BTW -  the Bloom tools are shipping to retailers now - so exciting I hope you got one. I used embossing powder to recolor the filigree flowers from antique brass to gold and silver.

For my tag I used the Garment District collection and Marion's Junque and Gems for my Flower centers.


I've attached my flower to this tag.  I created the tag background during my January Ustream.  Can you say ohhhhhhh soooo Shabby?


Here is a process video of me making the flower.


 I'm working on a few projects now using these flowers.  My next few posts will be using them. 


Thanks for stopping in today,

Tonya Gibbs
http://www.psychomoms.com


Flower Supplies:

Marion Smith Designs - Junque & Gems
Marion Smith Designs - Bloom Impressions Dies  - Rose Petal (Large die)
Unbleached Muslin
Needle
Thread
Desired Flower Center


Tag:
Golden Gesso (Black)
Liquitex - Matt Medium Fluid
Marion Smith Designs - Garment District Paper - 12 x 12
The Crafter's Workshop - 6 x 6 Doodling Templates - Mini Bricks
Advantus - Tim Holtz - Idea-ology - Sanding Block - also known as Sanding Grip
Ranger Ink - Archival Ink Pad - Jet Black
Ranger Ink - Archival Ink Pad - Coffee
Ranger Ink - Inkssentials - Dylusions Ink Spray - Melted Chocolate
Ranger Ink - Inkssentials - Heat It Craft Tool
Ranger Ink - Tim Holtz - Distress Paint - Metallic - Tarnished Brass
Ranger Ink - Tim Holtz - Distress Paint - Walnut Stain
Ranger Ink - Tim Holtz - Distress Ink Reinkers - Walnut Stain
Ranger  Ink - Tim Holtz Distress Ink Pads - Antique Linen
Ranger Ink - Inkssentials - Specialty Stamping Paper - 12 x 12
Prima - Bretton Vines Collection - Flower Embellishments - Purity
Prima - Flower Embellishments
Prima - Vintage Trinkets Collection - Metal Embellishments - Keys
Prima - Julie Nutting - Cling Mounted Stamps - Mixed Media Doll - Six
Sizzix - Tim Holtz - Alterations Collection - Movers and Shapers L Die - Vintage Valise
Sizzix - Bigz Die - Wings, Angel
Silhouette America - Cameo - Electronic Cutting System
Tattered Angels - Glimmer Mist Spray - 2 Ounce Bottle - Antique Brass
Tattered Angels - Glimmer Mist Spray - 2 Ounce Bottle - Wheat Fields
Copic - Sketch Marker - E50 - Egg Shell
Copic - Sketch Marker - E55 - Light Carmel
Copic - Sketch Marker - E30 - Bisque
Copic - Sketch Marker - E37 - Sepia
Copic - Sketch Marker - E11 - Bareley Beige
Copic - Sketch Marker - E01 - Pink Flamingo
Copic - Sketch Marker - R20 - Blush
Copic - Sketch Marker - 0 - Colorless Blender
Copic - Sketch Marker - BV23 - Grayish Violet
Tsukineko - Memento - Dye Ink Pad - Tuxedo Black
Faber-Castell Design Memory Craft - Color Gelatos - Metallic - Gold
Vintaj Metal Brass Company - Metal Jewelry Chain - Flat Link

Misc.  Pocket Watch
Misc. Vintage Hymn paper

- See more at: http://www.psychomomscrapbooks.blogspot.com/2014/01/ustream-baggage-mixed-media-canvas-by.html
Read More »

Sunday, April 13, 2014

Midas Touch Tag by Tonya Gibbs

0
Hi everyone it my day over the Die-Namites Blog.  Check out the blog for some fantastic inspiration from other Die-Namites DT members. 


Lately I've been on a "BRIGHT" and "SHINNY" kick!   For some reason the more vibrant the better. I'm usually more of a vintage shabby chic kind of girl.   I've found that experimenting with these different colors has really kick started my creative juices.

Today I would love to share my Midas tag. I'm noticing a shiny gold trend in the scrappy world, from dipped leaves to feathers. Seems like a shinny surface is supper chic these days! 


I started with a little gold here and there, and before long my tag started to look like it was kissed by King Midas himself. 


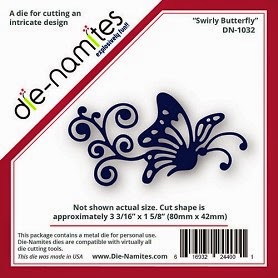
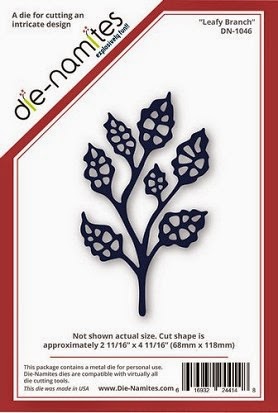
http://www.die-namites.com/Swirly-Butterfly_p_39.html http://www.die-namites.com/Leafy-Branch_p_53.html


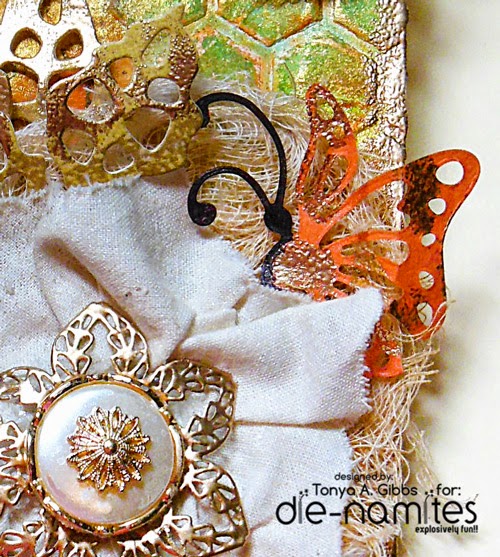
I used the Swirly Butterfly die on orange cardstock, then used a Versa ink pen to heat emboss  "Queen's Gold" embossing powder from Ranger Ink.   I love how it looks like he is molting.    The filigree flower was originally antique gold, and I used the same embossing powder on it.  The button finished off my focal center perfectly!


I think it is unexpected to see rich gold leaves. So I did the same embossing technique on the Leafy Branch cuts. Don't they look like 24k gold?   
  
I want to challenge you to unleash your inner Midas, and gold plate your next Die-Namites project!

Thanks for stopping in today.

Tonya Gibbs
http://www.psychomoms.com

Read More »

Friday, April 11, 2014

Washi Inspired Layout by Tonya Gibbs

2

 
Last week I issued a sketch challenge, and shared with you guys a card that I made using washi tapes.   My card was inspired by this roll of  tape!
 
 
Here is the sketch & card from last week...


Today I wanted to show you a layout that I created using the same washi tapes and the sketch as a layout guide. I  had a 6x6 pad of My Mind's Eye, Spread Your Wings and Fly, paper collection.  It coordinated so well with the washi selection that I decided it would be perfect for my layout. Since the 3D Embellishment that I used as my title reads "You Are My Sunshine, My Only Sunshine", I found a playful photo of my daughter, Brittany.  Side note:  Her Daddy calls her Sunshine!
 
 
Like last week, I sprayed the doilies with the Dylusions Ink Spray in Lemon Zest. Then Spritzed it with Heidi Swapp's Gold Lume color shine.  I thought the sunny pop of yellow, went well with my "You Are My Sunshine" title.
 
 
The 3D embellishment came with the sticker set, but it had a mustard yellow background. I peeled it apart, and placed it onto a piece of blue polka dot scrap from the collection.  I love how it pops against the yellow doily now. 
 
It was a lot of fun working with these vibrant bright colors.  This color pallet is way out of my norm, so it totally stimulated my creative juices.  I hope you try this challenge, along with the bright colors.  Don't forget to link up your blog post to last week's post if you decide to play along. Everyone who links up - will be featured in a May Artsy Addicts Showcase post.  I look forward to seeing how you use the sketch.

Tonya Gibbs
http://www.psychomoms.com

Resources:

My Mind's Eye - Spread Your Wings & Fly 6x6 pad
My Mind's Eye - Spread Your Wings & Fly Brads
My Mind's Eye - Spread Your Wings & Fly 3D embellishments
My Mind's Eye - Spread Your Wings & Fly Stamps
My Mind's Eye - Spread Your Wings & Fly Buttons
Marion Smith Designs - Mad Tea Party 12x12 Paper -
Doily
Dylusions Ink Spray in Lemon Zest
Heidi Swapp - Gold Lume Color Shine
Heidi Swapp - Archival Ink Pink
Heidi Swapp - Archival Ink Teal
Tattered Angels - Tutti Fruity
Tattered Angels - Frozen Lake
Yellow Baker's Twine
Teressa Collins Memorabilia Line Washi Tape (yellow)
Recollections - Random Washi Tape
Maya Road - Heart Shape Chipboard
Sizzix - Tim Holtz Alterations Rosette Strip Die
Faber-Castell Design Memory Craft - Pitt Pen Cadmium Yellow no. 107


Read More »

Tuesday, April 8, 2014

Ustream Follow Up and Supply List

0
Thank you to everyone who attended last night's Ustream.   Couldn't make it live? It was recorded.  We created a mixed media card, and basket using Marion Smith Designs and Die-Namites Dies.  


During the Ustream we discussed several challenges that are going on now. The Die-Namites Sketch challenge. The card that I shared in tonight's show was part of that challenge.   

Then Last week on Artsy Addicts I issued a challenge with a sketch.  The information can be found here on that challenge. I hope you play along with us.  Make sure on both blogs that you link up your projects!  


Here is the Recording of the show.


Or watch it on YouTube here.


Supply list for the Card: 

  • Card base:   A2 with a top fold.   4.25 inch x 8.5  scored at 5.5   folded size 4.25 x 5.5 inches.  
  • Marion Smith Designs - Mad Tea Party - Wonderland 
  • Die-namite Dies - Delicate Egg Die
  • Gesso:  Surface Prep & Full Bodied
  • Faber-Castell Design Memory Craft - Gelato pale pink 
  • Silhouette Cameo - Butterfly Background by Hero Arts (Stencil)
  • Heidi Swapp  - Archival Ink Pink
  • Recollections - Holiday Sentiments
  • Martha Stewart - Doily Border Punch
  • Trims 
  • I Am Roses - Small Roses
  • I Am Roses - Small Daisy
  • Ranger Ink - Adirondack Acrylic Paint Dabber - Metallics - Gold
  • Ranger Ink - Archival Jet Black Ink Pad
  • Stampabilities - Faded Script Stamp
  • Tombo Mono Adhesive 
  • Surbonder - Detail Glue Gun 
Supplies for the Basket:
  • Marion Smith Designs - Mad Tea Party - Wonderland
  • Marion Smith Designs - Junque & Gems
  • Marion Smith Designs - Peony Dies Bloom Impression Dies
  • Marion Smith Designs - Stamen & Leaf  Bloom Impression Dies
  • Die-Namite Dies -  Spring Branch
  • Silhouette Cameo Lori Whitlock - 3D Basket with Handle
  • May Arts - Jute Twine
  • Heidi Swapp  - Archival Ink Pink
  • Recollections - Holiday Sentiments
  • Tattered Angels - Plain Jane Baseboard
  • Tattered Angels - Chalkboard - Mantis
  • Ranger Ink  Distress Pens - Spun Sugar, Brushed Corduroy
  • Ranger Ink Distress Ink - Spun Sugar
  • Mead Drawing Paper 
  • Canvas Corp - Burlap Natural
  • McGill Stylus Tool Set
  • Lace
  • Score Tape
  • EK Sucess Curly Bracket Labels Punch
  • Surbonder - Detail Glue Gun
  • Clear/Gold Glitter Nail Polish
Read More »

Sunday, April 6, 2014

Ustream Reminder - Monday April 7

0
Hi everyone I hope you can join me live Monday, April 7 on Ustream. 

http://www.ustream.tv/channel/gibbst
Class begins at 8:30 p.m. est. 
 
 
I will be creating a cute Easter Basket and Mixed Media Card using products from Marion Smith Designs and the new March release dies from Die-Namites.

This class will be filled with fun techniques you can use in all your projects.

As always we will do our best to record. 

Hope to see you there!
Read More »
I love seeing things you create using my tutorials or project shares. Please use the following handles/tags in social media to insure that I get to see your creations:

INSTAGRAM: #FollowingTonyaGibbs    |   TWITTER:  @gibbst    #FollowingTonyaGibbs   |      FACEBOOK:Tag  Tonya Gibbs   #FollowingTonyaGibbs

I Design for:

    http://www.yvonneblair.com

Guest Artist: Click icon to see post!

http://www.teresacollinsdesignteam.blogspot.com/2013/10/family-stories-layout-and-video-by.html#comment-form   http://canvascorp.com/2013/03/21/easter-treat-baskets/


Past Teams

http://www.die-namites.com/     marion