Follow Me...

       
Thanks for stopping by! Don't forget to subscribe!

Friday, April 26, 2013

Tarnished Silver - Tattered Angels

0

This week has been so fun, I've been trying out some new products and getting my fingers stained with inks.  Today I wanted to share with you one of the cards that I made using the Tattered Angels' Naturally Aged Paint System Bare Metal Tarnished Silver.   This paint system adds so much texture and shine to your dull card stock, that you have to touch it to see if it is metal.


Canvas Corp Mini Red Clothes Pins, 7 Gypsies Washi Tapes, Tattered Angels Naturally Aged Paint System Bare Metal Tarnished Silver. Other: Nesting Labels Punches EK Success and Stamping Up, Studio G Make A Wish Stamp,
Ranger: Archival Ink Jet Black, Tim Holtz Sizzix Alterations Texture Fade Patchwork, Distress Ink Pumice Stone.


For my card base I used a Tim Holtz Alterations Texture Fade Patchwork on the bare card stock, then added my paint mediums.   I love how the paints bring out the texture from the embossing and make this look like embossed metal. 


I have a few videos demonstrating how this card was made. 

The first is a step by step for the paint system


This video shows how I made the card


Thanks for stopping in today, I hope you have a great weekend.  If you are using these paint systems, I would love to see your creations, please share them with me on Facebook. 
 
 
Tonya Gibbs

Read More »

Thursday, April 25, 2013

May 6th Ustream Kit

0
I hope you can join me and Flamingo Scraps on Monday, May 6 at 8:30 EST for a live Ustream class. The class is free to join, but if you want to create the project with me, a kit is available for sale at Flamingoscraps.com.
 
Bookmark the Ustream Channel Address http://www.ustream.tv/channel/gibbst
 
 
The kit is $25.99 and includes :
 
 
1 Maya Road Clutch Purse Chipboard Album
6 12×12 sheets of Pink Paislee Hope Chest paper
¼ package Hope Chest Paper Goods (ephemera)
1 Hope Chest butterfly clip
1 piece sewing pattern tissue
1 18” length Maya Road TuTu Tulle, Vintage Beige
1 18” length Maya Road TuTu Tulle, Seafoam Blue 1 18” length Maya Road Small Organza Rose Trim, Sand
1 18” length Webster’s Pages Petite Ruffled Trim, Gold
1 Maya Road Burlap Rose, Cream
1 FabScraps Chipboard Little Girl
½ package Jenni Bowlin Flatbacks, Reader
Assorted Prima Flowers
Flatback pearls, fasteners, trinkets


Here is a walk through video of the kit:


We will attempt to record the class for those who can't watch it live.

Read More »

Wednesday, April 24, 2013

Butterfly Tag

0


Pink Paislee's new Hope Chest collection has inspired today's post.  I'm working on a  project with the papers for my next Ustream, May 6 at 8:30 p.m. EST, and wanted to try some techniques out on a tag before the class. Today, I would like to share with you the techniques used to create the background and blue flowers.


Here is a glimpse at the products that I used  when making the tag. 


Ranger: Archival Ink in Black & Vermillion, Distress ink Evergreen Bough, Rusty Hinge, Glue & Seal, Tag;  Prima: Distress Tool; Hampton Arts: Remember This Background stamp, Tattered Angels: Wheatfields Glimmer Mist, True Turquoise (optional substitute more blue than green), Island Spring Glimmer Glam, Vintage Pattern Paper, Paint Brush.


Cover the tag with Glue & Seal or Matt Medium, then cut interesting pattern strips from the pattern paper, and use the glue and seal over the top to adhere it to the tag's service.  Let the tag dry completely then trim the extra paper from the edges. 


Shake up the bottle of Island Spring Glimmer Glam really well, then splatter it around the tag.   Let it dry completely before going to the next step. The Glam is like a glaze and will leave glossy splatters.   You can use a heat tool to speed up this process.  Using a heat gun will also cause the glam to bubble offering a different texture.

 Make sure the tag is completely dry.  Then use the Prima distress tool to distress the edges.  If you do not have this tool, use scissors to scrape down the sides.


Use the Gathered Twigs Distress Ink to darken the edges and the creases on the top of the tag.  Really work the distress ink into the tag.  Use your heat tool to set the distress ink into the tag, as it will take longer to dry on its own due to the glue & seal. 


Completely saturate the top of the tag with the Rusty Hinge Distress ink, then use a baby wipe or paper towel to gently wipe down the surface.  The Rusty Hinge will give the tag an aged color. Again, use your heat tool to set the distress ink.


Use a butterfly stamp with Jet Black Archival Ink to stamp the images around the tag. be sure to rotate your stamp so that your butterflies are coming from different directions.  Leaving some white space is important - Don't over do it.


Use a text based stamp like this one from Hampton Arts with some Vermillion Archival Ink. Again be sure to rotate your stamp to add interest.  I love how this stamp says "LOVE TODAY!"  So I wanted to make sure it was stamped in the upper right hand corner so that I didn't cover those words up.


For the flower, I used a white Prima Flower that had pointed leaves to mimic the flower found in the paper collection.  Since the flowers in the paper collection were also a teal color, I decided to cover them with Evergreen Bouge Distress Ink.   dont' worry if white areas are exposed, you will fix those with the next step.

Since distress is reactive with water, and Glimmer Mist is water based, I used the Wheatfields Glimmer Mist to fill in the white spaces tone down the brightness of the blue/green. Dry the flower with a heat gun until it is completely dry.  Using your heat gun, will also singe the edges making them appear more natural.


Fold the flower in half and apply hot glue to the inside to hold it in place as demonstrated above.

Now, fold the from left to right in half again, adding glue between these two layers.


Fold in half from left to right one more time, applying glue to the inside of this fold and pinch together at the bottom.  These flowers will be tucked into the floral spray on the right of the tag.


To finish the tag off, I used scrap parts from a Prima Valentine Spray, Metal Trinkets, and a clock from Prima.  The floral spray was white so I used the Wheatfield Glimmer Mist to color the heart and flowers.   The charm quote at the top is from the Girl's Paperie.  The butterfly I showed you guys how to make a few weeks ago in a previous post.

Thanks for stopping in today,

Tonya Gibbs
Read More »

Friday, April 12, 2013

Washi Cards

0
Have you ever had one of those weeks where you just can't think creatively no matter what you do?  This week has been that way for me.  I've been really sick and NOT motivated to do anything.  My studio is A MESS.  So instead of creating I decided to clean.  I was putting away some new Washi tapes and the inspiration hit me square in the face.  Make some cards and use washi tapes as your backgrounds.  Why not?  I own lots of tapes, they are so beautiful, colorful, cheery and fun. It makes me happy to collect them, so perhaps it will make me happy to use them.


So my mission was to make five cards using only washi tape, scraps, or ephemera pieces (as I have tons of these too).  I'm a total scrap collector - I buy ephemera packs even when I don't buy the entire collection, then I never use them!  Those days are over!
 
I pulled out my punches, Spellbinder's dies, MFT dies, scraps, tapes, and card stamps  and started trimming, sorting, and stamping.


My first card was inspired by a school days theme.  I have several nieces and nephews who are elementary aged children and I thought this collection of scraps would make a cute birthday card.  I used the ruler washi tape on this card as a border, and the dictionary tissue tape as tape on the notebook page. 


Keeping with the monochromatic theme, gave a degree of sophistication to this card. I cut the washi into arrows for a soft simple background. The hints of silver and pearls gave it life.  I just love this the simple elegance of this card.


I loved the look of the grey card so much, I decided to use it with teal and blue washi tape. This time I kept the edges of the tape torn to give a more masculine feel to the card.  I love how simple, yet whimsical this card is designed. 


A few of my nephews will be graduating to middle school this year, and I thought this card was a fun end of year graduation card.  The Tissue tape was used as a background here, and pieces of ephemera and wooden clocks border a metallic embossed tag.  I also embossed the card with  gears to give it a little texture.  
 
 
For my final card today.  I covered a piece of scrap paper with green and blue washi tapes and cut it into a giant banner.  I continued my banner theme, my sewing together scallop ovals that I cut in half and a MFT tiny banner die with some scraps of coordinating card stock.  I sprinkled the giant cupcake with Rock Candy Stickles and used it for my birthday focal point.  This card screams birthday party, and I love all the celebration layers.  
 
I encourage you to spend an afternoon thinking about your scrap pile and "overstock" and make some cards.  This is a great way to breathe new life into your scrap, and eliminate them from your room.  Most of the time, I lose my inspiration because my room becomes messy and over crowded.  Simply spend the day die cutting your scraps into small pieces and you will be amazed at how fast you find your inspiration again.
 
Thanks for stopping in today,
 
Tonya Gibbs
Read More »

Friday, April 5, 2013

Easter Layout

1
I hope everyone had a wonderful Easter celebration last weekend.  Today I wanted to share with you a layout I created using a photo of my niece and nephew taken at Easter a few years ago.   Each year our family hosts a HUGE Easter picnic.  I love seeing all of the kids dressed in their new Easter clothes. I take advantage of this moment to capture a picture of them each year. It is fun to look back and see how much they have grown.


I wanted to create a whimsical layout that showed hidden eggs, so I used the banner from the Sampler paper to form a make-make shift basket to hold my eggs.  I trimmed the bunnies and eggs from the Sampler pack then nestled them in the grass.  I used the clothespins to anchor the banner to the layout. Pom Pom trim was added to the bunnies to give them a tail.  I traced around some of the patterns on the eggs with a Geli Roll - Stardust pen to give them a little sparkly.


To create a pocket for my journaling, I decided to use one of the Canvas Corp ATC Envelopes to make a pocket.  I sealed the Envelope then cut a piece off the edge to make it a portrait opening. Then decorated around the opening with a piece of scrap paper, twine and another diecut from the sample sheet.  The journaling is on one of the ATC cards that matches the envelope.  The envelope will also give me space to include additional photos. 


I used one of the border strips from the sampler pack to create little flags and attached them to corsage pins. I love how they seem like little signs.
 
Supplies:

Canvas Corp Products: Mini clothes pin in hot pink, ATC Cards - Ivory,  Easter Sampler - Ivory, Jute Cord, ATC Envelope - Ivory, burlap sheet, Mini blue Polka Dots paper, Kraft Card stock.
Other:  Easter Grass, Pom Pom fringe, Geli Roll pen - stardust, stick pins, flat back pearls, EK Success Mini Egg Punch, Martha Stewart border punch, Tim Holtz distress tool.


Thanks for stopping in today,

Tonya Gibbs

Read More »

Friday, March 29, 2013

Butterfly Paper Clip - Tattered Angels tutorial

3
I thought I would bring you a touch of spring today with this tutorial on how I created these cute butterfly paper clips.  They are perfect pocket buddies in your mini albums, add a magnet to trap notes on your fridge, or remove the clip and add a pin as a charm holder.  
 
 
Wood pieces are so popular in scrapbooking and paper crafting right now. You can really find all shapes and styles and they are so fun to docorate.  Mine were created with the following supplies, but please experiment with different products when making your own.
  • Recollections - Wood Butterfly
  • Tattered Angels: 
    • Glimmer Mist  - Jack O'Lantern
    • Glimmer Mist  - Taffy
    • Plain Jane - Rosey
    • Glimmer Glam - Stiletto
    • Glimmer Glam - Twinkle Toes
  • Ranger:
    • Glossy Accents
    • Distress Crackle Paint - Rock Candy
    • Adirondack Alcohol Ink - Caramel
    • Archival Ink - Coffee
  • Office Supplies:
    • Large Metal Paper Clip
    • Sharpie - Gold & Black
  • Stampabilities - Faded Text Background Stamp
  •  
Here is a step by step video tutorial on how these were made. 


If you make these cute butterflies, please be sure to tag me on facebook, or youtube. I would love to see them.
 
Thanks for stoppig in today,
 
Tonya Gibbs
Read More »

Friday, March 22, 2013

Creating Yourself

1
A few months ago I shared with you the Turquoise Precious Stone Paint System from Tattered Angels.  I absolutely love this system so much that I've been through 2 kits now.  I recently got Marion Smith's Leak Shed Studios Butterfly mini album and decided a canvas was going to be born with these two products! 


I started with the Turquoise Precious Stone kit on the canvas, added some script stamping, and darkened the edges with black archival ink. I wanted the butterfly to resemble a garden decoration tarnished and crackled from the sun. So I covered it with Naturally Aged Fine Wood Paint System in White Washed Pine. However, I used more of the brown tones in the kit, and splotches of the white. For a patina effect I added some of the turquoise from the stone kit. When it was dry, I topped it off with Rock Candy Crackle. I bent the butterfly in half so it would appear to be flying.


I flanked flowers around the base of the butterfly and started tucking in pieces of metal and wood to give the piece interest. Eighty percent of these pieces were designed by Marion Smith. I wanted to keep with her products as much as possible, since she has been such a huge inspiration to me, and has encouraged my growth. 
 
 
I also added these  cute mini butterflies that were made with the Stampendous Frantage mica pieces, and a Martha Stewart punch.
 
The Tim Holtz plaque at the bottom says "Life is about creating yourself."  I thought this was perfect since I'm going through some changes and the butterfly's entire life is about creating itself.   


I love how the wings of the butterfly and the vine formed a heart. This wasn't planned, but a nice surprise since everything on this canvas is something that I LOVE down to the Designer of the Products used! 
 
Thanks for stopping in today,
 
Tonya Gibbs
Read More »

Thursday, March 14, 2013

Beach Layout

4

I love living in Florida and so close to the beach.  When Jade called and said she was flying into Jacksonville and needed a ride to Daytona Beach - honey  I couldn't wait to take her on a tour of Florida's First Coast!  She dipped her toes in the sand of  three Florida beaches during her visit each with a a unique sandy surface.

Today I would like to share with you a layout that I created of our first stop - Velano Beach near St. Augustine.  

For my layout I chose the following Canvas Corp products.  I love how simple and organic these products look.  Each reminds me so much of the beach.

Tattered Angels Plain Jane Sky, Tattered Angels Chalkboard Splash,
Canvas Corp Beach Sampler paper, Burlap Sheet, Twine Cord,  mini white paper bags, and kraft tags.


I wanted the layout to have a lot of white space so that I could show off the splashes from the Tattered Angels products to give the look of the sea foam splashing up on shore. I cut apart the Beach Sampler page to create the layers, and painted the burlap with white gesso sprayed with the Plain Jane Sky. The ATC sized Mini bag was a perfect holder for my journal tag. To give it a little character, I marbled gesso, Plain Jane Sky and Chalkboard Splash then dredged the white bag through the paints. 


We collected the shells from the beach as a souvenir, so I thought it would be nice to use them on the layout.  The shells at the bottom of this layout were also from the beach.   I love how the shells provide an organic texture, while grounding  the layout.   


Here is a close up of the layered section. 
 
I would like to issue you a challenge.   Pull out some old travel photos, and create a layout or mini album, then share your project on the Artsy Addicts Facebook page.
 
Thanks for stopping in today,
 
Tonya Gibbs


Read More »

Friday, March 8, 2013

Vintage Telegram Mini Album

2
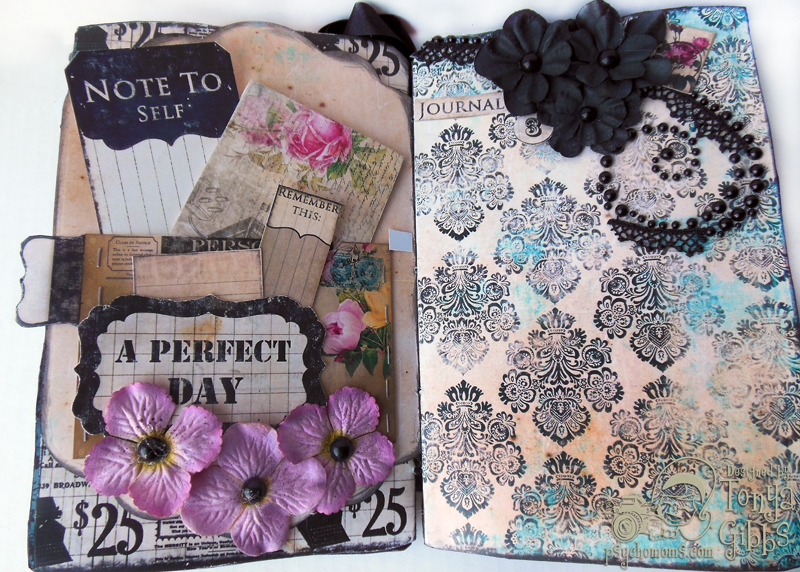
Marion just released a new Mini Album Printable called Vintage Telegram.  If you love her Romance Novel Line with Prima Marketing, you are going to love this printable.  It is a mini album that compliments that line. You can purchase the kit at MarionSmithDesigns.com.

I couldn't wait to play with it, and I think it is an all time record for me - From printing to decorating - I created this mini in 8 hours.  WOW - can you believe it. 

 
I used the Tim Holtz vintage typewriter die for the cover.  I used utee and gold ink to give it that brass look.   Then I used several of my Spellbinders Grand Caliber Labels dies to make pockets and die cut insert pages.  Love how they add a little interest to the book.  Below are some of my favorite pages in the book.  


Here is a video of a page by page walk through of the mini.


Thanks for stopping in today,

Tonya Gibbs
Read More »

Tuesday, March 5, 2013

Ustream March 4, 2013 - Tim Holtz Distress Techniques

0
You guys know I'm a Tim Holtz JUNKIE - the Distress line is always at the top of my MUST have list.  This month I dedicated my Ustream class to playing with Distress products, sprinkled with some of my favorite CHA releases from Prima, Maya Road, and Plus.  We created a mixed media tag from start to finish.  


Here is a list of products used from Flamingo Scraps.
For those of you who missed the live show - you can view it here...


Thanks to everyone for your support.  If you have any questions, please don't hesitate to ask.
 
~ Tonya 
Read More »

Thursday, February 28, 2013

7 Gypsies Easter Mini Album

1
With Easter just a few weeks away, I thought I would share with you a little Easter Mini Album I created using pictures from our Family's Easter Gathering last year. 

In this project I used all 7Gypsies Papers, Canvas Corp burlap and canvas products.  Since our Family gathering is always an outdoor picnic, I wanted the mini to reflect a natural organic theme. 

 
On the cover, I used the Canvas Corp burlap 12x12 page as the background.  I painted over it, to give texture and depth.  Then I sprayed a Canvas Corp flower with Glimmer Mist.  I love how the flower looks like denim. 
 
The papers were all taken from various 7Gypsies lines. Most were pieces I got from a variety pack, and then I filled in with the Conservatory ATC and Ephemera packs.  I love how most of these papers came from different collections, but they still work well together since I kept my selections in the same color family.


Here is a close up of the back of the album.  After painting the burlap, I stamped it with a script stamp from Hero Arts.  The stamping offers another degree of depth to the cover.


Here is a video walk through if you would like a little more detail on each page.


I can't wait to see your Easter projects.
 
Thanks for stopping in today.
Tonya A. Gibbs
 
Read More »

Friday, February 8, 2013

Secret Crush - Layout

0
Thank you to everyone who participated in our Ustream on February 4.  If you missed it, you can watch it here. Save the date for our next class on March 4, at 8:30 EST.
 
Today, I'd like to follow up with a layout that I created with some of the other products in the Pink Paislee's Secret Crush Line.  All of these products are available in the store while supplies last.   Many of these products used on this layout were included in the class kit. This layout was a fun way to use up those extra pieces.
 
Kenny and I  met in high school, dated for about 5 years, and on February 10, we will celebrate our 23rd Wedding Anniversary.  The ephemera pack and and the photograms in the Secret Crush line reminded me of my high school crush, so I decided to take that approach to the layout. 
 
Flamingo Scraps: Pink Paislee Secret Crush Paper, Ephemera Pack, Note Cards, Cardstock Stickers,  Photograms, File Folder tabs; Heidi Swapp - Color Shine Tinsel; Fab Scraps Chipboard - Decorative Hinge.  Other:  Tim Holtz Tissue Tape - Sketchbook, Tiny Attacher ; Gesso; Martha Stewart Doily Border Punch; Stamp'n Up Envelope Die.  
 
I remember my high school love notes to Kenny were always decorated with hearts,  arrows, XOXOXO,  lips (some were kissed),  and those  "True Love Always" grids with our initials were all over them. I would spend every class period writing him a note, so I could give it to him when we changed classes.  I still have the notes he wrote back to me.  They are tucked away in a shoe box at the top of my closet.  He found them the other day and began reading them. He was shocked I still had them after all these year. I have to admit, I blushed a little while he re-read them.
 
My mission was to make my layout match those love notes.  I started with a 4x6 photo of him I took last year. I layered the stickers, file tabs, hearts and arrows around the photo making sure all the love titles were visible.   I dry brushed gesso in some places to break up all the "pink", and I also added a gessoed border to the photo.  Tim Holtz Tissue Tape from his Sketchbook Collection offered spots of  "romantic script" to this sea of white and pink.   


For my journaling, I decided to use a piece of scrap from the paper collection to make an envelope.  I used a Fab Scraps decorative hinge chipboard cut that was sprayed with the new Heidi Swapp Color Shine Tinsel to anchor the thin arrow on the left.  I also sprayed the tinsel onto the background and let it drip down the paper. For the title, I used some fabric Thickers in pink that I got from Flamingo Scraps a while back. Since we have been together for so long, I decided the title should be "My Love Story".


I love how  this layout reminds me so much of those notes I wrote so many years ago. 
 
If you make a project using this line, please share it on the Flamingo Scraps Facebook page.  Be sure to tag me in the post so that I see it. I love to see your creations.
 
Thanks for stopping in today,
 
Tonya Gibbs
 

Read More »
I love seeing things you create using my tutorials or project shares. Please use the following handles/tags in social media to insure that I get to see your creations:

INSTAGRAM: #FollowingTonyaGibbs    |   TWITTER:  @gibbst    #FollowingTonyaGibbs   |      FACEBOOK:Tag  Tonya Gibbs   #FollowingTonyaGibbs

I Design for:

    http://www.yvonneblair.com

Guest Artist: Click icon to see post!

http://www.teresacollinsdesignteam.blogspot.com/2013/10/family-stories-layout-and-video-by.html#comment-form   http://canvascorp.com/2013/03/21/easter-treat-baskets/


Past Teams

http://www.die-namites.com/     marion