Follow Me...

       
Thanks for stopping by! Don't forget to subscribe!
Showing posts with label Mixed Media. Show all posts

Friday, July 21, 2017

Neon Graffiti - One HOT MESS Layout

0


Confessions -  this layout was created about a few years ago. The blog post has been sitting dormant, and I almost didn't share it with you.  But today I was updating my blog and stumbled across the draft and decided why not? I'm sure everyone has days like this!  So here it goes for better or worse...


Hi everyone, today I have a layout that I want to share with you using the Neon Graffiti Line by Lindy's stamp Gang and Limor Webber Designs.  The colors are so rich and vibrant, and REALLY make a statement!  They are flat, meaning no shimmer!


Unfortunately, there is no video showing how I achieved the look of this layout. When I set out to create it, I was not in a super stellar frame of mind. My thoughts were cluttered. I was feeling overwhelmed. The post man had just delivered these products, and I really wasn't sure how they were going to react with different surfaces. My goals were not originally a layout but to find out how the mediums reacted on different surfaces.


I sat down and started to play without thinking about an end project. The process was really about clearing my mind and clearing my desk.  Spritzing the colors on dark paper, white book text, and metal. 


I have sat on this project for a few months now, and never really intended to share it with the world.  But today I realized that I can't be the only person who goes through this feeling of constant chaos.  Today's layout demonstrates that through the chaos in my brain art does emerge.  When you read some of the passages around the page it becomes apparent that I am truly blessed. I brainstormed lots of the craziness around the page graffiti style with a white gel pen. 

I never loved this project because I detest the color HOT PINK!  Those who know me, know how I feel!  It has it's place in the color spectrum, but man these colors are bright and sassy, and I guess that is why I avoided showing the layout to you, because MAN is this one hot pink mess! But when I stepped back, and thought about the layout as a whole, I think I love that it is a mess. Because that is truly how I felt the day that I created the page. My brain was cluttered with these crazy thoughts, and they needed to escape! 


Fall is crazy here.  I'm a mother, I work full time, I volunteer for a youth football program, and I'm a local sports photographer, on top of all that madness, I decided to return to school. WHAT WAS I THINKING?  As you guys have probably noticed, this time of year, my artsy projects become sparse.  I'm still creating, but WHEN I retreat to my crafty space, it is for refuge not for work. Admit it, we have all been there!   So I didn't want to create a video, or hassle with step by steps. I just wanted to PURGE my inner thoughts, and spend some time creative playing.


I almost didn't share this layout with the world. But I wanted to remind you guys that it is ok, to create layouts like this that document your inner thoughts.  Not only do they help you process how you feel at the moment, but 10, 20 years or a lifetime from now, they help to document you the person!  


This particular day I had a photo of myself on my desk, the quality of the photo wasn't great, but neither was my frame of mind.  And all these pieces and parts inside my one hit wonder box, helped this mess come to life!  Sometimes life isn't perfect, it is a MESS.  It is ok to document that mess!
 
Thanks for helping me process, and vent from time to time! Thanks for being patient followers when I neglect this part of my world!  Thanks for understanding that sometimes you have to get out of your room, and go make some memories so that you can come back you have the energy to be creative!
 

Read More »

Wednesday, June 28, 2017

Americana Mixed Media Tag for Yvonne Blair Designs

0
 

Hi everyone, I hope your summer is off to a great start!  We are getting ready to celebrate our Independence Day here in the United States, and Yvonne has created some extra special stamps for this summer's release perfect for your patriotic themed projects.  Here are a few I plan to feature in today's post:


I created a mixed media tag for today's project to use these awesome stamps.  I love this Americana theme and wanted to experiment with some grunge techniques that I thought might work well on a larger canvas.   Sure enough they turned out great, and I can't wait to apply them to a larger surface! 


I used my 3x5 GelliArts® plate to create the background of the tag. Then used a Ranger Ink, Archival Black ink pad and The Grunge Numbers, and Military Alphabet stamp to add some character to the background.  The negative spaces left from the mono-printing seemed bright from the manila tag, so I used a Tea Dye Distress ink pad from Tim Holtz, and Ranger to distress the acrylic ink and add an aged look to the surface.  To finish off the edges, I darkened them with the black Archival ink.  Now it was time to make my embellishments.

I used a  Large Sizzix Star Die to cut out starts from Shrink Plastic Film, and punched a hole with my the large side of my Crop-A-Dile to make my stars into charms later.  I stamped The Pledge stamp with Archival Ink onto the plastic.  When you heat the shrink plastic with a heat gun it makes the cutest embellishments.   After the plastic cooled, I painted the backs with white acrylic paint so the words would pop against my dark background of my tag.   Two of my stars were threaded through the twine at the top of the tag, and the third is glued to the tag.  To make them appear to float, I added a glob of hot glue to the tag, allowing it to slightly cool, then gently tapped the star on one side of the glue so that the star is only adhered at an angle.

Next, I stamped my sentiment onto vellum, and embossed it with thick white embossing powder.  To create a vintage look, I ripped the edges and distressed the back of the vellum with the same Tea Dye ink. I used the Military Alphabet stamp on the red clothes pin so that it wasn't so "clean", then finished off the tag with some random embellishments from the bucket on my desk. 

Here is a quick video showing my process


Here is the finished tag!
 
Americana Mixed Media tag by Tonya A. Gibbs for YvonneBlair.com

 
This was a quick little project that would make a great home décor project if you chose to repeat this process on a canvas instead of a tag.  It would also make a great design for a patriotic themed party invitation, or masculine themed military card!
 
Thanks for hanging out with me today!  I hope you have had a great time. If you have these stamps and decide to follow along, share with us how you are using them in social media with the #YBArtFun
 
*GelliArts® is a registered trademark of the GelliArts® Corporation all rights are reserved.
Read More »

Tuesday, January 31, 2017

Love Like Crazy Cards

0


Hi crafty friends, I hope you have lots of inspiring ideas after the sneak peeks from Creativation 2017. I know my head is SPINNING AROUND!   Yvonne has released some fancy new word stamps along with a few cute little sketch stamps. Here are a few of my favorites from this release I picked to feature in today's post. I have linked them up for you to purchase from  Impression Obsessions Website,  but I also encourage you to support your local retailers if they carry Yvonne's stamps.


http://www.iostamps.com/1NEW/D17166.html

http://www.iostamps.com/1NEW/E17162.html


http://www.iostamps.com/1NEW/C17153.html


It is sometimes difficult to create masculine cards.  With Valentine's Day around the corner, I thought I would use these stamps to create a few cards that could be used for multiple purposes. Either simple "I love you cards", "Happy Birthday", "Thinking of  You" or you could even add "Happy Father's Day" to the inside of these cards to use all year long. The concept for both cards are the same; however, one card is flat for mailing, and the other is dimensional in case you are sharing face to face. 

 This is the flat design:

Both cards are top folding A2 sized cards.  The background cardstock is measured at:
4.25 in. wide  x  11 in. long (scored at 5.5 in.) 

Then I used a pieces of Canson 140lb white  watercolor paper as my base (Smooth side)
cut to 3.75 in. x 5 in.  (this leaves a 1/4 inch border)
Using watercolor paper insures that it will hold up
to the wet mediums and won't buckle or peel.

For my background I used:
Prima's Finnebar White Crackle Texture Paste
with a Tim Holtz Burlap stencil
allow this to dry

To apply color to my background I used
Lindy's Stamp Gang Starburst Stains:
Tibetan Poppy Teal
Edelweiss Moss Green
Rudolph's Nose Red

 
This is the dimensional card:

Here is a quick video showing the process of how these cards came together:


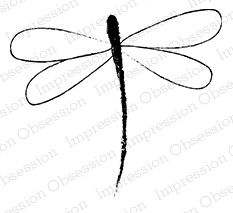
I love the dragonflies, and now I have lots more to use in different posts, and other mixed media projects.  It is hard to see in the photos, but they are super shiny. While they are primarily the same cards, they do have distinctly different looks.  


Stay tuned in the coming weeks as my fellow Art Girls share more from the Winter 2017 Collection.  You are going to want them all!  Thanks for hanging out with me today.
Read More »

Monday, January 9, 2017

Making Waves for Yvonne Blair Designs

0
Happy New Year everyone! I got to bring my New Year  in on the beach, and felt inspired to create a
journal page from this great stamp from Yvonne's collection.


http://www.iostamps.com/mm5/merchant.mvc?Screen=PROD&Product_Code=C17134&Store_Code=IOSTAMPS&search=waves&searchoffset=&filter_cat=&PowerSearch_Begin_Only=&sort=&range_low=&range_high=

For today's post, I'm using Yvonne's special Journal in 4x8.


Here is a quick 15 minute video on how I created this page:


I wanted to keep this page simple, and let the quote speak for itself.  So I printed a moon image from the internet, and painted myself  a giant wave!  Here you can see the texture left behind by the thick paint and the variations of paint color.  I love the contrast of the copper embossing powder on the sea foam greens.

 Here is a final glimpse at the Journal Page.   You can see the moon peek-a-booing out of the far left corner.  It is hard to tell what it is at first glance, but I know what it is.


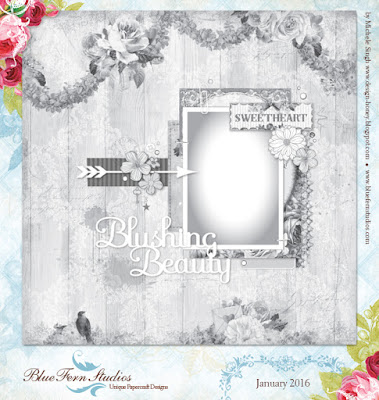
I really believe that you have to sometime make a few waves to make a difference in your life every now and then.  If we move through life afraid to shake things up, then we never seem to get anywhere.  This page will serve as my reminder to not be afraid to ride one of those waves and see where it takes me! I hope you enjoyed this page. Thanks for hanging out with me today, I hope you had fun, and learned a few new techniques.
Read More »

Tuesday, January 26, 2016

YouTube Scrapbook Layout Video Hop

1


Hi everyone it is YouTube Video Hop Day!   I'm joining up with a few amazing artists over on YouTube to do a fun collaborative hop to help showcase and promote designers on YouTube.  This will hopefully help to introduce you to new channels to explore.  

 Here are the other channels participating in today's hop:


For my project, I decided to showcase a layout using Prima's Almanac collection. I have been hoarding my limited stash of this collection for years now, and it was time to use it up!   Its feminine country theme was perfect for today's layout. 


For me - Memory keeping isn't just about family photos - It is also about remembering those moments that define our days.  Sometimes we take for granted those quick laughs or daily reminders, or simple parts of our daily routines.  My Sister and I share a little daily laugh, and today's layout spot lights that memory.  


Please meet Laughing Lucy, one my Sister's goats. My sister, Kim, owns a small farm where she takes in rescue animals. Some are abused, some the owners have passed on and have no one to care for them, and some were just abandoned. Well Ms. Lucy was one of those rescues. Through months of love she has been one of those animals that our entire family has grown to love.   Kim sends me a daily photo of Ms. Lucy and her sweet smile.  It is my daily reminder to Laugh.  I literally open my phone and belly laugh out loud.     I mean seriously how could you not laugh out loud when you see this sweet face staring at you?


For today's layout, I chose the Almanac paper because it had so many farm type images. I also really loved the feminine soft colors as well.   I imagine the "sounds" of the farm being like an orchestra early in the morning, with the crowing and clucking, so the music paper fit right in - don't you think?


I kept the design simple, but the overall layout looks very detailed due to the paper layers.   


Here is a process video showing you all the details and lots of techniques.


HERE IS THE VIDEO.. 


Here is a view of my finished layout:


Thanks for stopping in today, and for hopping along with us.  I hope my post today brought a smile to your face!  Lucy loves it when you LAUGH!  


Thanks,
Tonya

Supplies:

  • Prima 12x12 Almanac Collection - Wordsmith
  • Prima 12x12 Almanac Collection - Shaffer
  • Prima 12x12 Almanac Collection - Libre
  • Prima 12x12 Almanac Collection - Notary
  • Prima 12x12 Almanac Collection - Edison
  • Prima Capri Merlot Flowers
  • Prima Shabby Chic Treasures Ingvild Bolme Resin Baroque Frame
  • Prima Finnabair - Cling Mounted Stamps - Don't Forget To Fly
  • Prima - Ingvild Bolme - Chalk Fluid Edger - Old Road
  • Prima Stamp Hexagon (no longer available)
  • Prima Printery Chipboard pieces
  • Tim Holtz - Idea-ology - Tiny Attacher
  • Tim Holtz - Idea-ology - Tissue Tape - Music Notes
  • Tim Holtz - Idea-ology - Loopy Pins
  • Ranger Ink - Archival Ink - Jet Black
  • Ranger Ink - Manila Tag #5
  • Scotch - Foam Tape
  • Tombo Mono Adhesive
  • Liquitex - Iridescent Bright Gold Acrylic ink
  • FONT - MA SEXY (Laugh Daily)
  • Champaign Grosgrain Ribbon
Read More »

Monday, January 18, 2016

Inner Child Canvas - Art Girls Project

0


Hi everyone, I hope you had a fantastic weekend, today is my first post over on Yvonne's blog. Have you seen Yvonne's new stamp release this CHA2016? I have to tell you her blog is going to be buzzing with tons of inspiration this year.  Her stamps are fantastic and LARGE enough for art journals, but small enough for cards. I just LOVE them! I love that you can order these stamps in one of three mounts - Wood Mounted, Cling Mounted or Plain Rubber. This makes them perfect for your style of stamping! I'm featuring four of Yvonne's new stamps today with Impression Obsession.   I created this canvas using 4 of her stamps from this year's release:


http://www.iostamps.com/YB/E17101.html


http://www.iostamps.com/YB/D17087.html


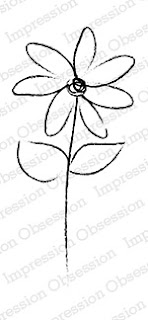
Sketch Daisy

I hope you have a minute to go check it out.  I created this gorgeous canvas. There is also a process video over there for you showing several techniques including how I created a clay embellishment using one of her stamps.


Thanks for stopping in today,

Tonya


SUPPLIES:
  • Faber-Castell Design Memory Craft® - Double Scoop Gelatos® - Snow Cone
  • Faber-Castell Design Memory Craft® - Gesso
  • Faber-Castell Design Memory Craft® - Gel Medium
  • Faber-Castell Design Memory Craft® - Stamper's Big Brush Artist Pens - Dark Sepia #175
  • Faber-Castell Design Memory Craft® - Stamper's Big Brush Artist Pens - Pink Madder Lake #129
  • Faber-Castell Design Memory Craft® - Stamper's Big Brush Artist Pens - Chromium Green Opaque #174
  • Faber-Castell Design Memory Craft® - Stamper's Big Brush Artist Pens - Cold Grey VI #235
  • Faber-Castell Design Memory Craft® - Stamper's Big Brush Artist Pens - Green Gold #268
  • Faber-Castell Design Memory Craft® - Stamper's Big Brush Artist Pens - Cobalt Green #268
  • Faber-Castell Design Memory Craft® - Stamper's Big Brush Artist Pens - Cadmium Yellow #107
  • Faber-Castell Design Memory Craft® - Stamper's Big Brush Artist Pens - Phthalo Blue #110
  • Model Air Dry Clay Poly Form
  • 7x9 Canvas Board
  • Liquitex - Matte Medium Fluid Medium
  • Liquitex - Iridescent Bright Gold Acrylic Ink
  • Black Cardstock
  • Dusty Attic Circle Mesh Small
  • Lace Doily Flowers Appliques
  • Prima Marketing  -  Soft Gloss Gel
  • Prima Marketing  - Wild Flower Tube Flowers
  • Prima Marketing  -  Texture Paste White Crackle
  • Prima Marketing  -  Glass Glitter - Sterling
  • Prima Marketing  -  Glass Glitter - Velvet
  • Prima Marketing  - Shabby Chick Treasures Resin Baroque Frame
  • Daler Rowney - Magenta Acrylic Paint
  • Versa Ink Pad
  • Ranger Ink - Archival Ink Coffee
  • Ranger Ink - Glossy Accents
  • Ranger Ink - Craft Mat
  • Ranger Ink - Heat Tool
  • Ranger Ink - Scraper
  • Ranger Ink - Wonder Tape
  • Ranger Ink - Fine White Embossing Powder
  • Tim Holtz - Idea-ology - Fractured Dolls
  • Tim Holtz - Idea-ology - Tissue Wrap Melange
  • Tim Holtz - Tonic - Scissors
  • EK Success - Embossing Buddy
  • Sakura Gelly Roll White Gel Pen
  • IndigoBlu - Flitter Box
  • Lindy's Stamp Gang - Starburst Spray - Glory of The Seas Gold
  • Lindy's Stamp Gang - Starburst Spray - Edelweiss Moss Green
  • Lindy's Stamp Gang - Glitz Spritz - Blazing Sun
  • Lindy's Stamp Gang - Limor Webber Designs - Tres Chic - Bonjour Butter
  • Lindy's Stamp Gang - Limor Webber Designs - Industrial Chic - Steampunk Sepia
  • Lindy's Stamp Gang - Limor Webber Designs - Under The Boardwalk - Raspberry Lemonade

Read More »

Thursday, January 14, 2016

January Live - Layout Tutorial Recap

1

Thank you to everyone who came to the live class on Monday night.  I had a lot of problems getting the show to air live on YouTube so we moved over the Ustream. If you guys had trouble finding us, I'm so sorry. I'm just going to keep at it until I figure it out!  Good news! We did get it recorded. 

We kept it light and discussed the CHA releases.  I based this month's class on a sketch challenge by Blue Fern Studios. Details can be found on their blog!


 I used the Love Story Collection and their Doodle Flowers Chipboard Coordinates for my layout.  


Here is the sketch...


Here is what my finished layout looked like: 


I used a photo that I had taken during the Holidays of my Mom & I for the layout. In the class I shared with you how to use the Pentel Fude Brush Pen to draw a trendy title.  Here is the pen that I used.  The ink from this pen takes a LONG time to cure.  Sometimes a day or so depending on the paper.  It is also a bit tricky to use.  If you purchase the pen, don't forget to remove the washer that separates the ink well from the brush tip (or it will never work - ::WINK WINK::) 


Here is a close up of how the title turned out.   


I also shared with you how I created & painted these cute little clay birds.  Aren't they adorable?  They are the perfect embellishment to compliment this paper collection.  So affordable and easy to create.  I love including small clay pieces like this in my embellishment clusters. 


Here is the video of the class. 


Happy New Year everyone. Thank you again to everyone who came  to the show live. 

Tonya 

Supplies: 
  • Blue Fern Studios - Love Story - True Harmony 12x12 paper
  • Blue Fern Studios - Love Story - Calling Cards 12x12 paper
  • Blue Fern Studios - Doodle Flowers Chipboard Coordinates
  • Pentel Fude  Brush Pen - Medium Black
  • Stickles (Glass dots) - Peach
  • Martha Stewart - Silicone Mold - Birds & Lady Bugs
  • Polyform - Model Air Air Dry Modeling Clay 
  • Versa Ink
  • American Crafts - Paper Clips - Gold Hearts 
  • Graphic 45 - Staples Collection - Antique Typewriter Wood Stamp Set 
  • Little B - Decorative Paper Tape - Light Grey Diagonal Stripes - 15mm 
  • Lindy's Stamp Gang - Glitz Spritz - Shimmer Mist - 2 Ounce Bottle - Blazing Sun 
  • Faber-Castell - Mix and Match Collection - Gesso 
  • Ranger Ink - Archival Ink Pad - Jet Black 
  • Advantus - Tim Holtz - Idea-ology Collection - Adornments - Arrows 
  • Ranger Ink - Specialty 1 Embossing Powder - Holographic 
  • Stampers Anonymous - Tim Holtz - Layering Stencil - Flourish 
  • Ranger Ink - Tim Holtz - Distress Marker - Barn Door 
  • Prima - Wildflowers Pillar Pack Collection - Botanical Flower Mix - White 
  • Prima - Trim - Jute - 200 Yards - Wheat 
  • Prima - Vintage Trinkets Collection - Metal Embellishments - Keys 
  • Ranger Ink - Tim Holtz - Distress Ink Pads - Mini - Vintage Photo 


Read More »

Monday, January 4, 2016

Yvonne Blair Designs Art Girls

2


Happy New Year everyone! I hope your year is off to a great start. I have some exciting news to share with you to kick start the year in the right direction! My great friend Yvonne Blair, whom I met several years ago when hanging out at my Local Scrapbook Store, She Scrapbooks, contacted me over Christmas break and told me she was releasing her second line of art journal stamps this week with Impression Obsession. She then asked me to be one of her Art Girls! A lot of SQUEALS took place, as I'm sure you can imagine. I'm so very excited for her, she is so sweet and talented, and I know my sweet followers are going to love her stamps and journaling products.

http://www.yvonneblair.com/2016/01/very-very-exciting-news.html

I'm so excited to be along talented group of ladies. Yvonne Blair in the top left, then Lynne Forsythe, and bottom right Bobbie Smith. Get to know all of these wonderful ladies here...

Yvonne's collections will be perfect quotes and doodle art drawings for all your art journals, Bible journal pages, cards, and mixed media projects. I can't wait to share more with you! Here is a little sneak peek at two of the stamps that Yvonne is releasing this week at CHA.


Her pieces are painted with turquoise on the tag so that they "shine" against the warm colors of pink and gold on the tag. The Shine Your Light Stamp says "Shine The Unique Light That is Only Yours To Shine." I added the sentiment onto a piece of acetate (recycled packaging) with gold foil, then painted the back with turquoise paint to make it pop. I just love the hand Sketch Butterfly Stamp was foiled onto a piece of cardstock painted turquoise, then I added doodled white lines with a gel pen to fill in the negative spaces. I love that the areas of the butterfly are left open so that you can doodle inside the wings, giving it a unique look every time you use it.

To find out more about Yvonne and her stamps, please visit her blog at: http://www.yvonneblair.com/

Her stamps can be purchased at: http://www.iostamps.com/

Thanks for stopping in today! Happy New Year!

Tonya

Tag Supplies:
  • Impression Obsession - Yvonne Blair - Shine Your Light Stamp CHA 2016 Release
  • Impression Obsession - Yvonne Blair - Sketch Butterfly Stamp CHA 2016 Release
  • Advantus - Tim Holtz - Idea-ology Collection - Baubles
  • Advantus - Tim Holtz - Idea-ology Collection - Loop Pins
  • Tombow - The Craft Collection - Mono Gel Pen - White
  • Lindy's Stamp Gang - Flat Fabio - Color Mist Spray Set - Caribbean Cruise
  • Lindy's Stamp Gang - Starburst Glitz Spray - Blazing Sun
  • Maya Road - Chipboard Collection - Chipboard Mini Set - Love
  • Martha Stewart Crafts - Crafter's Clay Collection - Silicone Mold - Flower Garden
  • Martha Stewart Crafts - Crafter's Clay Collection - Silicone Mold - Romantic
  • Martha Stewart Crafts - Crafter's Clay Collection - Silicone Mold - Birds  
  • Ranger Ink - Dina Wakley Media - Heavy Body Acrylic Paint - Turquoise
  • Stampers Anonymous - Tim Holtz - Layering Stencil - Rays
  • Ranger Ink - Tim Holtz - Distress Glitter - Picked Raspberry
  • Prima - Fairytale Roses Collection - Miniature Mulberry Flower Embellishments - French White
  • Prima - Fairytale Roses Collection - Miniature Mulberry Flower Embellishments - Baby Pink
  • Prima - Trinket Collection - Fabric Flower Embellishments - Reflections
  • Studio Calico - Snippets Collection - Wood Veneer Pieces - Chevron
  • Sizzix - Tim Holtz - Alterations Collection - Movers and Shapers Die - Tag and Bookplates
  • Sizzix - Tim Holtz - Alterations Collection - Bigz Die - Tiny Tabs and Tags
  • IndigoBlue - Flitterbox - Gold Foil 

Read More »
I love seeing things you create using my tutorials or project shares. Please use the following handles/tags in social media to insure that I get to see your creations:

INSTAGRAM: #FollowingTonyaGibbs    |   TWITTER:  @gibbst    #FollowingTonyaGibbs   |      FACEBOOK:Tag  Tonya Gibbs   #FollowingTonyaGibbs

I Design for:

    http://www.yvonneblair.com

Guest Artist: Click icon to see post!

http://www.teresacollinsdesignteam.blogspot.com/2013/10/family-stories-layout-and-video-by.html#comment-form   http://canvascorp.com/2013/03/21/easter-treat-baskets/


Past Teams

http://www.die-namites.com/     marion