Follow Me...

       
Thanks for stopping by! Don't forget to subscribe!
Showing posts with label Scrapbook. Show all posts

Tuesday, September 26, 2017

Favorite In The History of Ever for Yvonne Blair Designs

0
History of Ever Layout by Tonya A. Gibbs for Yvonne Blair


Hi everyone, today I wanted to share with you one of my favorite summer memories. We took a trip to Europe, and part of that trip was a week in the wonderful city of Paris.  Today I wanted to share a quick layout using one of my favorite photos and a special memory from the trip. 

Side note:  Unfortunately, I do not have a process video for this layout.  I started one, but I had a power outage half way through the process, and my computer did not save the video clips.

Yvonne's stamps go perfectly with your layouts as well as mixed media and card designs. Today, I chose her History of Ever Stamp with Impression Obsession for my layout.

History of Forever - C17191


For my paper collection, I grabbed the Posh 12x12 Collection Pack from Simple Stories from Scrapbook.com  I love buying collection packs or kits because they have everything I need in one convenient package.  Most Local Scrapbook Stores (LSS) will be happy to put similar packages together for you, or already carry similar products or monthly kit clubs.  

https://www.scrapbook.com/store/mw-6700.html

While visiting Europe this summer, my Husband and I took quite a few cheesy photos in front of some really beautiful places.  I checked off LOTS of bucket list items, and those photos need to be documented. I took along a traveling Midori with me so it may contain a lot of those photos.  But some of my favs will definitely land on layouts. 


To accent this photo I used Yvonne's Stamp on one of the note labels in the paper collection.  Most of the paper has gold foiling, and I used the foiling sheets to accent my photos. I decided to heat emboss The History of Ever Sentiment with Gold Foil


History of Ever Layout by Tonya A. Gibbs for Yvonne Blair


This is a photo we took in front of the Eiffel Tower. It is significant because we could see the tower from our flat.  Every night at 10pm we watched the tower sparkle and glitter.  My husband made sure we went out of our way to be in front of the tower each night to watch the show.  He loved it so much! Our last night in Paris, we grabbed a bottle of wine and watched the show on the lawn behind the tower. I loved watching him express so much joy!

 He really is my favorite of all time in the history of ever!

I wanted the glitter of the tower to be symbolic on my layout!
So this is how I was able to duplicate the look.


History of Ever Layout by Tonya A. Gibbs for Yvonne Blair


  1. I made this stencil YEARS ago from a cut file on my Cricut with a transparency to create the Eiffel Tower stencil.  I'm sure by now you can find similar stencils or create your own using a cut file from the Silhouette,  Cricut or other die cutting system.  
  2. I used Wendy Vecchi's Embossing Paste in Metallic Gold and spread a thin layer through the stenciled area.
  3. While it was still wet, I sprinkled German Glass Glitter in Sterling Silver from Prima on top of the tower. Only sprinkle a few pieces of glitter, I didn't want it to be too bulky. I want the tower to twinkle not look like a glittering tower.
  4. Then I slightly tapped the glitter into the wet paste. 
  5. When this is dry, (about 20 minutes do not use a heat gun - it will cause the embossing paste to shrink )  I tapped off the excess glitter and replaced it into the jar.
Here is the complete layout.

History of Ever Layout by Tonya A. Gibbs for Yvonne Blair


I didn't want anything to take away from the photo, journaling, and the tower. So I kept the layout very clean.  The Posh paper collection went perfectly with my photo.  I did add a little bit of gold embossing powder to the center of the flowers to spruce them up a bit.  Beyond that everything else is very simple.   When I finished this layout I remembered how much I loved doing layouts.  Thank you for hanging out with me today. 


http://www.psychomoms.com

Read More »

Friday, July 21, 2017

Neon Graffiti - One HOT MESS Layout

0


Confessions -  this layout was created about a few years ago. The blog post has been sitting dormant, and I almost didn't share it with you.  But today I was updating my blog and stumbled across the draft and decided why not? I'm sure everyone has days like this!  So here it goes for better or worse...


Hi everyone, today I have a layout that I want to share with you using the Neon Graffiti Line by Lindy's stamp Gang and Limor Webber Designs.  The colors are so rich and vibrant, and REALLY make a statement!  They are flat, meaning no shimmer!


Unfortunately, there is no video showing how I achieved the look of this layout. When I set out to create it, I was not in a super stellar frame of mind. My thoughts were cluttered. I was feeling overwhelmed. The post man had just delivered these products, and I really wasn't sure how they were going to react with different surfaces. My goals were not originally a layout but to find out how the mediums reacted on different surfaces.


I sat down and started to play without thinking about an end project. The process was really about clearing my mind and clearing my desk.  Spritzing the colors on dark paper, white book text, and metal. 


I have sat on this project for a few months now, and never really intended to share it with the world.  But today I realized that I can't be the only person who goes through this feeling of constant chaos.  Today's layout demonstrates that through the chaos in my brain art does emerge.  When you read some of the passages around the page it becomes apparent that I am truly blessed. I brainstormed lots of the craziness around the page graffiti style with a white gel pen. 

I never loved this project because I detest the color HOT PINK!  Those who know me, know how I feel!  It has it's place in the color spectrum, but man these colors are bright and sassy, and I guess that is why I avoided showing the layout to you, because MAN is this one hot pink mess! But when I stepped back, and thought about the layout as a whole, I think I love that it is a mess. Because that is truly how I felt the day that I created the page. My brain was cluttered with these crazy thoughts, and they needed to escape! 


Fall is crazy here.  I'm a mother, I work full time, I volunteer for a youth football program, and I'm a local sports photographer, on top of all that madness, I decided to return to school. WHAT WAS I THINKING?  As you guys have probably noticed, this time of year, my artsy projects become sparse.  I'm still creating, but WHEN I retreat to my crafty space, it is for refuge not for work. Admit it, we have all been there!   So I didn't want to create a video, or hassle with step by steps. I just wanted to PURGE my inner thoughts, and spend some time creative playing.


I almost didn't share this layout with the world. But I wanted to remind you guys that it is ok, to create layouts like this that document your inner thoughts.  Not only do they help you process how you feel at the moment, but 10, 20 years or a lifetime from now, they help to document you the person!  


This particular day I had a photo of myself on my desk, the quality of the photo wasn't great, but neither was my frame of mind.  And all these pieces and parts inside my one hit wonder box, helped this mess come to life!  Sometimes life isn't perfect, it is a MESS.  It is ok to document that mess!
 
Thanks for helping me process, and vent from time to time! Thanks for being patient followers when I neglect this part of my world!  Thanks for understanding that sometimes you have to get out of your room, and go make some memories so that you can come back you have the energy to be creative!
 

Read More »

Tuesday, March 7, 2017

My Forever Always - Layout

0
 
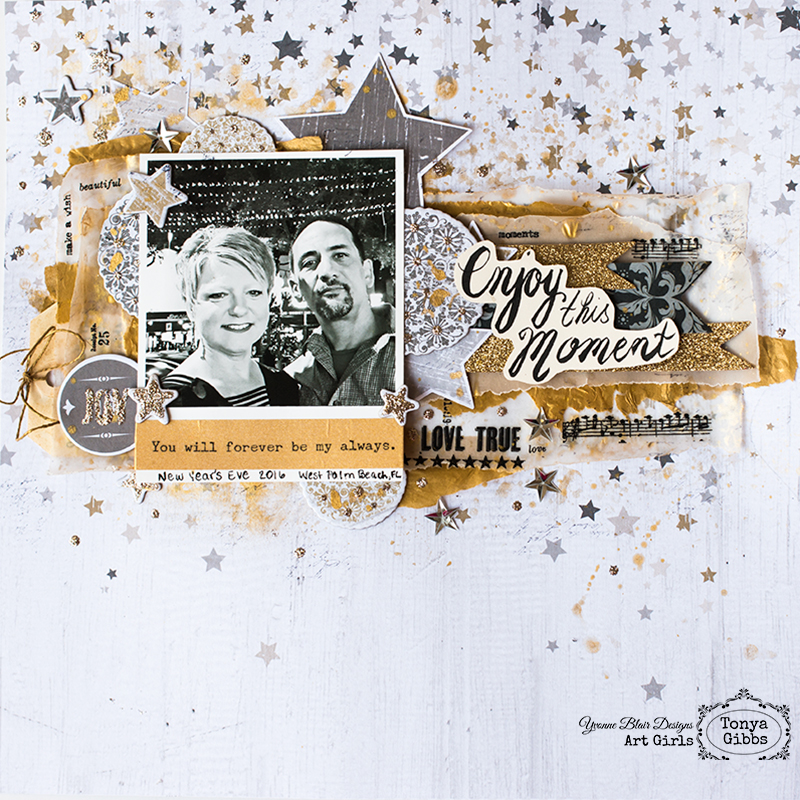
Seriously, this man has been my "Forever Always" since the day I put my eyes on him in 1985.  He walked into my computer class in high school, and this shy sophomore was instantly swept away by this obnoxious fast talking senior.  Five years later, we were married and three years later we had our first child.  Here we are, after thirty years, still so much in love, and I can not imagine my life without him. He is literally my world!  OK enough mushy stuff. 
 
Well, this was the first year that we actually went out for New Year's Eve in decades!  Bonus was this was also the year that I fit into a SIZE 12!  YEP - confession last year I was in a size 18 so I wanted to step out on the town in my high heels looking HOT!  Irony - we were all caught up in the moment, NO ONE EVER SNAPPED A SHOT of my outfit except the one above. LOL, sometimes we just have to go with what we have, right! It is ok, I have the moment in my head, and at least I have a photo of that smile on my face!
 
For my layout today - I chose to use these awesome stamps from Yvonne Blair and Impression Obsession.  As Always, check with your local retailers first, but I've linked them up on the IO Stamps site for your convenience.

http://www.iostamps.com/mm5/merchant.mvc?Screen=PROD&Product_Code=C17153&Store_Code=IOSTAMPS&search=C17153&searchoffset=&filter_cat=&PowerSearch_Begin_Only=&sort=&range_low=&range_high=

http://www.iostamps.com/mm5/merchant.mvc?Screen=PROD&Product_Code=J17125&Store_Code=IOSTAMPS&search=french+script&searchoffset=&filter_cat=&PowerSearch_Begin_Only=&sort=&range_low=&range_high=


I dug into my hoard vault and pulled out Teresa Collins' Tinsel & Co. Collection Stars Paper for my Layout base.  I used the Chipboard stars, and the stars from the Ephemera pack as well.  Then I used some of her boarder strips from the Memorabilia line since they were glittery. I encourage you to go into your hoard vault, and see if you have products that you have been storing up that could be used for some of your layout designs. We did after all purchase them for a reason, right!  The best way to hoard them is to use them for a project for ourselves.


When printing my photo, I left a bit of a border so I could cut it Polaroid style.  In the video below,  I will share with you how I stamped Yvonne's image onto washi  tape.  Allowed it to dry, then placed it directly onto my photo.  I love how clean this looks on my photo.   I will be using this technique again.   You do need to be careful when stamping since the washi has a slick surface and the stamp will slide if you press too hard.  Also, be sure to use a permanent ink like staz-on or archival by Ranger.


In the photo above, you can see how the French Script stamp was used to lightly add texture around the layout on the ephemera pieces and velum edges.  You can click the photo to enlarge them and see greater detail.  I also scattered a few rub-ons from the Tim Holtz botanical collection to add more visual interest to the vellum and create the illusion of printed paper. 


I started to use paint to create the gold effect, but I'm so glad I reached for the recycled gold tissue paper instead.  It was left over from packaging that I had received at Christmas, and I love how delicate it looks peek-a-booing out from around my vellum layers.  I'm glad I saved it.  Also, I love that the French Script stamp added life to the flat ephemera stars.  A little bit of platinum Stickles also gave a little life to those chipboard pieces, and a sprinkle of confetti stars add sparkle, as well, to this flat layout.  To finish it off, a few splatters of Heidi Swapp's Gold Color Shine was just what this layout needed to call it finished.

Here is a video showing my process


I wrote my journaling on the tag that is tucked into the left hand side and slipped it behind the photo.  It talks about our evening.  There was no need for it to be visible.  The title was one that I had hand drawn in a previous video, and was in my bucket of one hit wonders.  It seemed to fit my theme so I added it over the border flags.  I drew it with a brush pen.  The ink was not permanent so I didn't add splatters of gold to it. Here is a view of the finished layout.


This layout reminds me so much of the glitzy downtown streets of West Palm Beach where we spent New Year's Eve.  I had such a great time that night and it was fun to create this layout.  I guess I was holding on to this paper for just the perfect time, and I'm glad I finally found used it.  I love the richness that the monochromatic color pallet adds to this layout.  If you are hoarding a paper collection,  I encourage you to use my layout as inspiration to create something this week!  
 
Thanks for hanging out with me today.
Read More »

Saturday, July 18, 2015

Love Summer Art - Layout Splish Splash

0


Hey bloggers - welcome to day 2 of the #LoveSummerArt collaborative project with YouTube Artists around the WORLD!  The event runs from July 17 - 20th.  To find these artist,  just type #LoveSummerArt  in your YouTube search bar. 


This is a super fun way for you to discover new artists on YouTube, and be inspired by their work. All genres of art are participating - Exciting Right!     

Today  I wanted to share with you a layout that I created from some of the Prints we pulled in the July Ustream.   Remember these...  If you missed the ustream, it is linked up in the right bar. 


I decided to create a layout and use these guys as my frame around my photo, and as part of my ephemera in my embellishment clusters. 


I have shared many times in the past few months, I'm falling in love with hand lettering.  I love the look of the painted imperfect title that I did with watercolors then fussy cut around the.  Isn't this just a fun way to add a title to this wonderfully splashy layout?  


I also tucked in several of the die-cuts that I've been using to pull prints with in the last few months. Their interesting patterns keep my layout looking fresh, and unique. 


I used Faber-Castell Design Memory Crafts® Glaze Medium, Prima's Bubble stencil and little Lindy's Stamp Gang Magicals to create the splashed background.  I love customizing my layouts this way. 

To see how I did this, I've prepared a process video


Thank you for stopping in today.  I hope I have inspired you to create a fun summer layout.  Don't forget to check back tomorrow. I have a Mixed Media card for you.  

Also don't forget to check out the #LoveSummerArt  over on YouTube.  I've been inspired by so many wonderful artists this week, and have found some new people to stalk (I mean follow).   

Have a great weekend, 

Tonya 

Save the Date -  Our next Ustream is scheduled for August 3, at 8:30 pm est. 

Supplies:
  • Lindy's Stamp Gang - Limor Webber Designs Signature Tres Chic - Magicals - Merci Beaucoup Mint
  • Lindy's Stamp Gang - Glitz Spritz - Pearlescents
  • Ranger Ink - Dyan Reaveley - Dylusions Ink Spray - Lemon Zest
  • Marvy Reminisce - Gel Pen
  • Scotch Quick Dry Adhesive
  • Score Tape
  • Faber-Castell Design Memory Craft® - Gelatos® - Tangarine
  • Faber-Castell Design Memory Craft® - Gelatos® - Banana
  • Faber-Castell Design Memory Craft® - Gelatos® - Watermelon
  • Faber-Castell Design Memory Craft® - Glaze
  • Faber-Castell Design Memory Craft® - Gesso
  • Faber-Castell Design Memory Craft® - Stamper's Big Brush Artist Pen - Manganese Violet #160
  • Geli Arts® Gelli Plate® 8x10.
  • Prima Marketing - Zephyr - Say It In Crystals
  • Prima Marketing - Wild Flowers Pillar Pack White
  • Prima Marketing - Finnabair - Stencil - Bubbles
  • Prima Marketing - Flower Centers - Monarch Diamond
  • Foam Adhesive
  • Artist Loft - Watercolors
  • Gold Thread
  • IndigoBlu - Limor Webber Designs - Rugged Edges Stamp
  • The Crafter's Workshop - Mini Harlequin Stencil
  • Die-Versions - Hexagons Background
  • Die-Versions - Pretty Paisley
  • Teresa Collins - Urban Market - Wood Veneer (3)
  • Studio Calico - Wood Veneer - Camera
  • Rhinestone  (Center of Camera)

Read More »

Thursday, June 4, 2015

This Moment Mixed Media Layout Limor Webber Designs

1
 
Hi everyone! The other day I shared on Instagram  that this amazing Happy Mail was delivered and I couldn't wait to get my fingers inky!   These collections are the Lindy's Stamp Gang Limor Webber Designs On the Boardwalk, and Tres Chic lines in Flat Fabios, Sprays, Shots, and Embossing Powders.  Aren't they gorgeous? I mean seriously these colors scream spring, and happy all in one luscious package! 


I've prepared a process video of me creating this beautiful layout with these amazing products. 
The post is over on Limor Webber's blog. 
 
 
 Here is a glimpse at the finished layout.


Tonya Gibbs
 
 
Supplies:
 
 
Read More »

Saturday, May 16, 2015

Ustream Recap from May 16, 2015

0

Hi everyone, it was so much fun hanging out with you this beautiful Saturday.  It was nice to chat with a few of my international friends for a little while. Thank you so much for everyone who came out to watch the show live. 


Today, I decided to create a layout using some of the techniques I taught in the Ustream earlier this month.   I'll link up that post below for you to reference.   I was totally inspired to do today's project based on this "On Trends" paper collection by My Mind's Eye


While my flowers are not exactly like the ones in the paper collection, I think they compliment it well. I used the papers to back my photos and offer the title to my layout.  


I used the Prima - Scenic Route Watercolor Pencils  to create my background. 


and the IndigoBlu  Flitter Box Kit to create the Foiling. 


Here is the video recording if you missed the class.  


  To finish off the layout and offer some dimension,  I added a floral spray of beautiful Prima flowers. After the class I decided to fill in with some doodles and add a few more flowers.


Our next class is scheduled for June 1, 2015. 

Thanks again to everyone who came to see the show live.
It was a lot of fun, and totally spur of the moment. 

Read More »

Tuesday, September 2, 2014

Ustream September 2014 Follow up

1
Thank you to everyone who came to the Ustream last night live.  We had an awesome time, and learned lots of great techniques. 


Here was the kit from last night's show.  Thank you to Scrapbooking With M.E. Boutique for providing the kits, and sponsoring the show last night.  I believe there are a few of these kits remaining, if you are interested, please visit the boutique


In the class I taught you how to create these beautiful blossoms that mimic the flowers in the collection. These are fantastic on your layouts because they add visual interest, without the bulk!  They are so whimsy and fun that you can add them to cards, as well as mini albums!  I also shared a new technique for using your Whipped Spackle from the August Kit with Embossing powders to create amazing texture and depth. 


Here is a glimps at the finished layout.  So shabby and whimsical.  Love all the elements. Can't wait to create my next project with this collection.


Layout Created by Tonya Gibbs  http://www.psychomoms.com #psychomomscrapbooks #layout #scrapbooking #MME

Here is the video recording from last night's show in case you couldn't make it live:


If you create this layout or use some of these techniques, please make sure you share them with me.  I love to see your projects! Don't forget to #FollowingTonyaGibbs  in your social media outlets so that I can easily find you on Instagram, Twitter, Pinterest and Facebook! Thanks for stopping in today

Thanks again for supporting my creative journey!

Tonya

Supplies (All supplies used can be found at the Scrapbooking With M.E. Boutique):
  • My Mind's Eye - Just Sayin' 6x6
  • My Mind's Eye - Just Sayin' Enamel Accents
  • My Mind's Eye - Just Sayin' Ephemera
  • Faber-Castell Design Memory Craft® - Whipped Spackle
  • Faber-Castell Design Memory Craft® - Stamper's Big Brush Artist Pen  Nougat #178
  • Faber-Castell Design Memory Craft® - Gelatos® Guava 
  • Faber-Castell Design Memory Craft® - Gelatos® Cotton Candy
  • Faber-Castell Design Memory Craft® - Gesso 
  • Die-Namites Dies - Flower Scroll Die
  • Heidi Swapp - Butterfly Stencil
  • Kaisercraft - Stamp - Edges 
  • Tim Holtz  - Rays Stencil 
  • Tim Holtz - Distress Watercolor Cardstock
  • Tim Holtz - Distress Pen Vintage Photo (journaling)
  • Ranger Ink - Queens Gold Embossing Powder
  • Doily - 6" and 4"
  • Krylon Color Master Metallic Gold Spray Paint
  • Apple Barrel Acrylic Paint - Pineapple 20542
  • Prima Chalk Ink Edgers - Pastel Green, Old Rose
  • Cosmo Cricket  - Tiny Text Wood Veneers
  • Watercolor Set with 24 colors 
  • Tombo Mono Adhesive


I love seeing things you create using my tutorials or project share. Please use the following handles in social media to insure that I get to see your creations:
INSTAGRAM: #FollowingTonyaGibbs | TWITTER: @gibbst #FollowingTonyaGibbs | FACEBOOK: Tag Tonya Gibbs #FollowingTonyaGibbs
Read More »

Friday, May 30, 2014

Masculine Layout Tips

0
 
 
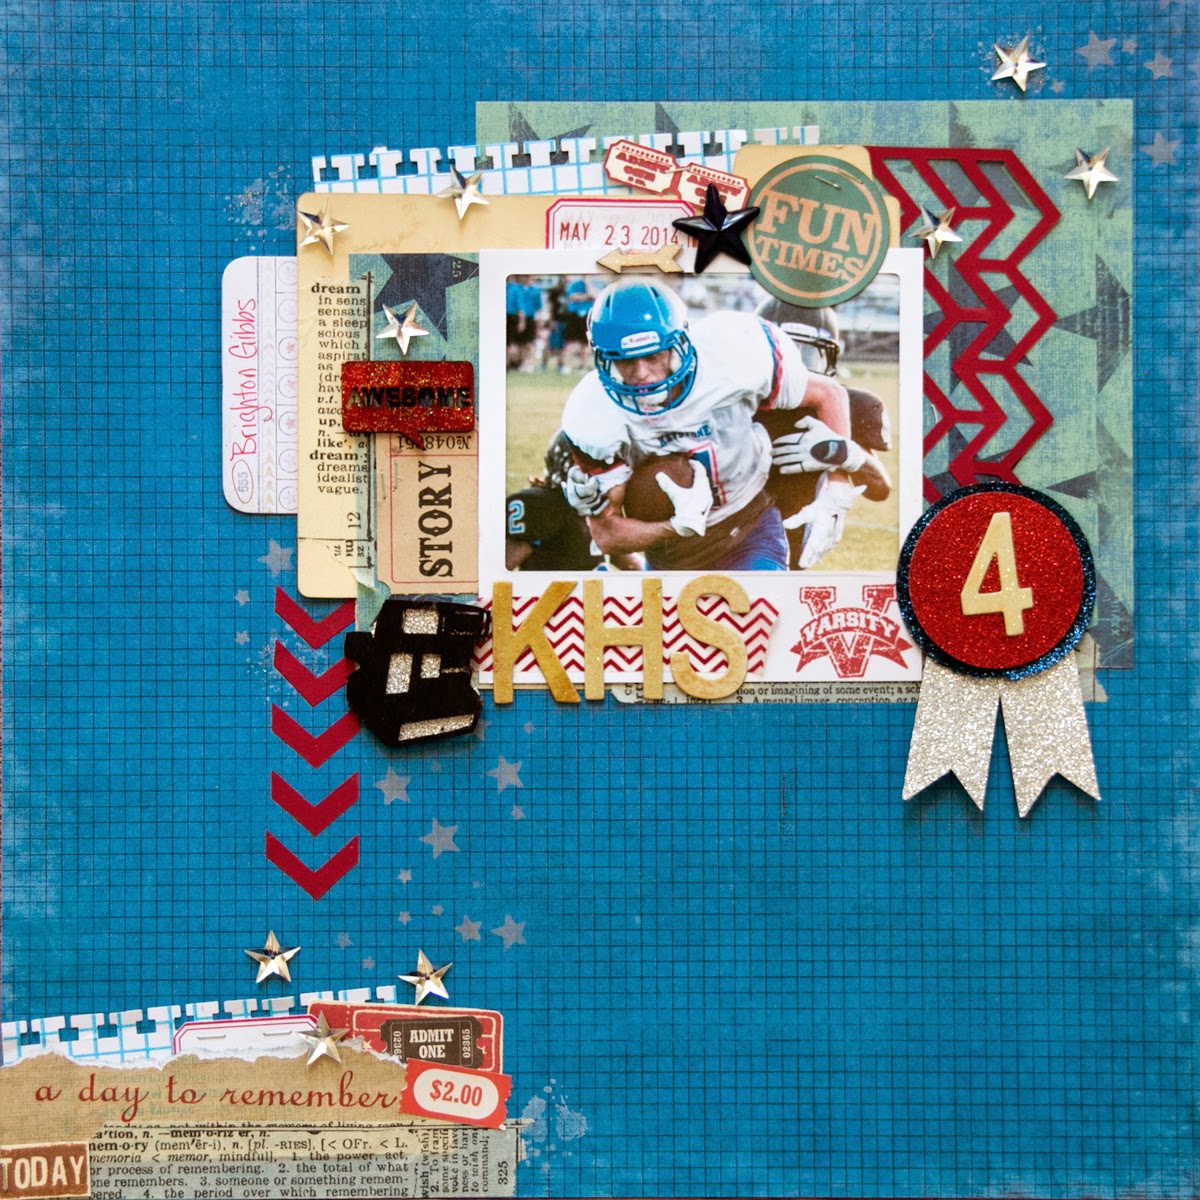
Well this is my last post of the month, and I issued everyone a challenge to create masculine  projects. The scrapbooking industry is full of products for feminine designs and it is sometimes a challenge to create for the men in your life. All month Peggy and I have been sharing some great projects over on the Artsy Addicts blog, that I hope have inspired you. Today I thought I would recap some tips on how I set out to create Masculine layouts.


1)  Dig around in your stash for items that have a neutral theme and color.   I like to select colors that are blue, red, neutrals (grey, tan, brown, black, white) and green.  Not that there is any kind of rule to sticking to a color, I just find that these colors help my focus stay masculine.
 
2)  Look for embellishments in your stash that are not gender specific, like the Dictionary Tissue Tape from Tim Holtz, Star Sequins, and chevron designs, notebook paper, cameras, arrows, tickets, labels, wood veneers and tags. Metal accents are awesome for Masculine projects.
 
 
3) Select papers that lean more on the masculine side.  Like the Heidi Swapp No Limits papers - which were actually travel papers, but you can't tell after it was used and the Echo Park Note to Self (which has a lot of things you can fussy cut to add interest to your layout).


 Here is a process video of me making the layout!
 
 
Here is the finished layout. 


My son's girlfriend said to me yesterday "I like that this layout is very masculine, but still has a lot of sparkle!"   Don't be afraid to use sparkle elements or even flowers on a masculine layout - just don't over do it!  
 
 
I hope this post has helped you with ideas on creating masculine projects.
 
Thanks for stopping in today,
 
Tonya Gibbs


Resources: 

Heidi Swapp  - No Limits Paper collection
Heidi Swapp - Confetti Stencil 6x6
7 Gypsies Paddington clear stamp
7 Gypsies - Postale Index Cards7 Gypsies - Naked Index Cards
7 Gypsies - Library Drawer - Tabbed Dividers - Naked Tabs
My Mind's Eye - Everyday Funday kraft - Everyday Fun stamps
My Mind's Eye - Find Your Wings & Fly - Stamps
Tim Holtz - Idea-ology - dictionary tissue tape
Tim Holtz - Idea-ology - Tiny Attacher
Sizzix - Tim Holtz - Alterations Frameworks Border Die Chevron
Studio Calico - Wood Veneer Hearts & Arrows
Studio Calico - Wood Veneer School Days Speech Bubbles
Ranger Ink - Archival Ink Vermillion
Cosmo Cricket - Glitter Adhesive Sheets  Red, Blue, Silver
Fiskars Circle Punch - 1.75 Inches
Marvy Circle Punch - 2 Inches
Washi - Red Chevron
Prima Wood Veneer Camera
Black Sharpie
EK-Success-Notebook-Border-Punch
EK Success Zig Writer
Clear Glitter Nail Polish
Star Sequins
Grid Line Index Cards
Labels
Color Box Pigment Stamp Ink Silver
Color Smart Pigment Stamp Ink White
Hampton Art - 7 Gypsies - Clear Acrylic Stamps - Varsity
Hampton Art Rubber Stamp A Day To Remember Numbers
Echo Park  Note to Self

Read More »

Thursday, May 22, 2014

You Are Loved Layout using Die-Namite Dies

1
Hi everyone, over on the Die-Namites blog today I'm sharing a layout that I created of me and my daughter Brittany. 


Here are the Die-namties Dies that I used for this layout.

http://www.die-namites.com
 
 
Here is a process video of me making this gorgeous layout.


Supplies Used:
  • Die-Namites Dies
  • Faber-Castell Design Memory Craft PITT Big Brush Artist Pens
    • Medium Flesh  131
    • Green Gold 268
    • Cold Grey VI 235
    • Light Cobalt Turquoise 154
    • May Green 170
    • Phthalo Blue 110
    • Dark Sepia 175
  • Tattered Angels Glimmer Mists
    • Dried Hydrangea
    • Honey Dew Melon
    • Cherub Pink
  • Heidi Swapp
    • Gold Lame Color Shine
    • Heart Lattice Stencil
  • Recollections
    • Microbeads
    • Resin Bird Houses
  • Prima - Shabby Chic Resin Birds
  • Liquitex
    • Gesso Prep Surface
    • Light Modeling Paste
  • Krylon - Gold Metalic Spray Paint
  • Glitz - Giant Roller Doodle Triangles
  • Ranger 
    • Archival Jet Black Ink
    • Tim Holtz Distress Ink - Vintage Photo
  • Stampabilities - Faded Script Stamp
  • EK Success - 1" Circle Punch
  • Tim Holtz Idea-o-logy - Word Plate
  • Fab Scraps -  Flat back Pearls
  • Amy Tangerine - "Yes Please" Roller stamp
  • 7Gypsies  - Library Drawer Naked Tabs


Read More »
I love seeing things you create using my tutorials or project shares. Please use the following handles/tags in social media to insure that I get to see your creations:

INSTAGRAM: #FollowingTonyaGibbs    |   TWITTER:  @gibbst    #FollowingTonyaGibbs   |      FACEBOOK:Tag  Tonya Gibbs   #FollowingTonyaGibbs

I Design for:

    http://www.yvonneblair.com

Guest Artist: Click icon to see post!

http://www.teresacollinsdesignteam.blogspot.com/2013/10/family-stories-layout-and-video-by.html#comment-form   http://canvascorp.com/2013/03/21/easter-treat-baskets/


Past Teams

http://www.die-namites.com/     marion