Follow Me...

       
Thanks for stopping by! Don't forget to subscribe!
Showing posts with label tutorial. Show all posts

Monday, October 10, 2016

Blessing Watercolor Cards for Yvonne Blair

0
Watercolor Card Tutorial by Tonya Gibbs for Yvonne Blair Designs

After a weekend of torment created by Hurricane Matthew up and down the south eastern coast line,  I thought I would spend some time reflecting on how grateful I am for the many blessings I have in my life.  During my extra time off, I spent a little time in studio while the storm raged outside with my watercolors and a few of Yvonne's stamps.  Today I would like to share with you a few cards I created during this time of reflection.

I reached for these two stamps sets that Yvonne Designs for Impression Obsession Stamps to create these cards:
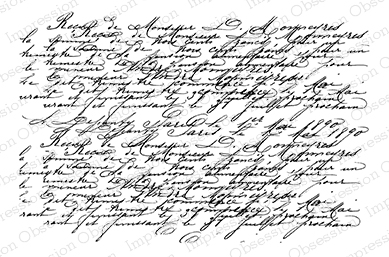
French Script


http://www.iostamps.com/mm5/merchant.mvc?Screen=PROD&Product_Code=3172-XL&Store_Code=IOSTAMPS&search=3172-xl&searchoffset=&filter_cat=&PowerSearch_Begin_Only=&sort=&range_low=&range_high=

I'm going to create two cards in today's share the first is using the "Count Your Blessings" from the Words of Art stamp set.  This set has so many amazing sayings in it. Perfect for card makers!


Tonya Gibbs Watercolor Blessing Card for Yvonne Blair Designs

In the video below, I share with you a technique for creating watercolor flowers using kitchen plastic wrap!  You allow the paint to dry on the paper and then follow the text that is left behind with watercolor pencils to give more details to your flowers.  It is so simple and perfect if you don't know how to draw flower shapes. You literally let the plastic wrap and wet paint do the work for you!


Tonya Gibbs Watercolor Grateful Heart  for Yvonne Blair Designs

I struggled a bit more with this flower shape as the colors seemed to blend more in and I really wasn't feeling it when I added the colored pencils.  In hindsight  I probably should have left it alone when I removed the plastic wrap. I really liked the abstract of the dried paint.  But oh well, this is creative play, and sometimes you just have to follow the journey that the art takes you.  To fix my painted mess I reached for Yvonne's French Script stamp and the Heidi Swap Navy Blue ink (which is my new favorite over black!), and started stamping.   After assembling the card I realized the only thing missing was flower centers on both cards and my flowers came to life!

The paper stacks that I used were found in Target's dollar bin, and I fell in love with the copper foiling.  I decided to duplicate this with copper embossing for Yvonne's Stamps.

Here is the video showing my process.


I'm so grateful that my family survived this terrible storm. I know so many that sustained damage to their homes, and several communities are still without power.  Some have lost their lives and I pray for their families to find peace.  My heart is saddened for the country of Haiti and for the Residents along the coast of Florida, Georgia, North Carolina, South Carolina, and Virginia many of these communities will never be the same.   If you are inclined, and have the capacity to do so, I encourage you to give to the American Red Cross.  I know there is a need for relief both at home and in Haiti where so much life has been lost. 


Supplies Used in these two Cards: 

  • Impression Obsession - Yvonne Blair Designs - Words for Art Stamp
  • Impression Obsession - Yvonne Blair Designs - French Script Stamp
  • Canson Watercolor Paper 140lb 
  • Artist Loft - Watercolor
  • Royal Langnickel - Brush Value pack   #3 Round, #10 Flat
  • Wheat Jute Twine
  • My Mind's Eye On Trend Cardstock 6x6 
  • Halloween Cardstock 6x6 Target Dollar Bin 375772
  • Fall Cardstock 6x6 Target Dollar Bin Kraft Copper Foil 375773 
  • Faber-Castell Design Memory Craft - Stamper's Big Brush Artist Pen Cadmium Yellow 107
  • Faber-Castell Design Memory Craft - Stamper's Big Brush Artist Pen Scarlet Red 118
  • Faber-Castell Design Memory Craft - Stamper's Big Brush artist Pen Caput Mortuum #169
  • Zing Copper Embossing Poweder
  • EK Success Powder Embossing Buddy
  • Versa Ink Pad
  • Marvy Embossing Heat Gun
  • Heidi Swapp Navy Ink 
  • Ranger Multi Medium
  • Scotch Double Sided Foam Tape
  • Scotch ATG Adhesive
  • Kraft Cardstock 


Read More »

Monday, January 18, 2016

Inner Child Canvas - Art Girls Project

0


Hi everyone, I hope you had a fantastic weekend, today is my first post over on Yvonne's blog. Have you seen Yvonne's new stamp release this CHA2016? I have to tell you her blog is going to be buzzing with tons of inspiration this year.  Her stamps are fantastic and LARGE enough for art journals, but small enough for cards. I just LOVE them! I love that you can order these stamps in one of three mounts - Wood Mounted, Cling Mounted or Plain Rubber. This makes them perfect for your style of stamping! I'm featuring four of Yvonne's new stamps today with Impression Obsession.   I created this canvas using 4 of her stamps from this year's release:


http://www.iostamps.com/YB/E17101.html


http://www.iostamps.com/YB/D17087.html


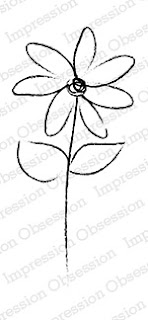
Sketch Daisy

I hope you have a minute to go check it out.  I created this gorgeous canvas. There is also a process video over there for you showing several techniques including how I created a clay embellishment using one of her stamps.


Thanks for stopping in today,

Tonya


SUPPLIES:
  • Faber-Castell Design Memory Craft® - Double Scoop Gelatos® - Snow Cone
  • Faber-Castell Design Memory Craft® - Gesso
  • Faber-Castell Design Memory Craft® - Gel Medium
  • Faber-Castell Design Memory Craft® - Stamper's Big Brush Artist Pens - Dark Sepia #175
  • Faber-Castell Design Memory Craft® - Stamper's Big Brush Artist Pens - Pink Madder Lake #129
  • Faber-Castell Design Memory Craft® - Stamper's Big Brush Artist Pens - Chromium Green Opaque #174
  • Faber-Castell Design Memory Craft® - Stamper's Big Brush Artist Pens - Cold Grey VI #235
  • Faber-Castell Design Memory Craft® - Stamper's Big Brush Artist Pens - Green Gold #268
  • Faber-Castell Design Memory Craft® - Stamper's Big Brush Artist Pens - Cobalt Green #268
  • Faber-Castell Design Memory Craft® - Stamper's Big Brush Artist Pens - Cadmium Yellow #107
  • Faber-Castell Design Memory Craft® - Stamper's Big Brush Artist Pens - Phthalo Blue #110
  • Model Air Dry Clay Poly Form
  • 7x9 Canvas Board
  • Liquitex - Matte Medium Fluid Medium
  • Liquitex - Iridescent Bright Gold Acrylic Ink
  • Black Cardstock
  • Dusty Attic Circle Mesh Small
  • Lace Doily Flowers Appliques
  • Prima Marketing  -  Soft Gloss Gel
  • Prima Marketing  - Wild Flower Tube Flowers
  • Prima Marketing  -  Texture Paste White Crackle
  • Prima Marketing  -  Glass Glitter - Sterling
  • Prima Marketing  -  Glass Glitter - Velvet
  • Prima Marketing  - Shabby Chick Treasures Resin Baroque Frame
  • Daler Rowney - Magenta Acrylic Paint
  • Versa Ink Pad
  • Ranger Ink - Archival Ink Coffee
  • Ranger Ink - Glossy Accents
  • Ranger Ink - Craft Mat
  • Ranger Ink - Heat Tool
  • Ranger Ink - Scraper
  • Ranger Ink - Wonder Tape
  • Ranger Ink - Fine White Embossing Powder
  • Tim Holtz - Idea-ology - Fractured Dolls
  • Tim Holtz - Idea-ology - Tissue Wrap Melange
  • Tim Holtz - Tonic - Scissors
  • EK Success - Embossing Buddy
  • Sakura Gelly Roll White Gel Pen
  • IndigoBlu - Flitter Box
  • Lindy's Stamp Gang - Starburst Spray - Glory of The Seas Gold
  • Lindy's Stamp Gang - Starburst Spray - Edelweiss Moss Green
  • Lindy's Stamp Gang - Glitz Spritz - Blazing Sun
  • Lindy's Stamp Gang - Limor Webber Designs - Tres Chic - Bonjour Butter
  • Lindy's Stamp Gang - Limor Webber Designs - Industrial Chic - Steampunk Sepia
  • Lindy's Stamp Gang - Limor Webber Designs - Under The Boardwalk - Raspberry Lemonade

Read More »

Thursday, January 14, 2016

January Live - Layout Tutorial Recap

1

Thank you to everyone who came to the live class on Monday night.  I had a lot of problems getting the show to air live on YouTube so we moved over the Ustream. If you guys had trouble finding us, I'm so sorry. I'm just going to keep at it until I figure it out!  Good news! We did get it recorded. 

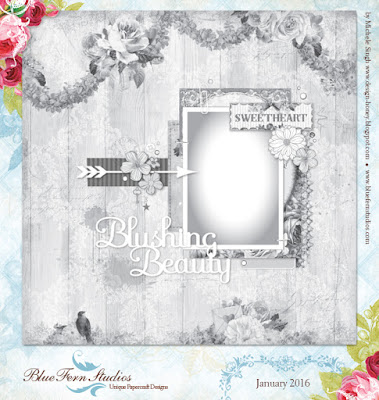
We kept it light and discussed the CHA releases.  I based this month's class on a sketch challenge by Blue Fern Studios. Details can be found on their blog!


 I used the Love Story Collection and their Doodle Flowers Chipboard Coordinates for my layout.  


Here is the sketch...


Here is what my finished layout looked like: 


I used a photo that I had taken during the Holidays of my Mom & I for the layout. In the class I shared with you how to use the Pentel Fude Brush Pen to draw a trendy title.  Here is the pen that I used.  The ink from this pen takes a LONG time to cure.  Sometimes a day or so depending on the paper.  It is also a bit tricky to use.  If you purchase the pen, don't forget to remove the washer that separates the ink well from the brush tip (or it will never work - ::WINK WINK::) 


Here is a close up of how the title turned out.   


I also shared with you how I created & painted these cute little clay birds.  Aren't they adorable?  They are the perfect embellishment to compliment this paper collection.  So affordable and easy to create.  I love including small clay pieces like this in my embellishment clusters. 


Here is the video of the class. 


Happy New Year everyone. Thank you again to everyone who came  to the show live. 

Tonya 

Supplies: 
  • Blue Fern Studios - Love Story - True Harmony 12x12 paper
  • Blue Fern Studios - Love Story - Calling Cards 12x12 paper
  • Blue Fern Studios - Doodle Flowers Chipboard Coordinates
  • Pentel Fude  Brush Pen - Medium Black
  • Stickles (Glass dots) - Peach
  • Martha Stewart - Silicone Mold - Birds & Lady Bugs
  • Polyform - Model Air Air Dry Modeling Clay 
  • Versa Ink
  • American Crafts - Paper Clips - Gold Hearts 
  • Graphic 45 - Staples Collection - Antique Typewriter Wood Stamp Set 
  • Little B - Decorative Paper Tape - Light Grey Diagonal Stripes - 15mm 
  • Lindy's Stamp Gang - Glitz Spritz - Shimmer Mist - 2 Ounce Bottle - Blazing Sun 
  • Faber-Castell - Mix and Match Collection - Gesso 
  • Ranger Ink - Archival Ink Pad - Jet Black 
  • Advantus - Tim Holtz - Idea-ology Collection - Adornments - Arrows 
  • Ranger Ink - Specialty 1 Embossing Powder - Holographic 
  • Stampers Anonymous - Tim Holtz - Layering Stencil - Flourish 
  • Ranger Ink - Tim Holtz - Distress Marker - Barn Door 
  • Prima - Wildflowers Pillar Pack Collection - Botanical Flower Mix - White 
  • Prima - Trim - Jute - 200 Yards - Wheat 
  • Prima - Vintage Trinkets Collection - Metal Embellishments - Keys 
  • Ranger Ink - Tim Holtz - Distress Ink Pads - Mini - Vintage Photo 


Read More »

Saturday, January 9, 2016

Reminder Live Tutorial Monday Jan 11

1


Happy New Year!  I hope everyone is settled  into their new routines and ready to get crafting again!  CHA is in full swing, so I hope you will join me live and let's chat about some of our favorites being released while we create a layout using the beautiful Blue Fern Studios Love Story Collection. 


Here are the details:


MONDAY -  JANUARY 11, 2016
8:00 p.m.  est - I will log in 10 mins early to chat!
On YouTube!  

Link to YouTube Channel:
https://www.youtube.com/user/Psychomoms


In an effort to bring you a better quality show, I've decided to switch up the time and venue a bit. I will broadcast LIVE from YOUTUBE this year. Also note that the time is a bit earlier, we are starting at 8:00 pm eastern standard time. Here is a link to a handy Time Zone Converter to find the time in your area.

All you have to do is be a subscriber of my YouTube Channel and the LIVE broadcast will show in your Subscription area! It will also show on my Channel Page, and Google Plus will remind you too! Follow me on Facebook and there will be a link there as well! 

WARNING - YOU MAY BEGIN DROOLING - Here is a glimpse at the beautiful Blue Fern Studios Love Story Collection, and the Blue Fern Studios Doodle Flowers Chipboard I will be featuring at the show.


As always I will do my best to record.   Hope to see everyone there.  Oh and don't forget to right down your favs from CHA2016, so we can chat about them!


Tonya


Please note that I am not affiliated with any of the Brands used in this broadcast. They have not paid me, contracted with me, or compensated me in any way to promote or teach the products that I am demonstrating.

Read More »

Thursday, November 19, 2015

Bloom Bird Watercolor Card - Live Class Monday Nov 23

3


JOIN ME LIVE ON YouTube  (https://www.youtube.com/user/psychomoms) - I'm going to give a new area a try this month) 

MONDAY, NOVEMBER 23
AT 3:30 PM EST  (NOTE NEW TIME) for my International buddies - just this class!   

A few weeks ago I shared on Instagram that I finally found these beautiful stamps designed by Jamie Daugherty.  


I FELL IN LOVE - the second I saw her post a project with them. Like shamelessly begged for her hand drawing to be stamps, and boom within a week here they are - like Prima was tuned into my wishes. (LOL)  Well not really but I like to think so!  They were probably in production long before she shared the hand drawing.  

If you have these cute little stamps and want to follow along - I'm going to use this little fellow as inspiration for coloring up my little birds: 


I am also going to play around with my Tim Holtz Markers: 
Ground Espresso,
Pumice Stone,
Cracked Pistachio,
Peeled Paint,
Evergreen Bough,
Tumbled Glass, and
Warn Lipstick.

Also grab out a pale distress ink pad either of these colors will work:
Antique Linen, Old Paper, Pumice Stone, Tea Dye


I hope you can join me live.  I know many of my USA friends may be working, so I will record.  I just wanted to share a live class with my international buddies who are always  sleeping when I broadcast live.   

Channel:   YouTube channel (live) http://www.youtube.com/user/psychomoms I want to see if this environment is better
Time:  3:30 PM EST 
Date:  MONDAY, NOVEMBER 23


Read More »

Friday, October 23, 2015

Class of 2015 Mixed Media Layout

1

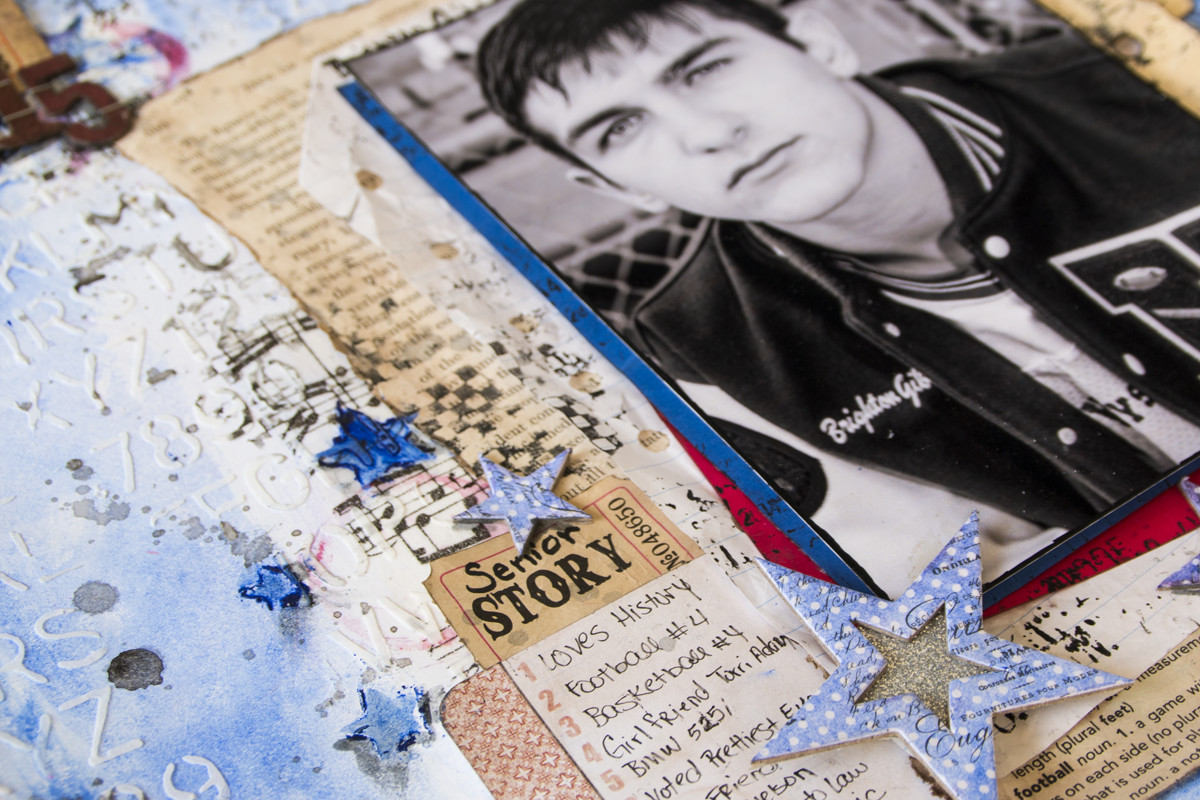
Happy fall everyone! I've been away for a while - have you missed me? This time of year is a MESS in my world. Just busy busy with lots going on in my personal life. Today, with the kids back in a school, and lots of "sports" photos being taken, I thought I would share with you a masculine layout to inspire you to scrap those teen school photos. My Son graduated last year, and the photo taken here, was one we used in his senior announcement.
 
 
I gathered up lots of Faber-Castell Design Memory Craft® to create a colorful background for my black and white photo.   I just love all the texture and grunge. 
 
 
What teen doesn't have music blaring 24/7? So I used Gel Medium to add music tissue paper to the background. The Boysenberry Gelatos® was the perfect blue to add color to my white card stock and represent his school colors of red and blue.   Once it was dry, I applied Whipped Spackle through the School House Stencil from Tim Holtz. This gave me some subtle texture.  For my journal area, I add a list of Brighton's top 10 details from his Senior year.


I also used the Boysenberry Gelatos® and the Tim Holtz Stars Stencil to add a few grungy stars to my background.  I created a wash with the Double Scoops® Red Cherry® and used a bottle to add a few circles in areas around the background.   For more texture, I used my Stamper's Big Brush Pen in Black as a stamping ink with some grungy texture stamps from Tim Holtz.  


I also gathered a few items that I thought would set the tone for a "school" themed layout.  Since my Son is a HUGE lover of all things historical, I figured a page from the Life of Abraham Lincoln would make the perfect photo mat. I also pulled a few mini file folders, notebook paper, grid paper, dictionary paper with the football definition visible to add to my photo mat layers.  If your son is anything like mine, his homework always looked like it had been stuffed in the bottom of a back pack for weeks.  To achieve this look, a crumpled up the papers and used the Nougat Stamper's Big Brush Artist pen to distress the edges.  I also wanted the entire piece to have a messy handwritten look, so I hand wrote my journaling and titles. To finish off the embellishment clusters, I used tickets and charms for my ephemera. Heidi Swapp's chipboard stars added depth, and show he is my "All-Star".  

Here is a quick video showing how I created the layout.  


Thanks for stopping in today,  I hope you have a great weekend.
 
Tonya
 
Supplies:


Read More »

Tuesday, September 8, 2015

Ustream Recap from Sept 7 2015 - Watercolor Cards

0
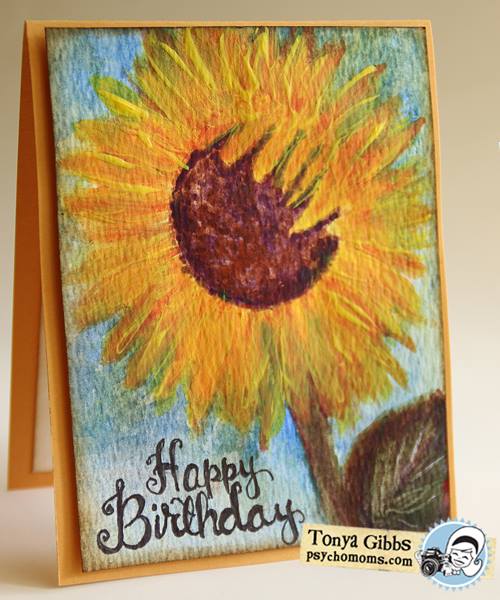
Hi everyone what a fun show last night. Thank you to everyone who came out to watch the show live. It was fun hanging out with you, and getting to know the newbies. Here is the beautiful card I created.


In this show I demonstrated some simple watercolor techniques for creating a beautiful Sunflower card (seen above).  I painted this card with a simple palette of 4 colors, and demonstrated how mixing them, you can create secondary colors for accents and shadows. I also shared some easy brush techniques to create shadows and highlights. 

If you are a newbie to watercolor and you simply want to experiment without a huge expense.  I recommend purchasing an inexpensive watercolor set. These student grade paints are great for practicing paint brush techniques and familiarizing yourself with how watercolor works.  The set I used during the show retails for under $8 at a local box store.


However, if have the budget for expensive paints and want to jump in feet first, by all means go ahead.  I recommend that you start your collection with four simple colors:  Ultramarine Blue, Cadmium Red, Cadmium Yellow, and a Burnt Sienna.  You can always expand from there as your budget allows.

Here is the recorded video: 

Watch On YouTube


I've really had a great time painting these cards, and shared at the end of the video how a set would make a great gift for someone during the holiday season, maybe a teacher, friend from church, or neighbor.  Who doesn't need a card every now then? Here are a few others that I have created using the techniques taught in this class. 


I hope you enjoyed the show.  Our next broadcast is scheduled for October 5, 2015. 

Thanks for stopping in today, don't forget if you try these techniques #FollowingTonyaGibbs in your social media or tag me on Facebook so that I can see what you have done. 


Products that I used:
  • Canson Watercolor Cold Press 140lb Paper
  • Daler-Rowney Simply Watercolor Paint Set, 12pk
  • Faber-Castell Design Memory Craft® - Watercolor Brush #3 Round
  • Artist Loft - Watercolor Brush #8 Round
  • Ice Cube Tray
  • Cardstock (card backing)
  • White foam adhesive
  • Scotch ATG Tape
  • Tim Holtz - Ranger Ink Vintage Photo Distress Ink
  • Tim Holtz - Ranger Ink - Distress Tool
  • Ranger Ink - Craft Mat
  • Uni-ball Signo Impact 207 Gel Pen (black) 1.0mm


Read More »

Monday, September 7, 2015

Live Ustream - TONIGHT

0
Hi everyone I hope you can join me live on Ustream tonight for a watercolor card tutorial.  


Class begins at 8:30 pm EST 


Tonight I will show you a super simple watercolor technique that a complete novice can create.  As always I will do my best to record. 


What you need: 

Watercolor paper
Round watercolor brushes -  8 and 3 
Liner watercolor brush 
Watercolor Tube paints in Ultramarine, Primary Yellow, Primary Red, Burnt Sienna
watercolor pallet
2 jars of water 1) clean and 1) for cleaning your brush
Fine - Sharpie Marker for hand lettering (or use your favorite stamp) 

Read More »

Tuesday, August 4, 2015

August 2015 Ustream Recap

0

Thank you to everyone who came out to watch the Ustream live last night.  We had a lot of fun creating this beautiful tag. 


In this show, I shared with you the technique that I used to create the roses seen in the background of the tag. Isn't this just scrumptious all by itself? 


Here you can really see the details in the painted flowers.  I decided to decorate the tag with a scene using Prima's Parlor  Resin pieces.  you can see here how the flowers in the scene match the ones in the background, offering a beautiful 3D effect. 


Don't forget to use those scraps when creating floral clusters.  This tag project has a few remnants that I found in my stash.  A small piece of lace is used as the screen in the window, a small stem from a floral spray, half a piece of metal filigree is just enough to tuck into the edge of my spray, and the butterfly was actually punched from the branding strip of  apiece of wood paper packaging.   


Adding a little glass glitter mixed with glossy accents, really helps to add sparkle to the shadows, and bridges the gaps between the embellishment cluster elements. 

Want to see how I created this beautiful tag from start to finish.  Here is the video recordings from last night's show.  I was interrupted briefly by a lighting storm, so the show is broken up into two videos. 


Watch on YouTube


I really love all the details on this tag.  This painting technique would make an amazing background on all of your projects.  See if you  can create one similar and share it with me in your social media outlets by adding #FollowingTonyaGibbs, or tag  me on Facebook.  I love to see what you create!

Thanks for stopping in today,

Tonya Gibbs


Supplies List: 

  • Vintage text paper in a variety of styles
  • Faber-Castell Design Memory Craft® - Gesso
  • Faber-Castell Design Memory Craft® - Gel Medium
  • Faber-Castell Design Memory Craft® - Stamper's Big Brush Artist Pens - May Green #170
  • Faber-Castell Design Memory Craft® - Stamper's Big Brush Artist Pens - Scarlet Red #118
  • Faber-Castell Design Memory Craft® - Stamper's Big Brush Artist Pens - Caput Mortuum #169
  • Lindy's Stamp Gang - Glitz Spritz - Blazing Sun
  • Lindy's Stamp Gang - Starburst Spray - Cocklebells Coral
  • Ranger Ink - Glossy Accents
  • Ranger Ink - Archival Ink - Jet Black
  • Liquitex Iridescent Bright Gold Ink 
  • Glitz Roller Stamp - Wavy Chevron
  • German Glass Glitter - Green
  • Plaid - Apple Barrel Paint - Jack-O-Lantern
  • Plaid - Apple Barrel Paint - Kiwi
  • Plaid - Apple Barrel Paint - Bimini Blue
  • Plaid - Apple Barrel Paint - Yellow Flame
  • Plaid - Apple Barrel Paint - Pink Parfait
  • Prima - Resin - Parlor
  • Prima - Mini Roses
  • Prima - Lace
  • Floral Lace Applique
  • Metal Filigree
  • Martha Stewart - Butterfly Punch
  • Sprig of Vine Floral Stem
  • Gold Button
  • Tim Holtz- Idea-o-logy - Philosphy token
  • Tim Holtz - Idea-o-logy - Loop Pin
  • We Are Memory Keepers - Large Eyelet - White
  • We Are Memory Keepers - Crop-a-dile
  • Sizzix - Tim Holtz - Alterations  Bookplate and Tag Die 
  • Gold Button


Read More »

Sunday, August 2, 2015

Ustream Reminder Monday Night August 3, 2015

0

Join me Live Monday, August 3, 2015, at 8:30 p.m. EST  

I am going to show you a simple way to make this elegant background
that you can use for your mixed media projects, or cards. 


As always I will do my best to record for those who can't join us live! 


Read More »

Thursday, July 30, 2015

On Trend - Card Tutorial

4


Hi everyone,  I have a cute card share for you today.  I had a comment on one of my YouTube videos from Anna, AsianTiger513.   She asked me to do a card tutorial, in real time.  YIKES I haven't done that in a really long time!   I quit doing them, because I felt they were too long, and I could cover more ground by speeding up the process.  Some of my projects take hours! 

So for you Ms. Anna - I have  accepted your challenge.  

For my card, I chose to use the My Mind's Eye On Trend 6x6 Collection.  I have seriously been hording this collection for a while.  I used it a little in a Ustream a few months ago, but the paper is so beautiful, I wanted to keep it forever!  AHHHH but I can't.   


These are truly my all time favorite colors,  mint and coral.  I mean seriously so delish, then add the gold foil - my heart literally stopped for second when I saw it! 


Ok - back to the tutorial!     It is no secret that I love to use my scraps when creating cards.  Since the paper collection was fairly new, that meant I must spend some time, looking for items that have been around for a while to help the card come together.   

Deep into the bucket of scraps and one hit wonders I went.  I pulled out  a tube of Prima Flowers - they have been here since early 2009, and a scrap of gold rick-rack.  Look at how simple and beautiful, things came together. 

\


I know everyone who has paper-crafted for a while, has a stash of Alpha bet stickers/chipboard pieces that are still lingering around, and may not match.  The H and I were from two different sets 1 was lavender the other pink.   Never fear -  I made them play nicely together with my card, by heat embossing them with Gold.  Now they are trendy, and match! 


The Inside of my card was simple,  I created a border with the paper from the collection, then added a piece of white card stock in the center for my hand written message.   The final card is an A2  4.25 x 5.5  top folding card. 


I added a little Lindy's Stamp Gang in Cocklebells Coral in the negative areas. This spray is also among my favs as it has this nice peach pigment with a gold shimmer (perfect right!). 

Here is the video tutorial (warning it is long - because I ramble -LOL) 


Thank you Ms. Anna for the challenge,  I really appreciate it.  I love that you left comments, so that I could get to know you better.   It was delightful speaking with you, and I look forward to seeing you around!


Thanks, 
Tonya 


SUPPLIES:

  • My Mind's Eye - On Trend 6x6 Paper by Jen Allyson
  • Lindy's Stamp Gang - Cocklebells Coral
  • My Favorite Things Stamps & Dies - Die-namics Dizzy Doily Duo
  • Prima - tube flowers
  • The Paper Studio - Gem Stones  Gold
  • Chipboard letters
  • Versa Embossing Ink
  • Ranger Ink, Queen's Gold Embossing Powder
  • GP 110lb White Card stock
  • Unibal - Signo - Micro 207 Gel Pen - Black


Read More »
I love seeing things you create using my tutorials or project shares. Please use the following handles/tags in social media to insure that I get to see your creations:

INSTAGRAM: #FollowingTonyaGibbs    |   TWITTER:  @gibbst    #FollowingTonyaGibbs   |      FACEBOOK:Tag  Tonya Gibbs   #FollowingTonyaGibbs

I Design for:

    http://www.yvonneblair.com

Guest Artist: Click icon to see post!

http://www.teresacollinsdesignteam.blogspot.com/2013/10/family-stories-layout-and-video-by.html#comment-form   http://canvascorp.com/2013/03/21/easter-treat-baskets/


Past Teams

http://www.die-namites.com/     marion