Follow Me...

       
Thanks for stopping by! Don't forget to subscribe!
Showing posts with label Chalkboard. Show all posts

Monday, October 3, 2016

Journal Buddy Blog Hop Yvonne Blair Designs

13
 

We are celebrating being picked as the editor’s choice in the Oct-Dec Issue of Stampers Sampler by Stampington. Each one of us Yvonne Blair Art Girls will be giving away a journal buddy on Friday Oct. 7.  Leave a comment on each of our blogs by noon October 7, and we will each select a random winner.
If you leave a comment on each blog you will be put in for a drawing to win a Journal Buddy, Art Journal and Stamper's Sampler Magazine Bundle. The winner will be announced October 7th at 7:00 pm. 
All winners will be notified by email and announced on Yvonne’s blog Oct 7 at 7:00pm.
 
Journal Buddy #YvonneBlairDesigns
Journal Buddy
 
The Journal Buddy is a multi-functional tool that helps you add artful journaling to any paper crafting project.  The Journal Buddy is made out of high quality stencil material that is not only pliable, but see through so you can see where you are adding lines. It features a wavy edge and straight edge with a ruler  two short straight edges on each side to line it up so your journaling stays straight, as well as line guides for you to ink, trace, paint, or spray onto your page. 
You will be amazed at how easy it is to use adding decorative journaling to your art journals, scrapbook layouts, cards, envelopes and more.
 
 
Today I will share with you how easy it was to use the Journal Buddy to create this fabulous chalkboard for my front porch area.   I found the chalkboard on clearance at a craft and hobby store left over from back to school merchandise. With a little elbow grease I sanded down the school themed edges and now it is perfect for my front porch.
 
Next I used standard chalk and the Journal Buddy as a guide to draw out my quote.  In the short 15 minute video below.  I will demonstrate just how simple it was to draw my design. In real time it took about an hour.  After Thanksgiving, I can simply erase the chalkboard and draw a design for Christmas.  The flexibility of the Journal Buddy helps when moving around the board, and the ruler is essential in helping to space out your design.  The wave edge is great for creating banners and writing on a curve.  It was so nice having all these guides in one simple tool.
 
Here is the video.


Here is what my little chalkboard looks like on my porch.
 
If you would like to purchase a  Journal Buddy email yblair1@gmail.com
or send payment of $8.00 + $2.00 Shipping to same email using Paypal. 
Thank you so much....Hope you enjoy! 
 

 Don't forget to leave a comment below before you leave! 
 If you liked what you saw don't forget to subscribe while you are here too!
NOW HOP ON OVER TO THE OTHER BLOGS
to see how my team mates are using the Journal Buddy:


Read More »

Thursday, November 12, 2015

Vintage Christmas Chalkboard

0

 
This is without a doubt my favorite time of year! It is the only Holiday I decorate for and love to create home made items every year. Today I would like to share with you a simple project that is perfect for your Holiday Home Décor.  Today's project is going to feature Blue Fern Studios' Vintage Christmas Collection 
 
 
Magical 12x12 papers
 
Wonderland 12x12 paper
 
I started with a 12x12 chalkboard that I picked up at a local box store.  I crackled it for a different project, and then simply erased the chalk saying to use for this project.  The crackle base is gold with white on top. This offered the perfect frame for my vintage Christmas project.  You can buy a chalkboard ready to use or make one by painting the glass inside a frame with chalkboard paint.  


I fussy cut the images from the two paper collections to use in the corners of my board.  To dress up the flat paper, I added a bit of white Puff Paint to the snow on the tree,  yellow Stickles for the ornaments and Glossy accents over the berries.   Then I clustered flowers, and miniature Christmas tree ornaments around the paper to give it depth and interest.  To help it all sparkle  I spritzed it was Lindy's Stamp Gang Glitz Spritz - Blazing Sun. 
 
 
Aren't these little Candy Miniature ornaments adorable?  And they add the perfect touch to the corners.


I just love how the flowers, ornaments and candies mimic the look of the paper. 
 
Coordinating Chipboard - Santa's Sleigh
 
When I saw this Chipboard piece I just had to have it.  I mean look at all the tiny fine details in the deer and sleigh. 


To add a golden element to the layout, I carefully heat embossed the chipboard with gold embossing powder.  Then made sure the antlers for the deer were safely mounted to the frame of the board so that they would not become damaged.  


Here is a quick video showing how this chalkboard came together.


Here are a few tips for creating your own chalkboard lettering.
 
  • For a new chalkboard - make sure you prime the board by rubbing chalk all over it, then erasing it.  You can use your heat gun to blow away dust residue but don't "wet" the board.
  • Use a pencil sharpener to keep a fine tip on your chalk
  • Practice Practice Practice -  It may help you visualize placement and spacing of the letter shapes if you practice first on a piece of paper.
  • Don't draw your letters too close together.
  • Thicken the lines on the down strokes to make them look better.
  • use a cotton swab to smooth away unwanted lines
 
I hope I have inspired you to create a chalkboard for your Holiday Home Décor.  If so, please make sure you come back and tell me about it, or #FollowingTonyaGibbs in your social media outlets so I can see your project.
 
Thanks for stopping in today,
 
Tonya
 
 
SUPPLIES
 
  • Blue Fern Studios - Vintage Christmas - Wonderland 12x12 paper
  • Blue Fern Studios - Vintage Christmas - Magical 12x12 paper
  • Blue Fern Studios - Coordinating Chipboard - Santa's Sleigh
  • Lindy's Stamp Gang - Glitz Spritz - Blazing Sun
  • 12x12 Chalkboard
  • Chalk
  • Foam Adhesive
  • Ranger Ink - Yellow Stickles
  • Ranger Ink - Glossy Accents
  • Ranger Ink - Embossing Powder Gold
  • Versa Ink
  • Miniature Ornaments - Candies, Toys and Ornaments
  • Faber-Castell Design Memory Craft® Gel Medium
  • Faber-Castell Design Memory Craft® Essential Tools Accessory Kit
  • Miscellaneous Flowers
  • Tullip - White Puff Paint 

Read More »

Monday, April 27, 2015

Hope Is The Anchor Chalkboard Art

1
A few months ago we moved into a new home, and I've been frantically nesting, trying to add a few personal touches here and there.   Today I would like to share with you a chalkboard that I created. I started by painting the glass in a 16x20 frame with Prima's Chalkboard Paint.  I painted 4 coats, allowing the paint to dry between each coat.

The quote that inspired this project is:
"Hope is the anchor, love is the ship, time is an ocean and life is the trip."

 
I found this Chipboard anchor and thought it would be great to alter it for the side of the frame.  I decided to add elements to the anchor that represent the quote on the chalkboard.
 
I started by covering my anchor with Prima's  Jodie Lee Nature Garden Collection Fairy Godmother"  the b-side.  I then began to add color and texture by spritzing the anchor with Prima's  Color Bloom sprays Antique Gold  & Storm Cloud  then I added Utee to the top and heat set.  I love how my anchor now looks like corroded metal. 
 
 
To represent "time" in the quote.  I decided to Use the Prima Finnabair Mechanical Clock with a Prima Wooden clock inside.  
 
The ship on Prima's Seashore stamp is adorable!   I decided to create a 3D ship using this stamp.
 
 
I stamped it on sticky backed canvas, and chipboard several times, then used foam strips to assemble pieces until I had a great 3D effect.   Isn't this ship just the cutest?  It would be adorable on a layout or card as well!  To keep the canvas from fraying I brushed a quick coat of Gel Medium over the top.
 
 
To finish off my anchor I added the Prima Cherry Blossom Vine (removing the flowers), the Capri Merlot Burlap Flowers and the Oahu-Hula flowers.   To fill in around the clusters, I added some shells that I recently found on a trip to the beach.  I love how the flowers mimic the texture found in the shells.
 
 
I added some rope around the frame to give it a little interest.  I used the Finnabair Art Ingredients Mica Flakes Gold Leaf to fill in the negative spaces around the shells and flowers.
 
 Here is my finished chalkboard. 


I hope I have inspired you to create a beautiful chalkboard for your home. 
 
Thanks for stopping in today,
 
Tonya Gibbs
 
 
Supplies:
 
Prima Marketing:  Chalkboard Paint - Black
Prima Marketing:  Color Bloom - Antique Gold
Prima Marketing - Color Bloom - Storm Cloud
Prima Marketing -  Jodie Lee Nature Garden Collection Fairy Godmother"
Prima Marketing - Seaside Stamp
Prima Marketing - Cherry Blossom Vine
Prima Marketing - Oahu, Hula Flowers
Prima Marketing - Capri - Merlot Flowers
Prima Marketing - Finnabair Mechanicals - Vintage Trinkets - Clock
Prima Marketing - Finnabair Art Ingredients Mica Flakes Gold Leaf
Prima Marketing - Wooden Trinkets - Clock
Frame 16x20
Tim Holtz - Compass
Tim Holtz - Spinners
Shells
Netting
Rope


Read More »

Wednesday, November 5, 2014

November Ustream Update

0
Wow we had such a great time on Ustream creating this lovely chalkboard.


There are lots of tutorials out there for using paint pens, embossing powders/stamps and colored pencils to make your boards look neater and professionally printed. However,  I wanted this class to focus on using actual chalk!  I shared tricks for getting the looks you want even if you think you can't draw.  

The two templates that I used in today's class were made by Hot Off The Press - they are older, and may be hard to find.  Check with your local retailers to see if you can get them in your market area.  If you can't no worries,  look at your stencils, dies, and electronic cutters and see if you can create a similar effect with something you have in your stash! 


Thank you to those who were able to make the show live.  If you were unable to attend, you can watch it on YouTube. 


The best advice I can give is PRACTICE!

Thanks for watching,  now get out there and create a beautiful Chalkboard for the Holidays.   I can't wait to see what you make.

Save the Date:  Our next Ustream will be December 1, 2014 at 8:30 p.m. EST. 

Tonya


I love seeing things you create using my tutorials or project share. Please use the following handles in social media to insure that I get to see your creations:
INSTAGRAM: #FollowingTonyaGibbs | TWITTER: @gibbst #FollowingTonyaGibbs | FACEBOOK: Tag Tonya Gibbs #FollowingTonyaGibbs
Read More »

Sunday, November 2, 2014

Ustream Monday Nov. 3

0


I hope you can join me Monday night, November 3, 2014 on Ustream at 8:30 p.m. EST.   I will be sharing with you lots of  techniques for creating Chalkboard Art.  This chalkboard will be perfect for Holiday Home Décor or make a great Holiday gift!   

Ustream Channel:    http://www.ustream.tv/channel/gibbst

As always, I will do my best to record the show.

I hope you can make!

Tonya


I love seeing things you create using my tutorials or project share. Please use the following handles in social media to insure that I get to see your creations:
INSTAGRAM: #FollowingTonyaGibbs | TWITTER: @gibbst #FollowingTonyaGibbs | FACEBOOK: Tag Tonya Gibbs #FollowingTonyaGibbs
Read More »

Wednesday, August 6, 2014

Full Bloom Chalkboard for Faber Castell Design Memory Craft

0


Hi everyone,  I'm super excited to bring  you today's project. I've created this Chalkboard Art that would make an awesome gift for someone.   This project is one of those that started out being one thing and ended up being something totally different.  I started out wanting to make watercolor card gift sets to share with friends. But when I finished the Art Panel it was just too beautiful to turn into a card. It needed to be displayed on a wall!

I have created a process video that is included in the post on the Faber-Castell Design Memory Craft Website.

Continue reading "Full Bloom Chalkboard by Tonya Gibbs" »


Thank you so much for stopping in today.

Tonya


I love seeing things you create using my tutorials or project share. Please use the following handles in social media to insure that I get to see your creations:
INSTAGRAM: #FollowingTonyaGibbs | TWITTER: @gibbst #FollowingTonyaGibbs | FACEBOOK: Tag Tonya Gibbs #FollowingTonyaGibbs
Read More »

Sunday, June 29, 2014

Terrific Kid Layout for Faber-Castell Design Memory Craft®

0
Today is my day over on the Faber-Castell Design Memory Craft® blog.   I have created a mixed media layout and a process video with lots of details.  I hope you have time to stop by and get the details.


 Here is the link o the post.  There is a process video there showing step by step how I created this layout.

Thanks for stopping in today.

Tonya 
Read More »

Friday, March 14, 2014

Hello Card Tutorial by Tonya Gibbs

2
 
Happy Friday my crafty peeps,  I hope you have an exciting weekend planned. Last summer the Teresa Collins Memorabilia line was one of the hottest selling Artsy Addicts kits. I still had a few pieces left over, and wanted to finish off the kit.


  First I came up with a design, and decided to share my sketch with you guys...
 
 
My challenge was to have 95% of the card come from the kit and the other 5% from the scrap pile.  NOTHING NEW WAS USED TO MAKE THIS CARD.


Here is a process video of me making the card..


This design is super clean and simple, and will easily transfer to some other collections that I own.  
 
DESTASH TIP:  If  you have a lot of left overs from kits, make a stack of cards using the same sketch design. Then wrap them up and give to a friend as a gift.   I usually place a pop square on the back of a stack of sentiments. This way my friend can choose the appropriate sentiment when she is ready to mail the card.  I recommend keeping the designs flat (no bulky flowers) since the friend will most likely mail the cards.  My friends love gift sets like this, and it is a great way to de-stash a kit!   Another option is to give them to your church to mail for outreach!
 
Thanks for stopping in today,
 
Tonya
 
Resources:
  • Ranger Ink - Embossing Powder - Super Fine Detail - Clear
  • Tim Holtz Distress Ink Pads - Embossing Ink Clear
  • Teresa Collins - Memorabilia Collection - 12 x 12 Double Sided Paper - Quatrefoil
  • Teresa Collins - Memorabilia Collection - 6 x 6 Paper Pad
  • Teresa Collins - Memorabilia Collection - 12 x 12 Die Cut Paper
  • Teresa Collins - Memorabilia Collection - Enamel Dots
  • Sizzix - Tim Holtz - Alterations Collection - Movers and Shapers Die - Vintage Telephone and Typewriter Set
  • Baker's Twine
  • Cardstock
Read More »

Saturday, November 30, 2013

Mad Tea Party Chalkboard by Tonya Gibbs

0
Hi everyone, I hope you are having a fantastic weekend.   Today I would like to share with you a Mirror that I altered with Marion's super fab Mad Tea Party Line. 


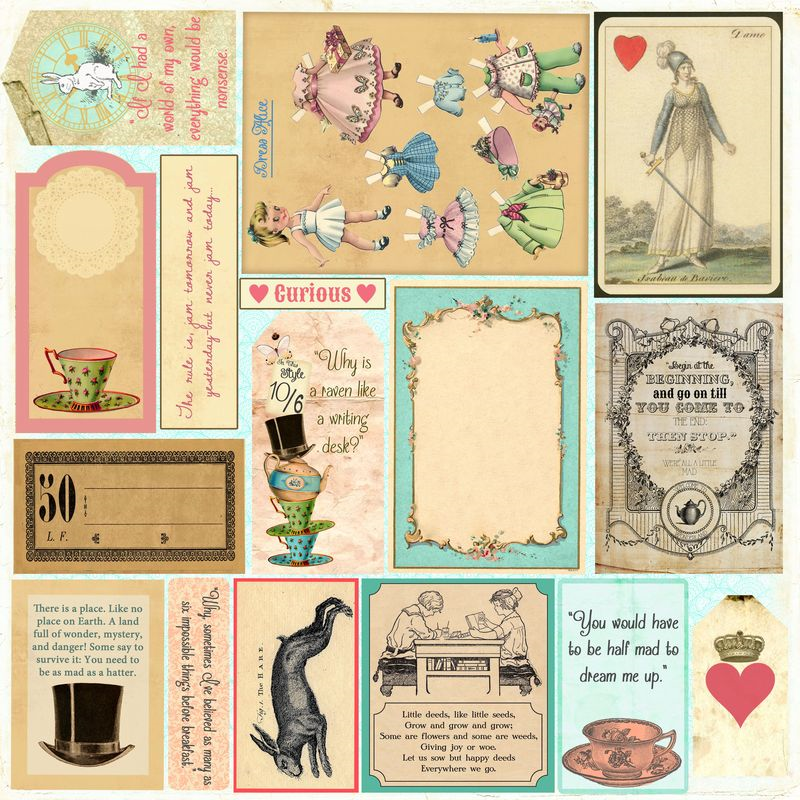
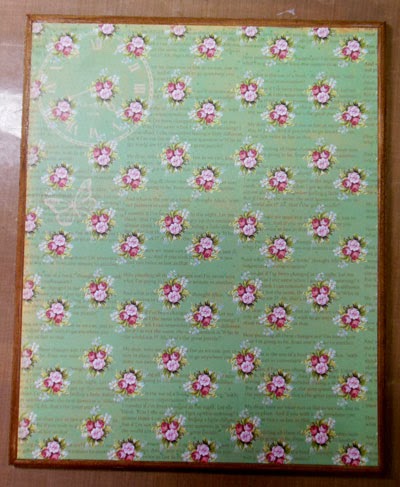
I used these patterns from the paper collection


I bought an unfinished wooden mirror and frame from a craft supply story.   I removed the mirror and stained the sides and back with Tattered Angels' Cork Glimmer Mist.  This frame is 11.25 x 9.25 inches with a 5x7 opening.


After the Glimmer Mist has dried, I covered the entire frame with Claudine Hellmuth Studio Matte Medium.  I applied several coats to the top surface to insure my paper overlay would adhered to the wood.  The Matte Medium seals the wood and the Tattered Angels spray.


I then added my paper to the top of the frame.  To insure that I didn't get the hole cut incorrectly, I decided to affix the entire paper to the frame.  I used a brayer to make sure all the air bubbles were removed from the paper. I allowed the paper to completely dry. 
 
 
Then I flipped the frame over and trimmed out the hole with an x-acto knife.   I then applied another coat of Matte Medium over the paper.  Set this aside and allow it to dry.


Then I painted several coats of this Glass Chalkboard Paint by DecoArt on the Mirror. Make sure you don't leave streak marks in the paint, and allow it to dry completely between each coat. If you plan to paint a surface that is going to be used in a dishwasher, make sure you follow the directions on the bottle and bake the item to cure the paint. Since I'm not washing this project, I let it completely dry for 24 hours before I wrote on the chalkboard.  


Once the board was completely dry, I added it back to the frame.  I rubbed chalk over the board and cleaned it off with a dry paper towel.  This seasons the board so that the chalk runs smoothly over the surface.  Then I decorated the left and bottom to make the frame more interesting.  


I made the flower that is used for the focal piece.
 
Here is a Youtube video showing you how I made these flowers.


This frame will make a nice Christmas gift for one of my friends.  I love how simple it was to create. It could be hung on the wall, or propped on an end table with a decorative easel. 
 
Thanks for stopping in today,
 
Tonya Gibbs

Read More »

Friday, October 11, 2013

Football Layout by Tonya Gibbs

0
From the first of August until sometime mid December my feet are planted in the grass of one football field after antoher 3 - 4 times a week.  I walk the field taking photos of children between the ages of 6 - 18, and I LOVE IT! This year my Nephew, Cooper, played his first down of tackle football the age of six, and you bet, Aunt Tonya was right there walking the field. 

Photos of my Nephew, Cooper, during his first football game.  Photos by Tonya A. Gibbs.

Today,  I want to give you five prompts for creating a layout. Hopefully these prompts will give you a place to start next time Mojo goes on vacation.  For today's layout, I'm going to use the photos from the above mentioned photo shoot.

Prompt 1 - Select papers that do not fit the theme or color pallet of your photos. 

My photos are clearly football themed, and predominately red, white, and blue. Themed papers are obvious selections, and I'm looking for unexpected. I don't need a football sticker to know this is a football layout. Also, if I chose the colors in the photo then my photos would compete with my background. Since I want the photos to pop, I've selected a neutral color palett of black, taupe, and gold. These colors are neutral which means they go with ANYTHING ANYWHERE!


Teresa Collins Memorabilia Line released summer 2013


Teresa Collins' Memorabilia line was perfect. The colors are neutral and the theme is centered around a family story, rather than a specific event.  The black chalkboard papers give great contrast against my bright sunny day photos.  If your photos are dark - you may want to consider lighter colors for your background.

Prompt 2  - Place Embellishment clusters directly on your photos. 


This technique will help to anchor the photo to the page, and also give it depth and interest.   This is  a great technique for photos that have a lot of negative space or distracting elements in the background.  

Prompt 3 -  Layer Sequins 


Sequins have become a super trendy embellishment.  I'm noticing that some are metallic and some are flat, they come in different shapes, sizes, and colors.  The sequins in this collection are rather large, and I simply added a wood veneer star from Studio Calico to the centers. Love how these made a cute embellishment, without taking away from my photos.
Technique Tip: Hot glue will melt most sequins.  This is how I placed mine...I placed the glue on the layout in a dot formation. Let it cool for a second until it is more than 50% solid, then add gently place the sequin ontop of the glue without pressing it too hard.  This makes the hot glue more like a pop dot and elevates the sequin off the page. 
Prompt 4 - Use Clear Glitter Nail Polish 


My wood veneers needed a little pop, but I wanted them to stay neutral.  So I reached for clear  gold glitter nail polish and painted them.  When selecting my nail polish - I go for the cheapest with the chunky glitter pieces.  This will give you a nice bokeh look when applied.  You may need several coats to achieve the look you're after, but I love the effect! 

Prompt 5 - Use Ribbon in an unusual way


The ribbon on my page is the only thing that has color found in the photos.  I did this so that your eye finds a base, or weight to the bottom of the photos.  I love how it is just waving across the layout.  You expect to see ribbon as banners, or tied neatly across an element, but squishing it up gives it a fresh look and provides movement and depth. 


and ...drum roll please ...  this brings me to my completed layout.


Masculine Sports layout by Tonya A. Gibbs using Teresa Collins Memorabilia line.  #12x12 #Scrapbooking #TonyaGibbs #Psychomoms #Layout


I know masculine layouts can be challenging.  So, I hope you have been inspired next time Mojo goes away on vacation. 


Thanks for stopping in today,

Tonya A. Gibbs
http://www.psychomomscrapbooks.blogspot.com


Resources:
Teresa Collins - Memorabilia Collection - 6x6 Paper Pad
Teresa Collins - Memorabilia Collection - 12x12 Double Sided Paper - Chalkboard
Teresa Collins - Memorabilia Collection - 12x12 Die Cut Paper
Teresa Collins - Memorabilia Collection - 12x12 Cardstock Stickers
Teresa Collins - Memorabilia Collection - Border Strips with Glitter Accents
Teresa Collins - Memorabilia Collection - Chipboard Buttons
Teresa Collins - Memorabilia Collection - Decorative Brads
Teresa Collins - Memorabilia Collection - Envelopes
Teresa Collins - Memorabilia Collection - Sequins
Studio Calico - Classic Calico Vol. 2 - Wood Veneer Shapes - Tiny Stars
Studio Calico - Yearbook Collection - Wood Veneer Pieces - Speech Bubbles


Read More »

Friday, September 27, 2013

Take Flight Layout - Happy Birthday Brittany!

1
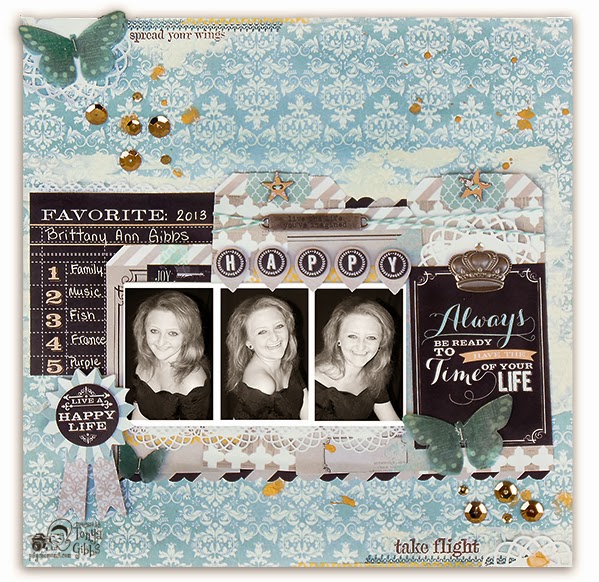
Today is my daughter, Brittany's 20th Birthday.   I'm so proud of her.  She has blossomed into such a beautiful, caring, and happy young woman.   When she enters the room you never know what to expect. She could speak to you in French, or just start singing - you just never know.  I wanted to showcase her fun spirit on a layout this year for her birthday. Teresa Collins' Memorabilia line is so elegant that I thought it would make the perfect backdrop for my formal black and white photos.  During this photo session she was twirling around and singing to me.  It was such a fun day!


The note cards in this line are pefect!  This one says "Always be Ready To Have the Time of Your Life."  This just seemed to be the perfect advice to give a 20 year old.  The only thing missing is "and take lots of photos!"     I wanted to add a little glitz to the layout - so I used the gold sequins from the collection, along with splatters of gold ink from Liquitex.


Here is a process video of me putting the layout together...

I used the Stamps from Teresa's Sweet Afternoon collection as additional accents. I loved the saying on the stamp set. Spread Your Wings, Take Flight. I felt that it really conveys the thoughts a mother has for her 20 year old, and the butterfly gave the perfect touch. I stamped it on vellum and layered two on top of each other, so that they have depth.
 
Thanks for stopping in today,
 
Tonya Gibbs
 
Resources for this layout:
  • Teresa Collins - Memorabilia Collection - 12 x 12 Double Sided Paper - Quotes
  • Teresa Collins - Memorabilia Collection - 12 x 12 Double Sided Paper - Frames
  • Teresa Collins - Memorabilia Collection - 6 x 6 Paper
  • Teresa Collins - Memorabilia Collection - Layered Stickers
  • Teresa Collins - Memorabilia Collection - Sequins
  • Teresa Collins - Sweet Afternoon Collection - Stamps
  • Liquitex - Iridescent Bright Gold Ink
  • Color Box - SurfaceZ Ink - Caribbean
  • Color Box - SurfaceZ Ink - Chocolate
  • EK Success Labels Punch
  • We R Memory Keepers Angel Punch
  • We R Memory Keepers Crop-a-dile
  • Twinery - Aqua Twine
  • Idea-ology - Tim Holtz - Word Plate
  • Idea-ology - Tim Holtz - Crown
  • Idea-ology - Tim Holtz - Tiny Attacher
  • Velum
  • My Favorite Things Stamps - Die-namics First Place Award Ribbon
  • Lace
Read More »

Friday, September 20, 2013

First Birthday Layout - Tonya Gibbs

0
I'm loving the chalk board trend in scrapbooking papers these days.  But I think my favorite one from summer CHA was the Teresa Collins Designs Memorabilia line.  I had to have it all the second that I saw it!  I love that the secondary colors are yellows, and aquas, the embellies are filled with awesome typography, and I'm totally in love with all those flags! 

Today I wanted to share with you a layout that created of my nephew Gage's first birthday party with this collection.


Layout by Tonya A. Gibbs  using Teresa Collins Designs Memorabilia Collection.  #Layout #Scrapbooking #TeresaCollins #Memorabilia #Birthday #TonyaGibbs #Psychomomscrapbooks
 
 
Here is a process video showing how I made the layout.


Thanks for stopping in today,
 
Tonya A. Gibbs
 
Resources for this layout:
  • Teresa Collins - Memorabilia Collection - 12 x 12 Double Sided Paper - Snippets
  • Teresa Collins - Memorabilia Collection - 12 x 12 Double Sided Paper - Recorded
  • Teresa Collins - Memorabilia Collection - 6 x 6 Paper Pad
  • Teresa Collins - Memorabilia Collection - 12 x 12 Die Cut Paper
  • Teresa Collins - Memorabilia Collection - Envelopes
  • Teresa Collins - Memorabilia Collection - Layered Stickers
  • Teresa Collins - Memorabilia Collection - Sequins
  • Prima - Ingvild Bolme - Chalk Fluid Edger - Pastel Blue
  • Sizzix - Tim Holtz - Sizzlits Decorative Strip Die - Alterations Collection - Die Cutting Template - Filmstrip Frames
  • Gold Glitter
  • Studio Calico - Wood Veneers - Heart & Arrows
  • Jenni Bowlin Studio - Fiskars - Squeeze Punch - Large - Blue Ribbon
  • My Favorite Things Stamps - Die-namics First Place Award Ribbon

This post was original published on WeAreArtsyAddicts.blogspot.com
Read More »
I love seeing things you create using my tutorials or project shares. Please use the following handles/tags in social media to insure that I get to see your creations:

INSTAGRAM: #FollowingTonyaGibbs    |   TWITTER:  @gibbst    #FollowingTonyaGibbs   |      FACEBOOK:Tag  Tonya Gibbs   #FollowingTonyaGibbs

I Design for:

    http://www.yvonneblair.com

Guest Artist: Click icon to see post!

http://www.teresacollinsdesignteam.blogspot.com/2013/10/family-stories-layout-and-video-by.html#comment-form   http://canvascorp.com/2013/03/21/easter-treat-baskets/


Past Teams

http://www.die-namites.com/     marion