Follow Me...

       
Thanks for stopping by! Don't forget to subscribe!

Monday, October 10, 2016

Blessing Watercolor Cards for Yvonne Blair

0
Watercolor Card Tutorial by Tonya Gibbs for Yvonne Blair Designs

After a weekend of torment created by Hurricane Matthew up and down the south eastern coast line,  I thought I would spend some time reflecting on how grateful I am for the many blessings I have in my life.  During my extra time off, I spent a little time in studio while the storm raged outside with my watercolors and a few of Yvonne's stamps.  Today I would like to share with you a few cards I created during this time of reflection.

I reached for these two stamps sets that Yvonne Designs for Impression Obsession Stamps to create these cards:

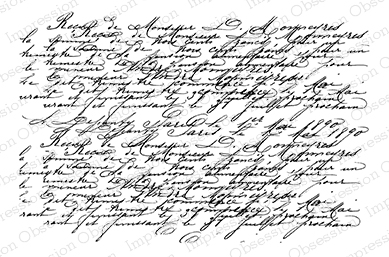
French Script


http://www.iostamps.com/mm5/merchant.mvc?Screen=PROD&Product_Code=3172-XL&Store_Code=IOSTAMPS&search=3172-xl&searchoffset=&filter_cat=&PowerSearch_Begin_Only=&sort=&range_low=&range_high=

I'm going to create two cards in today's share the first is using the "Count Your Blessings" from the Words of Art stamp set.  This set has so many amazing sayings in it. Perfect for card makers!


Tonya Gibbs Watercolor Blessing Card for Yvonne Blair Designs

In the video below, I share with you a technique for creating watercolor flowers using kitchen plastic wrap!  You allow the paint to dry on the paper and then follow the text that is left behind with watercolor pencils to give more details to your flowers.  It is so simple and perfect if you don't know how to draw flower shapes. You literally let the plastic wrap and wet paint do the work for you!


Tonya Gibbs Watercolor Grateful Heart  for Yvonne Blair Designs

I struggled a bit more with this flower shape as the colors seemed to blend more in and I really wasn't feeling it when I added the colored pencils.  In hindsight  I probably should have left it alone when I removed the plastic wrap. I really liked the abstract of the dried paint.  But oh well, this is creative play, and sometimes you just have to follow the journey that the art takes you.  To fix my painted mess I reached for Yvonne's French Script stamp and the Heidi Swap Navy Blue ink (which is my new favorite over black!), and started stamping.   After assembling the card I realized the only thing missing was flower centers on both cards and my flowers came to life!

The paper stacks that I used were found in Target's dollar bin, and I fell in love with the copper foiling.  I decided to duplicate this with copper embossing for Yvonne's Stamps.

Here is the video showing my process.


I'm so grateful that my family survived this terrible storm. I know so many that sustained damage to their homes, and several communities are still without power.  Some have lost their lives and I pray for their families to find peace.  My heart is saddened for the country of Haiti and for the Residents along the coast of Florida, Georgia, North Carolina, South Carolina, and Virginia many of these communities will never be the same.   If you are inclined, and have the capacity to do so, I encourage you to give to the American Red Cross.  I know there is a need for relief both at home and in Haiti where so much life has been lost. 


Supplies Used in these two Cards: 

  • Impression Obsession - Yvonne Blair Designs - Words for Art Stamp
  • Impression Obsession - Yvonne Blair Designs - French Script Stamp
  • Canson Watercolor Paper 140lb 
  • Artist Loft - Watercolor
  • Royal Langnickel - Brush Value pack   #3 Round, #10 Flat
  • Wheat Jute Twine
  • My Mind's Eye On Trend Cardstock 6x6 
  • Halloween Cardstock 6x6 Target Dollar Bin 375772
  • Fall Cardstock 6x6 Target Dollar Bin Kraft Copper Foil 375773 
  • Faber-Castell Design Memory Craft - Stamper's Big Brush Artist Pen Cadmium Yellow 107
  • Faber-Castell Design Memory Craft - Stamper's Big Brush Artist Pen Scarlet Red 118
  • Faber-Castell Design Memory Craft - Stamper's Big Brush artist Pen Caput Mortuum #169
  • Zing Copper Embossing Poweder
  • EK Success Powder Embossing Buddy
  • Versa Ink Pad
  • Marvy Embossing Heat Gun
  • Heidi Swapp Navy Ink 
  • Ranger Multi Medium
  • Scotch Double Sided Foam Tape
  • Scotch ATG Adhesive
  • Kraft Cardstock 


Read More »

Friday, October 7, 2016

Congrats to our Winners!

0


YAY - we have a winner of the blog hop!

On my blog - Congrats to CHAR!  

She will win a Journal Buddy!  

Go Check out the post over on Yvonne's blog

to see who else won on my team mate's blog and see
if you are the winner of the grand prize over on Yvonne's Blog! 

Thank you again to everyone who played along, and 
for the sweet comments!
  I wish I could send everyone a prize!


Read More »

Monday, October 3, 2016

Journal Buddy Blog Hop Yvonne Blair Designs

13
 

We are celebrating being picked as the editor’s choice in the Oct-Dec Issue of Stampers Sampler by Stampington. Each one of us Yvonne Blair Art Girls will be giving away a journal buddy on Friday Oct. 7.  Leave a comment on each of our blogs by noon October 7, and we will each select a random winner.
If you leave a comment on each blog you will be put in for a drawing to win a Journal Buddy, Art Journal and Stamper's Sampler Magazine Bundle. The winner will be announced October 7th at 7:00 pm. 
All winners will be notified by email and announced on Yvonne’s blog Oct 7 at 7:00pm.
 
Journal Buddy #YvonneBlairDesigns
Journal Buddy
 
The Journal Buddy is a multi-functional tool that helps you add artful journaling to any paper crafting project.  The Journal Buddy is made out of high quality stencil material that is not only pliable, but see through so you can see where you are adding lines. It features a wavy edge and straight edge with a ruler  two short straight edges on each side to line it up so your journaling stays straight, as well as line guides for you to ink, trace, paint, or spray onto your page. 
You will be amazed at how easy it is to use adding decorative journaling to your art journals, scrapbook layouts, cards, envelopes and more.
 
 
Today I will share with you how easy it was to use the Journal Buddy to create this fabulous chalkboard for my front porch area.   I found the chalkboard on clearance at a craft and hobby store left over from back to school merchandise. With a little elbow grease I sanded down the school themed edges and now it is perfect for my front porch.
 
Next I used standard chalk and the Journal Buddy as a guide to draw out my quote.  In the short 15 minute video below.  I will demonstrate just how simple it was to draw my design. In real time it took about an hour.  After Thanksgiving, I can simply erase the chalkboard and draw a design for Christmas.  The flexibility of the Journal Buddy helps when moving around the board, and the ruler is essential in helping to space out your design.  The wave edge is great for creating banners and writing on a curve.  It was so nice having all these guides in one simple tool.
 
Here is the video.


Here is what my little chalkboard looks like on my porch.
 
If you would like to purchase a  Journal Buddy email yblair1@gmail.com
or send payment of $8.00 + $2.00 Shipping to same email using Paypal. 
Thank you so much....Hope you enjoy! 
 

 Don't forget to leave a comment below before you leave! 
 If you liked what you saw don't forget to subscribe while you are here too!
NOW HOP ON OVER TO THE OTHER BLOGS
to see how my team mates are using the Journal Buddy:


Read More »
I love seeing things you create using my tutorials or project shares. Please use the following handles/tags in social media to insure that I get to see your creations:

INSTAGRAM: #FollowingTonyaGibbs    |   TWITTER:  @gibbst    #FollowingTonyaGibbs   |      FACEBOOK:Tag  Tonya Gibbs   #FollowingTonyaGibbs

I Design for:

    http://www.yvonneblair.com

Guest Artist: Click icon to see post!

http://www.teresacollinsdesignteam.blogspot.com/2013/10/family-stories-layout-and-video-by.html#comment-form   http://canvascorp.com/2013/03/21/easter-treat-baskets/


Past Teams

http://www.die-namites.com/     marion