Follow Me...

       
Thanks for stopping by! Don't forget to subscribe!

Wednesday, August 21, 2013

Announcing Marion Smith's 2013 Creative Team

5


I'm super excited and honored to announce that I was selected for Marion Smith's first design team. I will be working with some amazing talent, and feel so fortunate to collaborate with them. Please check out the new blog at http://www.marionsmithdesigns.blogspot.com.   The team will be posting projects there daily. You are sure to be inspired by these awesome women. Don't forget to  Subscribe to everyone's blog!  
 
If you are new to my site then please don't forget to subscribe, and thank you for visiting today!
 
Incase you have not heard, Marion Smith is now an independent brand and manufacturer! Please subscribe to the new blog where you will find announcements and mainly where the team will post awesome projects, videos, How to's, and the best part, GIVEAWAYS! Oh yes, and since this is her official release of her new creative team - there is a give away going on now at MarionSmithDesigns.blogspot.com.   Don't forget to subscribe here as well!

Grab the Marion Smith Designs Button for your blog!
Grab button for Marion Smith Designs
<div class="Marion-Smith-Designs button" style="width: 150px; margin: 0 auto;"><a href="http://www.marionsmithdesigns.blogspot.com" rel="nofollow"><img src="http://i2.photobucket.com/albums/y48/0533/Untitled-1.png" alt="Marion Smith Designs" width="190" height="190" /></a></div>


Angee Carter

Design Team Coordinator


Many many years ago I saw a creative woman on Youtube making videos of the most incredible crafts. Altered canvases, and mini albums. I admired her for a long, long time for her creativity and inventiveness. She was able to take something so insignificant and turn it into something so beautiful. 


Today that woman, Marion Smith, calls me her friend and I am beyond honored that she has chosen me to be apart of her design team. It's even the more special because it's my very first design team position. 


In my professional life I am an educator of 7th and 8th grade students. I am so fortunate to be able to do that job and I love it every day. Personally I am the wife to Cordell and we've been married for 2 years and we are having a blast being married. He's my biggest supporter and willingly looks the other way when I purchase scrapbooking supplies. He's very supportive that way. I have one angel baby watching over my family and one fur baby who is spoiled rotten. 


My artistic style has been refined in recent years. As I learn more and more about art, and design my style changes to adapt to what feels and looks "right" to me. I'm a big fan of learning techniques and adapting those to fit my style of crafting. I'd describe my style as evolving. I'm inspired by photography and unique color combinations. I also tend to use complementary colors and love texture. 


I'm social networking obsessed am always connected via my i-devices. I'd love to connect with you! Send me a message. Tag me @alwaysangella!! I'm so proud to be included in this fabulous groups of talented international group of designers and I can't wait to be inspired.


Tonya Gibbs


I've been  a follower of Marion's for years and have learned so much from her. I feel so honored being selected as a member of her first design team. 

I'm happily married to my high school sweetheart Kenny Gibbs for 24 years. We have two children Brittany (19), and Brighton (17). I am a versatile artist and love experimenting with new techniques and different styles. Because of this I would consider my personal style to be eclectic. I can do it all - from Shabby Chic to Grunge, from digital to paper crafting, from mixed media to altered art. I enjoy the challenge of experimenting outside my comfort zone. I let the art speak to me and dictate the style - rather than me forcing the style.  I like that each style fills my need for creativity, but require different mindsets. 

I'm known in the crafty community as Psychomom. I know that is a bit unorthodox, but once you know me - you will totally get it! The name came from my son's baseball coach when he was 7 and it just stuck. I also enjoy photography and own a small Youth Sports Photography business. The name started from that business. I am also the lead educator for FlamingoScraps.com, design for TeddyBoo.com, both online retailers, and a blogger for WeAreArtsyAddicts.blogspot.com. I love hanging out on Facebook  Instagram, Pinterest, and Youtube. I also teach monthly Ustream classes on the first Monday of each month. I look forward to an exciting year with these talented artists.
 

Peggy Lee Baker


My name is Peggy Lee Baker, I live in the White Mountians of New Hampshire with my two beautiful daughters, and my wonderful hubby of 21 years. I enjoy sharing my love for scrapbooking, stamping, sewing-taking something olde with something new and creating one of a kind art. 
I love rustic, vintage, shabby chic, grunge!I create everyday even if it's just trying out new ideas, techniques and create play! I also love to teach/share with others that they too can be creative-I do classes in my home, I love it when they have created something so beautiful and they say I made that....my soul is full of creative scraps of art waiting to be freed...
I am a blog author for Artsy Addicts, Design Team member for Die~Namites Dies. You can follow me on my blog "Creative Scraps by Peggy Lee" over on blogger.I've been a follower of Marion's for a few years now back when I stumbled upon a youtube video of hers...and that's all it took I was hooked-loved her style and willingness to share her passion! 
I am thrilled to take this creative journey with her, and love Marion's new fabulous paper collections and I'm excited to see where it goes.


Aneta Magdalena Matuszewska 


I am 36 years old Polish crafter and I have been living in Iceland for 12 years. I work as an Icelandic teacher. My scrapbooking fascination started about 3.5 years ago but I have been deeply preoccupied with that for the last two years.

I love light pastels, vintage and shabby chic, nevertheless I feel comfortable in any pattern. In my case everything is dependent on the kind of paper I can see on my desk, the topic of a card and finally my mood. I am a responsible and conscientious person, open to new challenges and opportunities. Marion, thank you for this one. 

Maggie Armstrong


My name is Maggie Armstrong and I live by the seaside in New Zealand with my husband and 2 children (and 1 rescue cat!). I was introduced to scrapbooking and cardmaking by a close friend in 2004, and quickly fell in love with it! I had always thought that I didn't have an artistic bone in my body, but scrapbooking and it's complimentary crafts (e.g. altered art, OTP, cardmaking and mixed media) opened up a whole new world and definition of art to me. I grabbed this 'world' with both hands and it's been such an amazing journey over the last 9 years, developing and mastering techniques, keeping a blog, teaching around New Zealand and SENZ (Scrapbook Expo of New Zealand) that I really feel I have found my passion. 
 
I find it difficult to pigeon-hole my style as I like to experiment with most techniques, but if I had to narrow my style down I would have to describe it as Shabby Chic meets Mixed Media Grunge! You'll see that I like to use lots of different mediums in my work, and I'm always on the lookout for something a little 'different' to incorporate into my classes. I love to create 'paperscape' style layouts where I create a scene with papers and embellishments. 

I am so thrilled to be working with Marion and her incredibly Creative Team and I know we are all looking forward to inspiring you all!


Nadia Cannizzo


My name is Nadia Cannizzo, and I was born and raised in Greece before settling in Sydney, Australia in 1989. I just turned 35, and married my husband almost 15 years ago. Together we live in the suburbs of Sydney raising our 3 daughters (6, 4 & 3 months) while trying to stay sane! I am a Primary School teacher and absolutely love my work, but its on hold right now while I raise my children. 

I create something almost every day, and I am like a child on Christmas morning when a parcel of goodies arrives at my doorstep. I create depending on how I feel that day and my personality and mood are reflected on my work. I am a neat freak, impulsive, extremely loyal, obsessed with my children, super sensitive, a lover of movies and cooking, a wannabe world traveler (I have a bucket list yes!), a people lover, and extremely passionate about little children and their well being. 

My motto in life is "nothing is impossible" and I never take no for an answer.


Sarah Bargo


Hey paper peeps! Can I just say how excited and honored I am to be a part of Marions new team?! She is so amazingly talented and I love her dearly! I have been artsy fartsy my whole life, but I have been papercrafting since my first son was born 14 years ago. (sheesh!) 
I live in the Chicagoland area and have 2 amazing boys who are my biggest inspiration! I think scrapbooking is so important because I never want my loved ones to wonder how much I love and cherish them. Thank you so much for having me Marion, and here's to embarking on this new creative journey!! Woohoo!!

http://www.sarah-bargo.blogspot.com


Ana Paula Leal


My name is Ana Paula Leal and I was born in 1970 and live in Santa Catarina, a state in South of Brazil. I’m an architect, but recently I decided to dedicate my time to scrapbooking, teaching and giving workshops all over Brazil. 

I currently write for magazines, take part in forums, Design Teams, and I also help develop materials for this area. It means that nowadays my profession, Architecture, is in second place.

Marion, thank you very much for such a great opportunity. It’s good to know that in this globalized work we can communicate through a universal language: Art.

Kim Price


Hello! My name is Kim Price and I live on the Central Coast of New South Wales, Australia with my husband of 20 years and our two grown up teenage daughters. 
I have a strong passion for papercrafting having enjoyed this pursuit for over 10 years now but I have always had a keen interest in the arts and anything creative. I love to incorporate mediums into my scrapbooking and find that this satisfies both my natural flair for the arts as well as a way to document some of my most treasured memories. 
I create something every day, even if it is a scribble in a journal or an idea for a project I have on my mind. I love color, I love design, I love new ideas and I love to experiment. And I love Marion's amazing new collections.


Colette Nederhoff


I am Colette Nederhoff from the Sunny Southwest! I grew up in the Midwest (Iowa) but moved to Albuquerque, New Mexico 26 years ago. I am married to my kindergarten sweetheart and we celebrated 30 years of marriage this July. I have 2 biological kids ages 22 and 19 and my third child is our adopted daughter from Korea. She is now 14 and is probably the most cooperative photo model! My 22 year old just got married two weeks ago and I was a happy Mother of the Bride the last 6 months helping with wedding planning! Fun!
I have been a crafter all my life and love all types of mediums! I love to sew, paint, stamp, photograph, and just about anything else you can think of. I have worked as a hairdresser, floral and balloon designer, and a retail window display designer. I am obsessed with all things "Scrapbooking." As many of you, I have and continue to be a huge fan of Marion's designs. 


Read More »

Sunday, August 18, 2013

Birthday Card from Scraps

0
You guys know how I feel about using up those scraps.  Well today is card making day. I'm between projects and need to clear my head & my desk (lol).  A few nights this week, I pulled out my punches and ides and began stamping and die cutting prepping for a card making weekend. 


Birthday Card created by Tonya A. Gibbs using #MyMindsEye #FindYourWingsAndFly #RhonnaFarrer  #psychomomscrapbooks #TonyaGibbs #card


On this card - I decided to create it in real time so you guys could get a feel for how my mind works during the process.   Grab some pop corn or a cup of coffee (lol). 


Supplies used for this card include:

My Mind's Eye - Find Your Wings & Fly 6x6 paper pad, FYWF Stamp Set
My Favorite Things Stamps - Dynamic Dies Doilie Die
Small Shipping Tag
Seam binding
Tattered Angels Antique Brass Glimmer Mist
Martha Stewart - Doilie punch
Georgia Pacific - 110lb White card stock
Fab Scraps - Flat back pearl
Thanks for stopping in today, Tonya
Read More »

Friday, August 16, 2013

Digital Printing 101 - Lesson 2

0
Last week I gave you a glimpse into printing your digi files.  If you missed the post - make sure you go back and read up before we move to this week's lesson. 

Did you know that you could type on your digital files in Acrobat?

Most of the printables that I download come in the Acrobat format. While you can add text with other graphics programs, I wanted to show you how to do this technique inside Adobe Acrobat.

This card is a great example of a hybrid project. The papers used to create the card are from Marion Smith's Mad Tea Party Collection.  She gave the prototype papers at CHA. Check with your local retailers for availability - the collection is shipping in September.

#Hybrid Birthday card created by Tonya A. Gibbs using #MarionSmithDesigns #MadTeaParty collection and the #Scarlet #Printable #Digi #Digital #Card #Psychomoms

The journal card that has the card sentiment on it, is from Marion's digital collection Scarlet.  The downloads are distributed in Acrobat.  I used the Papyrus font to add the sentiment in Acrobat - then I printed it to add to my card. 

Here is how it is done....

Here is a quick video showing you how to use Adobe Acrobat Reader & Adobe Acrobat Pro to type out your journaling on your  digital files.  


You may need to adjust your computer's volume the software captures my voice "soft".

 
NOTE:   Some conditions set by the author of the document could  prevent you from being able to do this in Reader since Reader was created  for "viewing purposes".

Download the Adobe Reader for free here!


Thank for stopping in today,

Tonya A. Gibbs
http://www.psychomomscrapbooks.blogspot.com
This post was original posted on the Artsy Addicts Blog


Read More »

Thursday, August 15, 2013

Masculine Layouts with Scarlet by Marion Smith Designs

0
This story was originally posted on the Marion Smith Designs blog -  please go over and sub you will love all the talent there!

I'm so excited to have the opportunity to use Marion Smith's digital images from the Scarlet collection. Last week I shared with you a layout I created of my niece Emily.  Today I want to show you how the same collection can be used to create a Masculine layout.  

Mr. Cool began first grade this week. He is the baby on my side of the family, and all week we have been saying "why did he have to grow up so fast!" When I found this photo of my nephew Cooper, I had to find a way to use it on a project.  Today, a year after the photo was taken, he looks so grown up.  I'm sure many of you can relate to this, as your loved ones go back to school.

Mr. Cool digital layout created by Tonya A. Gibbs  designer for MarionSmithDesigns.com  #Art #Digital #Digi #Scrapbooking #DigitalScrapbooking #layout #Masculine #TonyaGibbs #Psychomoms #printable #MarionSmithDesigns
Layout generated in Photoshop CS6, using the Scarlet Collection by MarionSmithDesigns.com


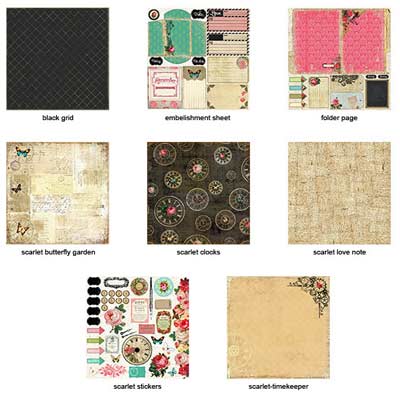
I used the masculine patterns from the Scarlet collection to create this digi layout. To make the layout more masculine, I focused on a monochromatic color scheme. Below are the patterns that I used......

Scarlet Printable Papers by MarionSmithDesigns.com  #Scarlet #Digi #Digital

In the Scarlet-Timekeeper paper I wanted to use the clocks and gears as a frame around the photograph, but the flower was too feminine. I decided to cover it with one of the clocks from the Scarlet-Clock paper.

Mr. Cool digital layout created by Tonya A. Gibbs  designer for MarionSmithDesigns.com  #Art #Digital #Digi #Scrapbooking #DigitalScrapbooking #layout #Masculine #TonyaGibbs #Psychomoms #printable #MarionSmithDesigns

I converted the Scarlet-folder page to black and white then inverted the image to give me a darker more edgy file folder for contrast against the layers of patterned paper.  Then I cropped only the edge of the folder to use on my layout.  You can see it poking out behind the gears in the above photo.


Mr. Cool digital layout created by Tonya A. Gibbs  designer for MarionSmithDesigns.com  #Art #Digital #Digi #Scrapbooking #DigitalScrapbooking #layout #Masculine #TonyaGibbs #Psychomoms #printable #MarionSmithDesigns

To create my washi tape - I used the Scarlet-LoveNote paper.  To make it dark, I followed the same steps as the file folder. Then changed the color to a rich brown so that it would have contrast, but not be too distracting. I then used a mask to give it a torn look.

I love to use things in an unexpected way. This collection has a very feminine vibe. By being selective with which portions I took from the collection, I was able to create a very masculine project.

Thanks for stopping in today. 


Tonya A. Gibbs


Read More »

Friday, August 9, 2013

Digital Printing 101

0
Hi everyone,  I wanted to start a series of blog posts that go into some details about digital projects.   Like it or not we are in a digital world. Between aps on our phones, electronic readers, and computer groups - it is totally unavoidable.  I don't think digital is going to replace paper completely in the next few years. However, by offering some tutorials and answering frequently asked questions, hopefully I can eliminate some of the anxiety associated with this evolution.  I know digital isn't for everyone - I get that - but hopefully you will keep an open mind and let me help you get your feet wet!

I'm often asked these two questions the most, so this seems like a great place to start!

"How do you print your digital files?" 
This really depends on what my final project is, below I have broken this question out into two answers. Let me exit geek talk for a minute and give you a few definitions. These are words I will reference often -

Digital - meaning the entire project was created in a graphics program and printed finished.
Hybrid -   meaning printing out the digital elements that are then mixed with traditional supplies.  
Printing Digital Layouts: Digital layouts are those that are created from start to finish in your graphics editor software, like the layout below. I typically create these in a 240 dpi - 300dpi (resolution) to the largest dimensions that I plan to print. Example if my target is 8x10  then when I start my Photoshop document I begin with an 8x10 at 300 resolution.  The layout below was created 12x12 so when printed on 8x10 photo paper it will have a output of 8x8. Once printed, they can be placed in a traditional album. Another option is to upload the spreads to a service like Shutterfly.com and print them into photobooks. Photobooks make AWESOME Christmas gifts! (I will share a video on my youtube in a few days of a couple of photobooks that I've done in the past).
Here is an example of a digital layout that I created of my daughter Brittany Gibbs. I used the Scarlet collection from MarionSmithDesigns.com.  When I have 20 of these made up - off to Shutterfly they go for binding!

Digital Layout created by #TonyaGibbs  using the #Scarlet Collection by #MarionSmithDesigns.  #Digital #Printable #DigitalScrapbooking #Art #Scrapbooking #12x12 #Teen
To create this paper I used the Scarlet collection by MarionSmithDesigns.com and Photoshop CS6.
 
 
Printing for Hybrid:  Printing for hybrid layouts I usually do on my home printer. I currently have 2 printers  HP4500 deskjet, and a HP Laserjet CP1525. Neither printers are very fancy. Sometimes I like the look of the Inkjet and sometimes I want the perminent printing of a laserjet just depends on the project. Another option - I know that many prefer to take their digital files to an office copy center and print them there.  This is an excellent alternative since they usually have the latest and greatest equipment and the resolution is better than anything you have at home.  The biggest expense obviously is the ink for home printing. 
Here is a short video explaining the "printing" process.  


Since Hybrid is  "printed" here is a sample of a hybrid project that I recently shared in a previous post.


"What type of Paper do you use to print your digital files?"
This is always a fun question - because it really depends on your final project. If you are printing this out on your home system, then explore with papers & stocks that you have around the house. I would say that 90% of mine are printed on Georgia Pacific 110lb cardstock.  If I'm making mini albums I print on all types of things like Grunge Paper, Canvas, cardstock, and fabric. You may want to print interior pages on 65lb cardstock to cut down on the bulk.  It really doesn't matter, just make sure that your printer is capable of handling the material.  Here are some suggested Materials for inkjet printers (but please check with your manufactor for settings and limitations): 
  • 110lb Cardstock - this is a super thick stock that is great for layouts, ephemera and minibooks.
  • Canvas Paper  - this will give you an interesting texture that looks like a painting.
  • Transparencies -  LOVE this idea for filler for my mini books
  • Standard copy paper - (if you are making mini books, planners, you may want this lighter paper for signatures.
  • Fabric like Muslin
  • Ribbon (oh this is really fun!)
I guess one of the reasons I really like the digital papers for hybrid projects is that it isn't my only copy of the pattern if I mess it up - I just print it again. Another is  I love the flexibility to transfer my patterns to different mediums by simply printing.

Hopefully you have learned some things today, and I've answered some of your questions.   Next week we will go a little deeper into the benefits of digital work, and how you can slowly introduce some of the elements into your workflow. 

Thanks for stopping in,

Tonya Gibbs
http://www.psychomomscrapbooks.blogspot.com
Read More »

Sunday, August 4, 2013

Emily Layout

1
 
Today I posted a project on http://www.marionsmithdesigns.blogspot.com and thought I would share it with you guys here. If you are not already a follower of the above blog - please go over and subscribe.  Marion has several super talented women who will join us in posting inspiring projects.
 
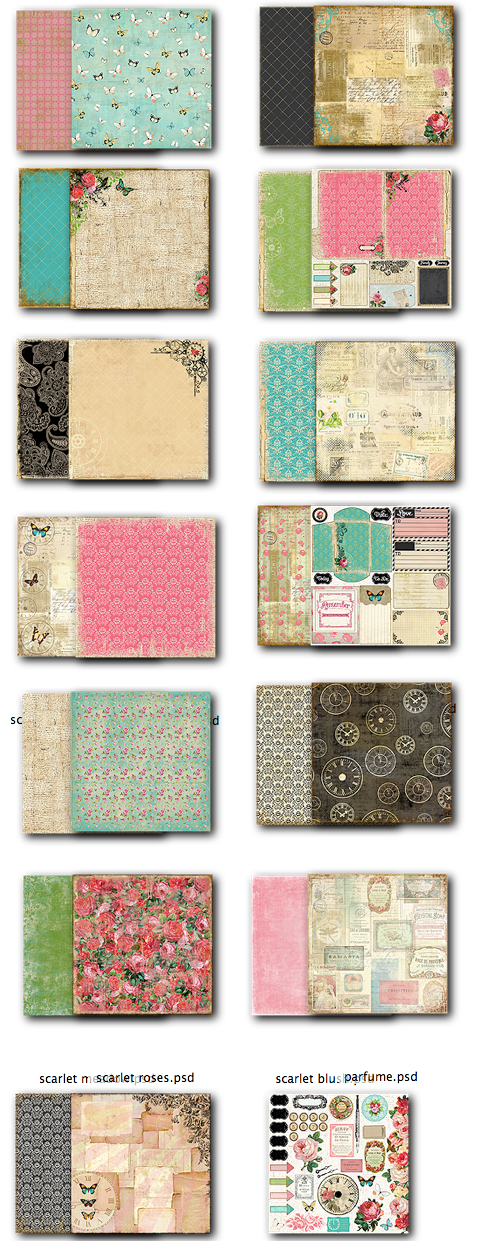
A few days ago, Marion Smith announced her new digi line Scarlet. The papers are vintage prints with lots of your favorite eclectic and bright motifs.  I love the embellishment pages, and decided to use some of the elements to create a layered Digi Layout of my niece Emily on her first birthday.   
 
Layout designed by Tonya A. Gibbs  using Scarlet - Digital papers by MarionSmithDesigns.com  #MarionSmithDesigns #TonyaGibbs #Psychomoms #hybrid #digi #digital #layout #Scrapbooking
 
When I have 20 of these layouts finished, I love to upload them to an online photo service like Shutterfly and have them printed into a hard bound book. These books make great gifts and look beautiful on coffee tables. Bonus is you can print them as often as you like to share with loved ones.
 
This line contains 27 beautiful digi downloads for $16. I also love to print these out on standard cardstock, and make mini albums, layouts, and cards. Click here to download these gorgeous papers.


Scarlet  Digi Papers by Marion Smith Designs.com   #MarionSmithDesigns #Hybrid #Digital
 
 
Thank you for coming in,


Tonya Gibbs

 
Read More »

Marion Smith's Design Team

0
 
 
I'm super excited and honored to announce that I was selected for Marion Smith's first design team.   I will be working with some amazing talent, and feel so fortunate to collaborate with them. Please check out the new blog at http://www.marionsmithdesigns.blogspot.com.  I will be posting projects there weekly as well as the other members of the team. You are sure to be inspired by these awesome women.  Subscribe so you don't miss out on a post!
 
Marion is still look for three designers. I know there are TONS of ubberly talented people that follow me. I encourage you to submit your work! Details are  on how to apply are in this flier. 
 
 
Marion will make her final announcement on August 20. 
 
Good luck!  
 
Read More »

Friday, August 2, 2013

August 5 - Live Ustream

0
Join us Live on Monday night - August 5 on Ustream at 8:30 p.m. est

I'm going to make a layout using Marion Smith Designs new release "Mad Tea Party ". These papers are in print now and scheduled to ship to Flamingo Scraps in September.


We hope you can join us live, but as always we will try to record the show in case you miss it.
 
Hope to see you in the chat on Monday night!
 
Thanks for stopping in today,
 
Tonya Gibbs
 
  
Read More »

Nail Art Plaque - CHA Project

0
 
Hi everyone, I'm really excited today to share with you a project that I created for the Canvas Corp, Marion Smith, 7Gypsies and Tattered Angels booth at the Summer Create -n- Connect 2013 Show (also known as summer CHA). 
 
Nail Art Plaque on Display at CHA Summer 2013 - Designed by Tonya A. Gibbs #7Gypsies #TatteredAngels #CanvasCorp #MixedMedia #ArtsyAddicts #Psychomomscrapbooks
 

I wanted to create a vibrant mixed media piece with the luscious Tattered Angel's Blue Green mediums but wanted it to be a bit unusual. I was inspired by some string art projects that I found on Pinterest.   Since I live in Florida I decided to theme my project around the beach.

I pulled out all of my Tattered Angels sprays in blues, turquoise, and mint greens.   (colors used are  listed under the photo)

Glimmer Mists: True Turquoise (not pictured),  Lake Shore, Caribbean Blue, Bubbles, Mantis,  Maya Blue, Chalkboard Glimmer Mist:  Sandy Beach, Mantis,  Plain Jane: Sky, and Glimmer Glam: Palm Leaf
 

Nail Art Plaque on Display at CHA Summer 2013 - Designed by Tonya A. Gibbs #tatteredangels #ArtsyAddicts #Psychomomscrapbooks
 
I started by painting my unfinished wooden plaque with white full bodied gesso.  Once it was dry, I began building layers of the Tattered Angels Glimmer, Plain Jane and Chalkboard sprays all over the surface. I started with the blues and added small amounts of the greens to give the colors of the Florida coast line.  I then mixed in some of the Palm Leaf Glam and hit is with my heat gun causing the glaze to crackle and provide texture.  This texture gives the illusion of looking through the water to ground below. I love how all the glimmer swirled to give the piece movement and depth.  I made sure this surface was very  dry before starting the next step.  
 
I made a paste of clear Elmer's Glue & Sea Shells - I spread this paste across the plaque diagonally.  I encouraged the dripping along the sides of the plaque for interest.  The Glue is so thick that it took a long time to be completely dry.  I let it sit for at least 24 hours.    
 
I combined modeling paste and full bodied gesso into a paste and spackled some irregular lines  to give the illusion of waves crashing the shore.  I also spread a little of this into the shells to give the look of sea mist. 
 
Once EVERYTHING was completely dry I sprayed the entire plaque with a clear Acrylic Spray paint to seal the Glimmer mists.  I didn't want them to get wet and run.
 
For the star,  I started with a silhouette starfish image that I found on the Internet.   I printed it the size of my plaque. I went out to the garage and found used rusty nails (they need the flat head on top to make sure the twine doesn't slip). The nails were about 2 inches long. I nailed around the perimeter of the star pattern, and removed the pattern from the plaque before wrapping my twine. The Canvas Corp twine was the perfect "rustic" style to give my start fish life.
 
This was a super simple project that resulted in a cute home decor item.  I think I might hang this  in my guest bathroom.  
 
Thanks for stopping in today,
 
Tonya Gibbs
http://www.psychomomscrapbooks.blogspot.com
This post original published on weareartsyaddicts.blogspot.com


Read More »

Friday, July 19, 2013

Travel Journal - Marion Smith Life Planner

2
So tomorrow I'm headed out to CHA's Create & Connect Summer 2013. I can't wait to go! I've spent the last few weeks pinning every sneak peek I could find.  My mind is spinning and I've decided I really need to find a way to "focus".  I decided to make myself a little planner for the trip, and Marion Smith's latest printable - Life Journal Book was perfect.

Journal created by Tonya Gibbs http://www.psychomomscrapbooks.blogspot.com

The downloads are only $19.99 and you get 22 Journal Pages, 3 covers, 1 spine, Monthly calendar page, Weekly Planner Page, Daily Planner page,  Life Journal Intro page, Recipe Intro Page Photos intro page, planner intro page, Project planner page, 36 tabs, 4 photo frames, Recipe pages Notes page, Lists/shopping list page, 2 bookmark sets.  You can purchase the kit here!

Here is a walk through of my journal.


Thanks for stopping in today,
 
Tonya Gibbs
Read More »

Friday, July 12, 2013

Soar Layout

1
Hi everyone.  Today I wanted to show you a layout that I created with the May Artsy Addicts Kit  featuring MME - Find Your Wings & Fly by Rhonna Farrer.
 
 
May Artsy Addicts Kit  - Tonya Gibbs
 
The kits are a monthly subscription for around $40. For more information about the kits and to subscribe please visit: http://www.marionsmithdesigns.com/kit-club.html
 
At the end of  Addie's Birthday party last year she picked up this stack of helium balloons and starting spinning around in a circle.  The photo gives such a good glimpse into her whimsical free spirited approach to life.  I've been holding this photo for a while in hopes of the perfect paper to tell the story. Since this collection has a lot of  hot air balloons, soft pastel colors and girly girl images, I thought it would be perfect.
 
 
Soar Layout by Tonya Gibbs http://www.psychomomscrapbooks.blogspot.com
 
 
Soar Layout by Tonya Gibbs http://www.psychomomscrapbooks.blogspot.comThe layered look printed on one of the papers, allowed me to give the feel of lots of small layers with little effort and no bulk.  I continued the look by layering a few of the pages from the 6x6 pad to form a clustered frame around the photograph. I left the border that has the hole for the paper pad on the paper and distressed it. This technique allowed me to build on the other office supply themes found in the paper.

The arrows were cut from my Silhouette Cameo, and the cut file can be purchased from the Silhouette store. I used both the positive and the negative of the cut on the layout.   The arrows help to give direction and movement to the embellishments.  

I added a little of the washi tape and half a doily to soften up the harsh overlapping lines from the paper.  The Hot Air balloon and Soar Title were the 3D stickers from the collection and offer great dimension to the layout.  To hide a white vase in the background of the photograph, I used one of the brad embellishments next to the title.

I love the new trend of office supplies on layouts.  So I bought a package of reinforced holes and used my Prima Chalk Inks in pastel green to make them match my layout. I also included a small shipping tag.  To give a more organic whimsical look to the layout I sewed some of the elements down and left the strings hanging from the edges, and let the twine free fall around the photo at a diagonal.
 
**DESIGN TIP  I used the negative from a notebook paper punch scrap as one of my layers too.  When punching out borders, or cuts from diecuts, pay attention to the negatives, you may find a hidden treasure.
 
I love all the small details that make up this layout. It was a lot of fun challenging myself to use 6x6 papers to create a 12x12 layout. I would love to see what you guys are doing with your Artsy Addict Kits.  I challenge you to stop hoarding these beautiful papers, and post a project with them on the Artsy Addicts Facebook Wall.  
 
Thanks for stopping in today,
 
Tonya Gibbs
 
 
Resources:
  • My Mind's Eye - Rhonna Farrer  Find Your Wings & Fly:  6x6 paper, brads, Alpha Stickers, 3D Stickers, Washi Tape
  • Prima Chalk Ink
  • Recollections - Washi Tape
  • Paper Source - Flat Back Pearls
  • Prima Fluid Chalk Ink - Pastel Green
  • EK Success - Notebook Paper Border Punch
  • Paper Doily
  • Studio Calico - Speech Bubble Wood Veneer
  • Twinnery - Pink Twine
  • Silhouette - Arrow die cuts
  •  


Read More »

Friday, June 28, 2013

Parade - Loot Bag / Clutch Purse

0
Hi everyone, I think I've shared in previous posts that the 4th of July is one of my favorite Holidays that we celebrate here in the US.  Our little town throws a celebration that literally lasts for days.   The fourth is a full day that includes a parade, craft festival, parties, and ends with a huge firework demonstration.  Our typical "parade loot bags" are recycled plastic bags from the grocery store - (Super classy - right).  Well, not this year....
 
 Canvas Corps Saggy Baggy, Denim Flower, and Red Twine.

When I saw this little Saggy Baggy from Canvas Corp my mind immediately went to Loot bags for the little girls in my life. At the parade they collect flags, beaded necklaces, candy, gum, stickers and all sorts of other fun trinkets when walking around downtown. This bag offers a chic way to store their bounty.


This is also a great project for the kids to help you make.
 
You need to either stich your embellises to your bag or use a fabric glue (I don't recommend hot glue for this project).  I trimmed the flap of the bag with some pretty lace, and layered metallic Ric Rac trim over the top to mask the glue.  I also trimmed around the center of the  Canvas Corp denim flower center with the same Ric Rac trim and added a button and twine to finish off the flower.  Star buttons were glued diagonally across the bag to add a little more sparkle and shine. I finished the bag off with red grosgrain ribbon for handles. 
 
This little bag would also be a cute clutch for a small cellphone and camera at the downtown festivities.  A small piece of white Velcro could also be added to the inside of the bag, if you decide to use this as a clutch purse.
 
Thanks for stopping in today, I hope you guys have a fantastic weekend.
 
Tonya Gibbs


Read More »

Friday, June 21, 2013

Happy Day - Layout

0
 
Today I want to feature a layout that I created using the May Artsy Addicts Kit.  The kit included: My Mind's Eye - Find Your Wings and Fly designed by Rhonna Farrer. The kits are a monthly subscription for around $40.  For more information about the kits and subscribe please visit:  http://www.marionsmithdesigns.com/kit-club.html


Last weekend we attended a birthday party for my Niece Emily who turned one (A layout of Miss Emily is forthcoming - I had to find some supplies first!)  Of course Aunt Tonya took hundreds of photos.  Among some of my favs were these of my Husband, Kenny, being silly with Averie and Addie.  I swear all I hear is "Tickle me Uncle Kenny" when they are around. I wasn't surprised to walk into the living room and see him being attacked by two giggling girls.  They were all so happy I needed the layout to have a fun happy theme, so I chose bright bold colors, but toned them down with a muted blue background.


 **GASP** Is that Glitter I see  on the page?  Yes, Yes it is.  Those of you who have followed me for a while know that I HATE GLITTER WITH A PASSION. However, my goal for this layout was to try some different things.
  1. I wanted to use a glittered title (it was after all a celebration) and silver/gold glittered titles are trendy now.
  2. Use bold colors (again, I tend to migrate to vintage muted colors)
  3. Keep it flat -  I wanted to try my hand at clusters of flat embellishments - (NO FLOWERS allowed!). 
  4. NO sprays/mixed media techniques. (this was really hard for me).
  5. Use multiple photos (I normally only use one)
I know what your thinking -  what alien has taken over her brain?  Sometimes trying things outside your comfort zone will help stimulate your creativity.  I must say as simple as this layout looks IT TOOK ME ALL DAY to complete.  


I am pleased with the result.  I think the colors give a "circus" type feel to the layout and who isn't happy at the circus? I used lots of cuts from my Silhouette Cameo as accents on the right.  I love that pictures really pop off the page against the bright yellow background.  What are your thoughts?
 
I encourage you to try something different - whether it is a style or a product that you don't normal use.  You may stimulate the creative juices and find a "new" you!  Not that I'm going to totally embrace glitter with every project, but hey, I found a way to keep it from shedding so you may see it more often.
 
Thanks for stopping in today,
 
Tonya Gibbs


Read More »

Tuesday, June 18, 2013

Multiple Looks - One Sketch

2
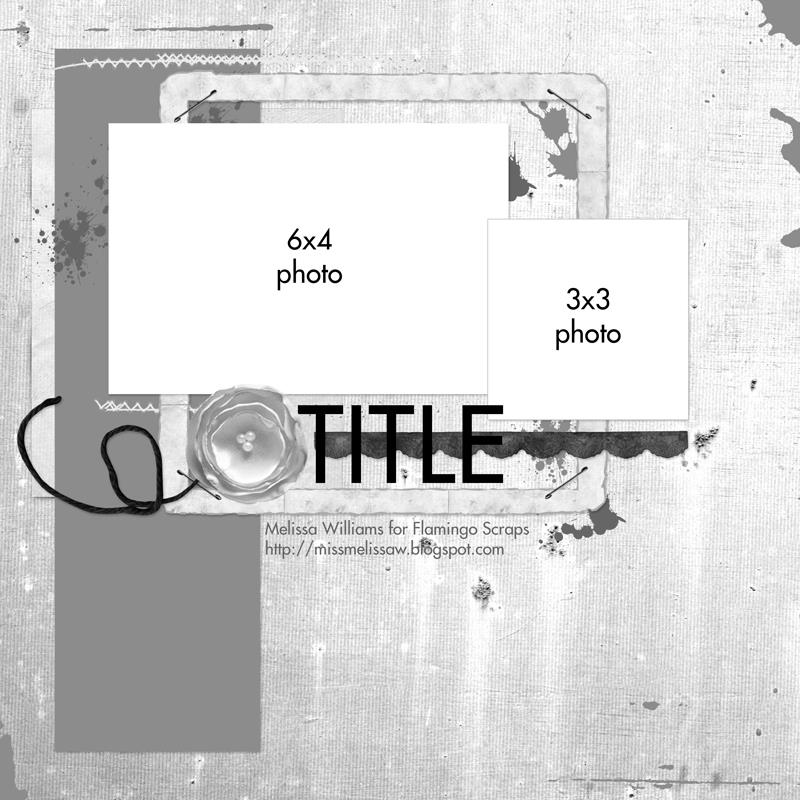
During my last Ustream on June 3 (view it here) we created a layout using this sketch from Flamingo Scraps Designer,  Melissa Williams.


We took the sketch and made it masculine with the Heidi Swapp No limits and Vintage Chic collections, and Pink Paislee's Mistables.   Loved the look and texture of this multi photo layout, that celebrates my son's passion for football. 

 
Today I would like to share with you a layout that uses the same sketch in its feminine spirit using the Pink Paislee Hope Chest Collection. 
 
 
In this version I used gesso, masks, and sprays to soften the bold pattern of the paper and give the layout more texture.  I also adhered strips of linen and pieces of hymnal pages to the page for depth and added interest.
 
 
Layers of Maya Road and Webster's pages trims soften the page and give a pop of color that draws your eye to the photograph.   Additional elements were die cut from scraps of the paper collection to create layers around the photos.  The title was cut using the Silhouette Cameo. 


I love that both of these layouts look so different, but were based on the same sketch.   Have you created a layout using this sketch?  If so, please share it with me on the Flamingo Scrap's Facebook page.
 
Our next Ustream will be broadcast on July 1 at 8:30 est. We will be celebrating Christmas in July. I figured if I started making Christmas ornaments in July I may have them ready for Christmas (HAAA).  Hope to see you there!
 
Supplies for both layouts can be found at: Flamingscraps.com
Read More »

Friday, June 14, 2013

4th of July Table Caddy

0
4th of July is one of my all time favorite holidays - JUST LOVE IT!  The colors, the celebrations, parades, parties, fireworks - who could ask for more fun?
 
I was trying to think of some fun decorative ideas for parties.  A few weeks ago I shared with you an invitation, and today I thought I would alter a six pack box to use as a table caddy.  


Here are the supplies I used to alter the caddy.   In addition to the supplies listed below, you need to upcycle a beverage six pack box.  I used two sheets of each of these papers to complete the box.  Measurements will vary depending on your box.  I started with the bottom and completely cover it wrapping about a half an inch up the sides to keep my utensils from falling out. Then covered the over hang with the side panels. 


I used Canvas Corps' Royal Blue And White Stars Reverse Paper as my base. Then made pinwheels with the Red & White Ribbon Stripe paper then cut them in half and topped these beautiful Red Canvas Banners.  Tied the banner with the Red Canvas corp Twine bows.  Then add a little sparkle with party garland, cake pick star Tucked in a Small American Flag as a topper,  and this catty turned out FAB!
Our high school team colors are royal blue, white, and red I think I may modify this caddy after the 4th for a tailgate caddy by removing the flag and adding a football!
 
 
**Side note:  Place a water bottle in the back center spot to weigh the box down so it doesn't blow off the table.  You can camouflage the bottle with paper napkins. **
 
 
Here is a second invitation I made with the scraps from this project.


Thanks for stopping in today,
 
Tonya Gibbs


Read More »

Friday, June 7, 2013

Tattered Angels - Opal Paint System

1
Can you say - LOVE!  For all you shabby chic lovers out there this system is going to be a fav. This is the Tattered Angels Naturally Aged Paint System Precious Stone - Opal.   It is so pretty and soft. Sheer elegance!
 
 
Each kit consists of 4 1oz bottles of a medium from the Tattered Angel's family.  I have had several people ask about larger bottles. Yes, you can buy these in the standard bottles individually if you have a larger project in mind.

 
Here is a close up of the marbled background.

 
I love how soft and delicate it turned out for the backdrop for this card.

 
here is a process video on how to use the system.
 
 
Thanks for stopping in today,
 
Tonya Gibbs
Read More »

Tuesday, June 4, 2013

Masculine Layout - Friday Night Lights

0
Thank you to everyone who came to the live Ustream last night.  We had a great time creating this masculine layout of my son and husband.
 
 
The layout was based on a sketch by Flaming Scraps Design Team Member Melissa Williams. We took the feminine layout and grunged it up for a masculine layout.


I used the Heidi Swapp No Limits line (which is themed more at travel) and used it for a sports themed layout.  I love the unexpected, but I really love using things that are not as they were intended.  The splatters of Tinsel colorshine remind me a lot of bokken lights, and I think they really add to the title of Friday Night Lights.  The title seems a little lost on the layout because of the Shine from the flash - but it really does stand out in the original.
 
Another thing we explored was using the negatives from your die cuts and punches. We used the negative of an arrow strip and also the confetti stars were punched from a Martha Stewart border punch.  These offer interesting embellishments to the layout with no added expense. 
 
Glitter was added to the Gesso and Glue & Seal (You could use matt medium instead), to give the gesso a little sparkle and texture. 


In this class I gave you 10 promps for making trendy layouts for scrapbooks, project life, and mini albums.

Here are the 10 promps:
  1. Grunge it up (tear, distress edges, uses stencils, gesso)
  2. Metal (Use staples, pins, paper clips)
  3. Use Negative spaces from dies and punches
  4. Use Glitter (Gasp I know I know you guys are in shock because I hate glitter), but we used it in the Gesso for texture!  But glittered titles are very popular.
  5. Use Vellum or Transparent pieces
  6. Sew  *I used Metallic Silver thread and love it! 
  7. Use Sequins - this is a super popular trend right now.
  8. Drip shimmer sprays
  9. Stars - Stars are very popular right now especially for confetti.
  10. Metallic Embellishments - Gold and Silver are HOT right now especially for titles, and frames.

Product lines:
Heidi Swapp - No Limits (paper)
Heidi Swapp - Vintage Chic (paper)
Heidi Swapp - Color Magic Tags, Banners, and Chipboard
Heidi Swapp - Color Shine  - Tinsel and Teal
Heidi Swapp  - Fabric Banner
Tattered Angels - Glimmer Mist - Hula Hoop
Cosmo Cricket - Photo Frames
Silhouette Cameo -  Dies & Titles
Liquitex Surface Prep Gesso
Glitter
Prima - Donna Downey Stencil Dots
Sequins
Tim Holtz - Tiny Attacher
Ranger -  Archival Ink  Red
Star Vellum
Martha Stewart Star Border Punch.

For those who missed the live show - you can watch the recording on here.


Read More »

Monday, June 3, 2013

Ustream Tonight - June 3

0
Please join me & Flamingo Scraps tonight, Monday, June 3 at 8:30 pm est on Ustream, as I create a layout using this sketch shared by Flamingo Scraps Designer, Melissa Williams, earlier last week on the Flamingo Scraps Blog. 


This sketch is going to get a masculine twist when I use Heidi Swapp and Pink Paislee papers and embellies from Flamingo Scraps. We are going to talk about using things for an unexpected purpose, including embellishments, paper, and the sketch.

Make sure you join the crowd, http://www.ustream.tv/channel/gibbst early.

There will not be a kit this month. As always, we will do our best to record the show for those who can't make it live.

Read More »
I love seeing things you create using my tutorials or project shares. Please use the following handles/tags in social media to insure that I get to see your creations:

INSTAGRAM: #FollowingTonyaGibbs    |   TWITTER:  @gibbst    #FollowingTonyaGibbs   |      FACEBOOK:Tag  Tonya Gibbs   #FollowingTonyaGibbs

I Design for:

    http://www.yvonneblair.com

Guest Artist: Click icon to see post!

http://www.teresacollinsdesignteam.blogspot.com/2013/10/family-stories-layout-and-video-by.html#comment-form   http://canvascorp.com/2013/03/21/easter-treat-baskets/


Past Teams

http://www.die-namites.com/     marion