Follow Me...

       
Thanks for stopping by! Don't forget to subscribe!
Showing posts with label Stamping. Show all posts

Tuesday, May 9, 2017

Grace In Her Heart Layout

0
Grace In Her Heart Layout By Tonya Gibbs


Hi everyone,  with Mother's Day right around the corner, I thought I would do a layout this week paying respect to this lovely woman who recently went on to be the Lord!  She is my husband's Grandmother, and I have had the pleasure of loving her for over thirty years!
 
I picked one of the sentiments from Yvonne's  Everyday Quotes 1 sets "She has fire in her soul and grace in her heart" to Title this layout, as it is the perfect way to describe Grandma May.  She spent everyday of her life motivating those around her, but the words on her tongue were always singing the praises of our Lord Jesus Christ.
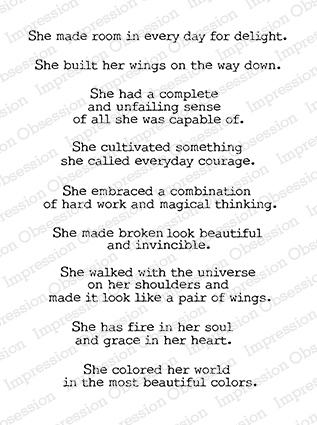
http://www.iostamps.com/mm5/merchant.mvc?Screen=PROD&Product_Code=3152-XL&Store_Code=IOSTAMPS&search=3152-xl&searchoffset=&filter_cat=&PowerSearch_Begin_Only=&sort=&range_low=&range_high=

 The sentiment was added with gold embossing powder so that it shines bright on the layout. The gold also works nicely with the foiling accents in the ephemera from the paper collection.
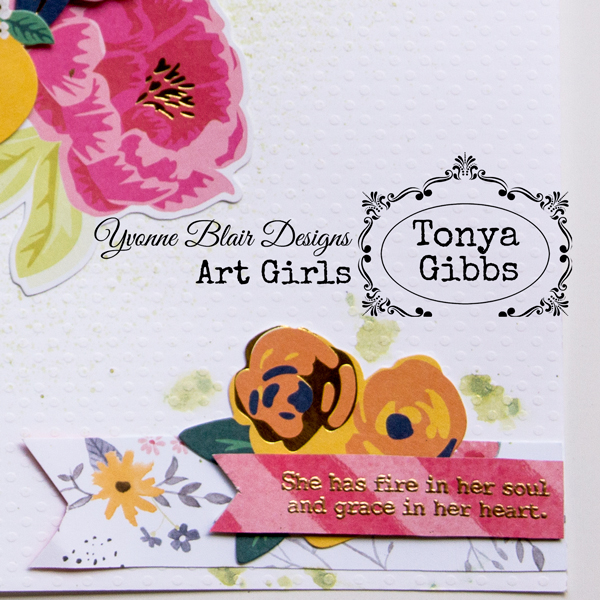
Grace In Her Heart Layout By Tonya Gibbs


I wanted my layout to remain simple. So I chose a dot embossed white texture paper from Bazzill for the background. Then I lightly spritzed it with  Lindy's Stamp Gang, Edelweiss Moss Green.  This is a nice green with gold shimmer.   It gives a bokken effect around my garden cluster.
Granny loved her flower gardens, and she was laid to rest on Earth Day this year. I wanted lots of flowers to frame her photograph. 

Grace In Her Heart Layout By Tonya Gibbs

I used papers and ephemera from American Crafts. The ephemera is Jen Hadfield,  Home Made, and the papers are Dear Lizzy's Saturday collections Central Park and Skyline.   

Here is a quick video sharing how I created the layout.


When we lose someone we love, it can be difficult.  But I am always thankful that I have photos to reflect back on those happy memories that we have shared with them in the past.  Thank you all for sharing this moment with me today.  I encourage you to hug someone special, and snap a photo of them. Then pull out a paper collection, and create a layout.

Read More »

Monday, February 13, 2017

Blessings Journal for Yvonne Blair Designs

0
Blessing Journal Designed by Tonya A. Gibbs for Yvonne Blair


Hello mixed media crafty peeps how are you today?  With all the uncertainty in the world today, I decided to create a Blessings journal to help me focus on all the wonderful things that happen in my daily life.  It helps to center me, and serves as a daily reminder that God is in control of all things! 

Let me walk you through my process for creating this journal using these awesome stamps from Yvonne and Impression Obsessions!   As always I've linked them up to the Impression Obsessions' online store, but shop your local retailers if you have one!


http://www.iostamps.com/mm5/merchant.mvc?Screen=PROD&Product_Code=D17166&Store_Code=IOSTAMPS&search=D17166&searchoffset=&filter_cat=&PowerSearch_Begin_Only=&sort=&range_low=&range_high=

http://www.iostamps.com/mm5/merchant.mvc?Screen=PROD&Product_Code=L17103&Store_Code=IOSTAMPS&search=Wirly+Vine&searchoffset=&filter_cat=&PowerSearch_Begin_Only=&sort=&range_low=&range_high=


http://www.iostamps.com/mm5/merchant.mvc?Screen=SRCH


 http://www.iostamps.com/mm5/merchant.mvc?Screen=SRCH

Inspiring this entire project was Yvonne's stamp! Thank You God.  Have you ever been doing something in your life and just knew God had his hand in that moment in your life?   When I saw this stamp I knew I wanted to create this journal. 


I have a few of these dollar bin journals laying around my craft room that I keep on hand for note taking and decided to use these for my base.  They come in handy for these types of projects and are very inexpensive. NOTE: I usually pick them up at the end of the season when they clearance them out since I generally alter the covers anyway!   

Blessing Journal Designed by Tonya A. Gibbs for Yvonne Blair

To give the outside of my journal a nice rich color and feel, I used created a mono-print to create the background image, on a piece of bleached muslin fabric, once everything was dry I did some sewing on around the edge of journal. This keeps everything in place over time, but it also adds texture. Dropping gold Liquitex Acrylic Ink, and spraying the entire journal with Heidi Swapp's Gold Color Shine adds a richness to the final journal.  I encourage you to pull out your stamps, stencils, inks, and paints and enjoy a little creative play. This was so much! 


Blessing Journal Designed by Tonya A. Gibbs for Yvonne Blair

 
This next step you can do after the book is filled with memories or before, or before.  I love how it inspires me!  I went into my little bucket of left overs and created a beautiful cluster.  Sprinkled a little seed beads and sequins to add sparkle, and topped my sentiment with a prima clay cherub piece.  Isn't this just a beautiful book. It would make a great Secret Sister gift or Prayer Partner book.  You could also switch out the sentiment and use the book for a number of other occasions as well.

Blessing Journal Designed by Tonya A. Gibbs for Yvonne Blair
 
Thanks for stopping in and hanging out with me today!  I hope I have inspired you to a create a Blessings Journal to remind yourself of the tiny little miracles that happen in your own daily life. 
Read More »

Monday, November 21, 2016

Imagine the Possibilities for Yvonne Blair Designs

0

 
Oh imagine the possibilities when you say I'll try instead of I can't.  Well today I have a fun little project for you to try.  A little doodle art.  I'm using these great stamps from Yvonne Blair, to finish off my project, to create the perfect card!


Everyday Holds
 
 
These little doodle projects are easy to do and I find them very therapeutic.  You can easily complete one in a matter of minutes, and look at how fabulous they look on cards. 


You can keep them black and white or watercolor them like I did here to give them more interest.  The possibilities are endless.  I think these little guys would be fabulous on Christmas cards, Birthday cards, and even Holiday Tags.    If you only filled in part of the circle they would even be interesting. 
 
Here is the inside of the card:


Here is a quick video to show you how it is done.


Wasn't that easy as pie?   Ok I want to start seeing the internet filled with doodle wreaths.  If you decide to do one, make sure you #YBArtGirlFun  in social media so I can see what you did! 
 
Thanks for stopping in today.


Read More »

Tuesday, January 26, 2016

YouTube Scrapbook Layout Video Hop

1


Hi everyone it is YouTube Video Hop Day!   I'm joining up with a few amazing artists over on YouTube to do a fun collaborative hop to help showcase and promote designers on YouTube.  This will hopefully help to introduce you to new channels to explore.  

 Here are the other channels participating in today's hop:


For my project, I decided to showcase a layout using Prima's Almanac collection. I have been hoarding my limited stash of this collection for years now, and it was time to use it up!   Its feminine country theme was perfect for today's layout. 

For me - Memory keeping isn't just about family photos - It is also about remembering those moments that define our days.  Sometimes we take for granted those quick laughs or daily reminders, or simple parts of our daily routines.  My Sister and I share a little daily laugh, and today's layout spot lights that memory.  


Please meet Laughing Lucy, one my Sister's goats. My sister, Kim, owns a small farm where she takes in rescue animals. Some are abused, some the owners have passed on and have no one to care for them, and some were just abandoned. Well Ms. Lucy was one of those rescues. Through months of love she has been one of those animals that our entire family has grown to love.   Kim sends me a daily photo of Ms. Lucy and her sweet smile.  It is my daily reminder to Laugh.  I literally open my phone and belly laugh out loud.     I mean seriously how could you not laugh out loud when you see this sweet face staring at you?


For today's layout, I chose the Almanac paper because it had so many farm type images. I also really loved the feminine soft colors as well.   I imagine the "sounds" of the farm being like an orchestra early in the morning, with the crowing and clucking, so the music paper fit right in - don't you think?


I kept the design simple, but the overall layout looks very detailed due to the paper layers.   


Here is a process video showing you all the details and lots of techniques.


HERE IS THE VIDEO.. 


Here is a view of my finished layout:


Thanks for stopping in today, and for hopping along with us.  I hope my post today brought a smile to your face!  Lucy loves it when you LAUGH!  


Thanks,
Tonya

Supplies:

  • Prima 12x12 Almanac Collection - Wordsmith
  • Prima 12x12 Almanac Collection - Shaffer
  • Prima 12x12 Almanac Collection - Libre
  • Prima 12x12 Almanac Collection - Notary
  • Prima 12x12 Almanac Collection - Edison
  • Prima Capri Merlot Flowers
  • Prima Shabby Chic Treasures Ingvild Bolme Resin Baroque Frame
  • Prima Finnabair - Cling Mounted Stamps - Don't Forget To Fly
  • Prima - Ingvild Bolme - Chalk Fluid Edger - Old Road
  • Prima Stamp Hexagon (no longer available)
  • Prima Printery Chipboard pieces
  • Tim Holtz - Idea-ology - Tiny Attacher
  • Tim Holtz - Idea-ology - Tissue Tape - Music Notes
  • Tim Holtz - Idea-ology - Loopy Pins
  • Ranger Ink - Archival Ink - Jet Black
  • Ranger Ink - Manila Tag #5
  • Scotch - Foam Tape
  • Tombo Mono Adhesive
  • Liquitex - Iridescent Bright Gold Acrylic ink
  • FONT - MA SEXY (Laugh Daily)
  • Champaign Grosgrain Ribbon
Read More »

Saturday, December 5, 2015

Simple Poinsettia Watercolor turotorial

0


Merry Christmas everyone!   I just love this time of year!  I've been getting my Christmas cards ready to be mailed.  Today I wanted to share with you a simple way to watercolor that takes very little time, but looks like you spent hours. The best part - these cards are flat, and can easily be mailed!

For today's focal point, I stamped this gorgeous stamp by Stampendous!   It comes with a mask/stencil which comes in handy for layering larger projects or painting negative spaces.   As you can see the stamp fills an A2 card nicely!  There is a coordinating die for this stamp set that is sold separately.
 
I recommend a heavy card stock if you plan to emboss your stamping like I did.  I would use a stock that is 80 - 110lb if possible.   Watercolor paper could be used, but the stamping may not be crisp.
 
Card dimensions:
The cardstock is cut at 4 1/4 inches  x 11 inches  then scored at 5 1/2 inches  so it is a top folding card
Interior Panels:   4inches x 5 inches
 
Here is a glimpse at my finished card:

For a super simple watercolor method where you don't have to be too persnickety about colors mixing, try heat embossing your stamped image. The enameled raised edges give boundaries for the water to pool and help keep your pigment trapped.  While you may experience a little wicking it will be minimal, and you won't have to be too fussy.  I really love the richness the gold embossing offers to the overall look of the card.
 
To watercolor my card I created a palette with an ice tray using this watercolor set. You can see how I did this in my September  Ustream!
  
 
Here is the video where I created the card:


Who wouldn't enjoy receiving a hand painted card.  These are just gorgeous!   Thank you so much for hanging out with me today!
 
Tonya
 
Supplies:
Stampendous Cling Create A Poinsettia CRS5081 Stamp
Inkadinkado 97342MM
Cardstock - 81/2 x 11  Red Cardstock
Solid white/ivory cardstock  80 - 110lb
Versa Ink
Ranger Ink - Queen's Gold Embossing Powder
Daler Rowney Watercolor Tubes
White Paint
Round 0 Watercolor Brush
Round 10 Watercolor Brush
Scotch ATG tape
 
 
Read More »

Tuesday, June 2, 2015

June 1 Ustream Follow up Gelli Prints

9

Hi everyone, thank you so much for those of you who came to watch the show live last night.  I had a lot of fun playing with my Gelli Plate. It was a great night of total creative freedom!  


In the promo, I promised a night of inky finger fun, and  from this photo of my hands, looks like Mission Accomplished. My husband thought I was becoming a Smurf (LOL). 

I used the 8x10 Gelli Plate to pull prints on Hymnal Pages, Cardstock, Printer Paper, Muslin, Kraft Paper, Index Cards and even Canon Warranty Newsprint.


Here is a link where you can purchase a Gelli Arts® plate.   I recommend biting the bullet and just getting the 8x10. However, if that is too overwhelming,  then I would say the 5x7 is great beginner size. Then your prints can be used for cards and tags.   Anything smaller can become frustrating.  (In my opinion). 


Paints -  I used an assortment of Apple Barrel Acrylic Craft Paints (list of colors used are in the supplies below).  Anything goes, pick your favs, just don't forget a white, and black to go with your selections.   You can really use any type of ink or paint (fluid or full bodied) that you wish. Even spray color mists work great.  I would avoid permanent inks since they may stain your Gelli® Plate. 

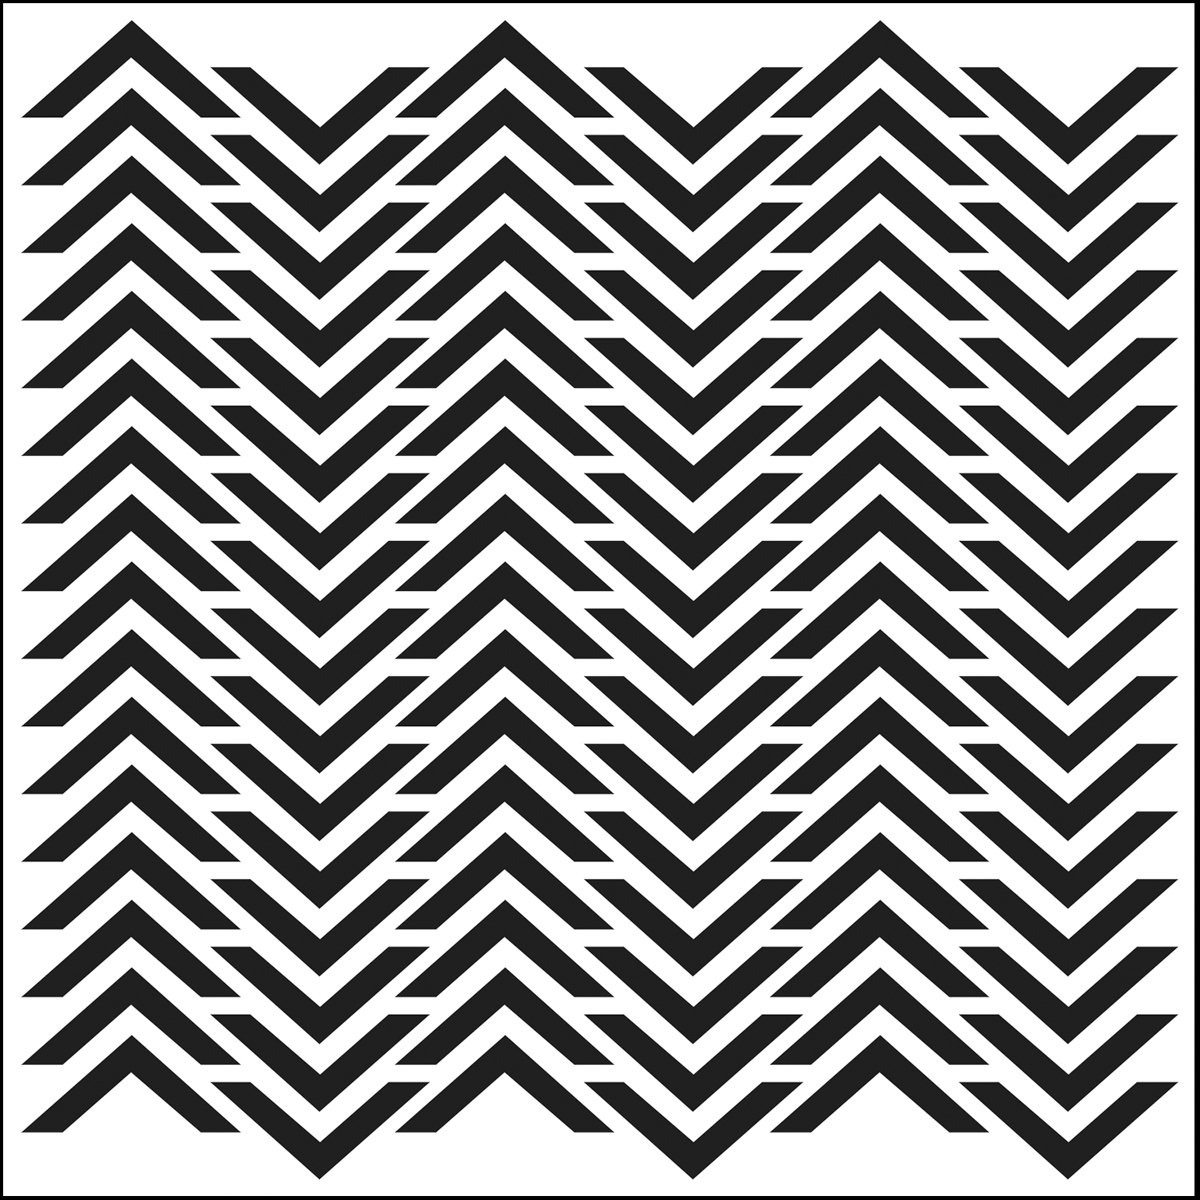
Now gather up some house hold times to add texture.  I used String, and disposable cups to create interesting shapes.  I also used The Crafter's Workshop Cheveron 12x12 stencil to create an interesting pattern. 


I also used die-cuts to create patterns on my prints

My go to backgrounds are:


You can print on most any surface.  I pulled a print onto a piece of muslin, that I later used to cover my little journal.  Our finished journal size was 4x4.  


I used a butterfly stamp and archival jet black ink on one of the prints to create butterflies.  Don't be afraid to stamp and fussy cut or use your print with your die-cuts to create interesting elements for your journal pages and collages.   Another print was used for the background of the first spread. Look at how they contrast of the ghosted print on the hymnal page looks against the 1st generation print used in the background.  SOOOOO FUN! 


Then I used an Uni-ball  Jetstream Bold Point 1.0 mm Black Pen to add my title and a few doodles.  This pen didn't even hesitate on this gel covered page.  It flowed so smooth and silky.  Highly recommend this!  I picked mine up at Target.


I also added a few splashes of color in the white spaces, and some shadows around my butterflies \ with my Faber-Castell Design Memory Craft® Stamper's Big Brush Artist Pens in Cold Grey, and May Green


In case you missed the class live, here is the recording: 


Since I couldn't finish up each page of the book in the allotted time for the class, I decided to use the remaining prints to create the other spreads throughout the month.  Visit this blog weekly in June, to see my new entries.  I will also continue to build one existing pages as the mood strikes me.  So it will be fun to see how everything evolves.

Thanks again for hanging out with me.  It was so much fun. Our next class is scheduled for July 6.  But I may do a Saturday Ustream again, sometime in the middle of June. I'll try and give a heads up if I do.

Tonya

Supplies:
  • 8x10 Gelli Arts® Plate
  • Plaid  Apple Barrel Acrylic Paint Various Colors, Kiwi, Yellow Fame, Pink Parfait, Jack O'Lantern, Bimini Blue. White, Black
  • Brayer
  • The Crafter's Workshop - Balzer Designs Chevron Stencil 12x12
  • String
  • Various Disposable Cups (in different sizes)
  • Die-Versions Whispers Background - Hexagons   
  • Die-Versions Whispers Background - Morocco
  • Cosmetic Sponge
  • Martha Stewart Butterfly Stamp
  • Faber-Castell Design Memory Craft® - Gel Medium
  • Faber-Castell Design Memory Craft® - Stamper's Big Brush Artist Pen - May Green
  • Faber-Castell Design Memory Craft® - Stamper's Big Brush Artist Pen - Cold Grey
  • Uni-ball Jetstream Bold 1.0 mm
  • White Geli Roll Pen
  • Various papers with patterns, textures and weights. I used hymnal pages, index cards, copy paper, book text, paper bag, newsprint (warranty printed paper), cardstock.  The variety gives interest to your prints. 
  • Tim Holtz - Sizzix  Block Talk Alphabet Upper Case
  • Tim Holtz - Stamper's Anonymous - Ultimate Grunge Stamp 
  • Ranger Ink, Archival Ink Pad - Jet Black
Read More »

Wednesday, March 26, 2014

Marion Smith Designs and Petaloo Blog Hop Day 3

10
It is so exciting to be a part of this AMAZING blog hop. Make sure to visit all the designer's blogs from March 24th-28th! There are so many amazing projects being shared ALL week! So keep checking back every day.  


 Make sure you comment and subscribe to each blog, as we will be picking some lucky winners to win some awesome new products from both Marion Smith Designs and Petaloo!
 
Links to each blog can be found on the following sites
Marion Smith Designs and Petaloo
 
 
Welcome to day three of the hop!  Today I wanted to share a little mixed media card that I made for Mother's Day. This card could easily be used for any occasion by changing out the sentiment.  


I used scraps from the Never Grow Up Sleep Over paper, Mad Tea Party Wonderland paper, Filigree Doily, Tea Party Stamps, Texture Stamps, and Garden Rose Stamps from Marion Smith S


Petaloo's Velvet Hydrangeas Fuchsia flowers are the star of this card.
 
 
 I really wanted to showcase some of the Marion's amazing stamps on my card.  So I painted the Sleepover paper with white gesso to tone down the paper pattern. I then used Archival Coffee Ink to stamp my images.   I even stamped over the wooden filigree and the flowers, to give them texture. 


This is one of my home made wooden embellishments that I made with the Tea Party stamps and a  balsa wood piece.  I did a tutorial a few months back.  You can view it here.


I added some flat back pearls to the center of the flowers, and painted them with my RV09 Copic Marker to match the flowers.


 A little Heidi Swapp Gold Lame Color Shine finished this card off with the Midas touch!   I know my Mother is going to love this card.
 
Don't forget to check out my projects from Days 1 & 2 as well. 
 
Thanks for hopping with us today,
don't forget to leave a comment, and subscribe! 
 
 
 Angela Carter
 
Aneta Matuszewska

Maggie Armstrong

Sarah Bargo
Ana Paula Leal

Colette Nederhoff

Peggy Baker
 Then hop over to
 
 
Happy Hopping,
 
Tonya
 
 
Card Resources:
 
  • Marion Smith Designs - Never Grow Up Paper Collection "Sleepover"
  • Marion Smith Designs - Mad Tea Party "Wonder"
  • Marion Smith Designs - Filigree Doily  
  • Marion Smith Designs - Texture Stamp
  • Marion Smith Designs - Tea Party Stamp
  • Marion Smith Designs - Garden Rose Stamp
  • Petaloo - Velvet Hydrangeas Fuchsia
  • Flat back pearls
  • Scotch ATG
  • Surebonder Detail Glue Gun
  • Heidi Swapp Pink Archival Ink
  • Heidi Swapp Gold Lame Color Shine
  • Recollections Card sentiment
  • Tattered Angels Timeless Lilac
  • Tattered Angels Tutti Fruiti
  • Bazzil Texture Cardstock
  • Burlap
  • Pearls
  • Dollar Bin - Wood filigree
  • Liquitex Gesso
  • Woodsy - Circles
  • Copic RV09
  • Ranger - Archival Ink Coffee
Read More »

Tuesday, November 12, 2013

My Honey Bee Layout by Tonya Gibbs

0
When my sister-in-law called and asked me to take pics of this little honey bee in the pumpkin patch,  I didn't hesitate.  She was  buzzing around the pumpkins, like she was pollinating a garden. The entire time, her wings were upside down, her tongue hanging out, and buzzing noises coming from her mouth. She was so busy and absolutely ADORABLE! 


Marion's Nirvana collection was the perfect backdrop for this photos.  I used the Photo Ops for my base, because it has a nice muted turquoise color and orange damask on the b-side.  The contrast was just what I needed for my photo to take center stage.   I used smaller pieces of the Typograph paper as accents around the photo.  


For embellishments, I reached for Marion's stamps.   


The  alpha stamps were used to spell out My Honey Bee on a banner cluster at the bottom of the layout.


I used the large rose from the Curious set with some water colors in pinks and gold.  To make the flowers have a little depth I decided to mix them in with mulberry flowers, colored to match.   I also used clear gold glitter nail polish in the centers of the stamped images to give them a little texture.  


The Doilies were stamped with black ink onto a scrap of  paper from the collection, and I trimmed around them to make them look like border.  For a little added shimmer I dripped Gold Ink and the Tim Holtz bronze metallic distress paint all over the layout near the photo cluster. I love how it looks like dripping honey.  The camera really doesn't do justice to the shimmer on this layout. 


Thanks for stopping in today, please don't forget to subscribe.  If you like what you see here, please visit my blog at  for more great projects! 


Tonya Gibbs
http://www.psychomomscrapbooks.blogspot.com 

Read More »
I love seeing things you create using my tutorials or project shares. Please use the following handles/tags in social media to insure that I get to see your creations:

INSTAGRAM: #FollowingTonyaGibbs    |   TWITTER:  @gibbst    #FollowingTonyaGibbs   |      FACEBOOK:Tag  Tonya Gibbs   #FollowingTonyaGibbs

I Design for:

    http://www.yvonneblair.com

Guest Artist: Click icon to see post!

http://www.teresacollinsdesignteam.blogspot.com/2013/10/family-stories-layout-and-video-by.html#comment-form   http://canvascorp.com/2013/03/21/easter-treat-baskets/


Past Teams

http://www.die-namites.com/     marion