Follow Me...

       
Thanks for stopping by! Don't forget to subscribe!
Showing posts with label Graphic 45. Show all posts

Sunday, December 16, 2012

Graphic 45 - Santa Card

0
Christmas is right around the corner, and I've been working on Christmas Cards for my friends.   I wanted to share this holiday card that I created using Graphic 45's Christmas Emporium in 8x8, and my new Tim Holtz Embossing Diffusers. 


I used a standard 4.25 x 5.5 kraft card as my base.   Then placed my embossing folder over the front of the card as you normal would do, but instead of using a top plate, I replaced the top plate with the Oval shaped Embossing Diffuser from Tim Holtz.  This place actually prevents the embossing in the "Cut out" area.   Then using an xacto knife and the place as a template, I carefully removed the center "non embossed area". 
 
 
I then backed the hole with the Christmas Emporium paper and fussy cut the other elements from the unused sections of the page.   The Poinsettia at the top was made using red velvet and a Spellbinder's Poinsettia Die. 
 
I love the layered look of this card.   There are so many rich details in such a small space. 
 
Thank you for stopping in today,
 
Merry Christmas,
 
Tonya Gibbs
 
 
Resources:  
  • Graphic 45 - Christmas Emporium 8x8 paper
  • Ranger  - Forrest Moss Stain, Gold Stickles, Gold Paint Dobber
  • Sizzix -   Tim Holtz Embossing Diffuser Set 1
  • Provo Craft - Embossing Folder
  • Spellbinders - Layered Poinsettie Die
  • Martha Stewat Crafts - Holly Punch, Micro Beads
  • Red Velvet Ribbon


Read More »

Tuesday, November 27, 2012

Dec. 3 Ustream - Place In Time Calendar

0
I hope you can join us on December 3, at 8:30 EST on Ustream as Tonya Gibbs creates this Graphic 45 Place In Time Mini Album.  This album is designed to highlight a memory or important photo for each month for a year. At the end of 2013, you will have an entire year documented.

Ustream Channel:   http://www.ustream.tv/channel/gibbst

 
Here is a glimpse at one of the spreads. 


Kit includes:

1  Graphic 45 A Place in Time 8x8 Paper Pad    
1  Graphic 45 A Place in Time 12x12 Sheet Cardstock Stickers   
1  SRM Calendar Numbers Small    
1  SRM Calendar Months Sleek Small  
12”  Maya Road Small Organza Rose Trim Black  
12”  Maya Road Small Organza Rose Trim Sand 
12”  Maya Road Small Organza Rose Trim Cream 
12”  Maya Road Small Organza Rose Trim White 
12”  Maya Road Small Organza Rose Trim Sky Blue 
12”  Maya Road Small Organza Rose Trim Pink  
12”  Maya Road Small Organza Rose Trim Light Pink  
12”  Maya Road Small Organza Rose Trim Brown  
2 Sheets Graphic 45 A Sophisticate 12x12 Paper   
1 Prima Bretton Purity Vine  
1 Yard Prima Cabachon Lace  
1 Prima Wood Clock Face 
TOTAL       $31.99*


*We figured the price of the kit to offset the cost of the shipping, since the new store will not allow us to include shipping in the price of individual items!


Additional Items needed to complete this project:

Available at Flamingo Scraps


8 Sheets 12x12 Black Cardstock    (In Stock  $5.49)
Bind It All and Spine OR 3 Binder Rings (Binder Rings In Stock $.99)
Tim Holtz Alterations Die Pocket Envelope  (Special Order- $21.99   30% off)
Matte Medium, 8oz. (In Stock $10.99 30% off)
Flowers

Other
Tim Holtz Movers & Shapers Cargo Numbers 
Black Chipboard
Border Punch


Read More »

Monday, August 20, 2012

Stashed Treausers 2

0

Last week I shared with you a layout that I was making. The layout is going to be used as a collaborate book with a group of other friends.   My theme was to use something that I had never used before or scraps. 

Today I wanted to share with you the other side to the layout.


Everything on this side was a scrap. The paper in the background was scraps from the other side, and was quilted together to form the base. A Strip of Prima Almanac paper was used to form a pocket in the middle of the page.  The Inspire label was a remnant from the April Journal from Marion, and the Pocket was also one of the left over pieces from one of Marion's Journals.  The two flowers were cut from scraps of book pages, and the trim and lace were all less than 3 inch pieces that were in my stash.

I love using my scraps, and look how beautiful this all turned out.  I hear people say all the time, I toss my scraps.  Well I don't when I'm between projects I pull those scraps out and I make cards, layouts, journal pages.  

I love how the small pieces of trim on the right side mimic the piano keys on the left.  Funny thing was I didn't realize I had done that until the photographs were taken.

Don't forget about the challenge that ends Sept. 1  -  See previous post for details.

 
Thanks for stopping in today,

Tonya

 
RESOURCES:   
  1. Prima:   Reflections Paper - Shalamar, Almanac Paper. Black sequin fiber
  2. Graphic 45:  Stamped Girl - Ladies Diary
  3. Ranger:  Distress Markers (colored the girl with them).
  4. Marion Smith Designs:  Envelope and  Journal Card
  5. Tonya Gibbs Designs:  Inspire Label
  6. EK Success Scallop Circle Punch
  7. Tonic Studios: Lacy Scallop Border Punch
  8. Misc. Pearl Trim, Lace, Twine, Buttons, Doily, Black Cardstock.

Read More »

Sunday, August 5, 2012

Tim Holtz Distress Markers - Card

1
I wanted to share with you today a card that I created with the Graphic 45 Ladies' Diary paper collection.  I LOVE the vintage look of this paper, and thought the stamped image would be beautiful colored with my Distress Markers by Tim Holtz.


These markers are a bit tricky to color with, but I think the image turned out beautiful.  I used the Ranger Stamping Paper for the base.  Then used Spun Sugar and Victorian Velvet to color her dress.  To achieve the shading I just put a small amount of water on the paper before applying the ink.  Then I spread the ink with a water brush, and tapped the excess water away with a paper towel to keep the paper from buckling.  Here is a close up of the girl.


In this photo, you can see the Prima Cabbage roses were also painted with the Tim Holtz Spun Sugar pen,  I put streaks of color onto the roses then used the water brush to spread the ink around.  This technique gave the flowers a variegated look.


Here is a video of me demonstrating how to use the Distress Markers to color this image.


Do you have the Distress Markers?  If so, how are you using them.
Thanks for stopping in today.

Tonya Gibbs


Resources:
  • Graphic 45:   Ladies' Diary "Moment in Time" paper, Lady's Diary Stamp No. 6
  • Prima: wooden clock, cabbage roses, mini roses
  • Ranger: Tim Holtz Distress Markers:  Spun Sugar, Victorian Velvet (Dress & Hat), Aged Mahogany (Hat), Tattered Rose (Skin), Pumice Stone (shadow), Scattered Straw (background)
  • Gelly Roll - Crystal Star Glitter pen (hat), gold pen for buttons.
  • lace
  • black card stock


Read More »

Wednesday, July 4, 2012

Once Upon A Spring Time - Cigar Box

0
I guess you could say I've been on a Fairy kick lately.  Graphic 45's Once Upon A Springtime is one of my all time favorite paper collections.   I have been wanting to alter a cigar box with it for a long time now.   This past weekend I finally had the chance.


Graphic 45: Once Upon A Spring Time: Pixie Post and Once Upon A Spring Time, Ranger: Claudine Hellmuth Matt Multi-Medium and Forest Moss Distress Stain, Prima: Rose buds, Mini Roses and Trellus Roses; Tattered Angels:  Gold Glimmer Mist, Mist Fits Glimmer Chalks; Floral Vine; Gelly Roll Clear Star Pen.

The base of the box was painted with the Ranger Forest Moss Stain then I sprayed Gold Glimmer Mist on top so that it has a nice shine to it.  I cut out the book and Fairies from the paper collection and flanked it with some Roses from Prima. Then I fussy Cut Fairies and birds from the paper collection and nestled them into the floral spray.

I love the way this box turned out, and I hope that my friend likes it too.

Thanks for stopping in today,

Tonya

Read More »

Thursday, April 19, 2012

Distress Pens

0
So I finally got a chance to play with my Distress Markers from Tim Holtz that I purchased from Flamingo Scraps as a pre-order.

These markers are so much fun, they have a watercolor quality - but react a little different than water colors since the colors replace each other rather than contaminate.


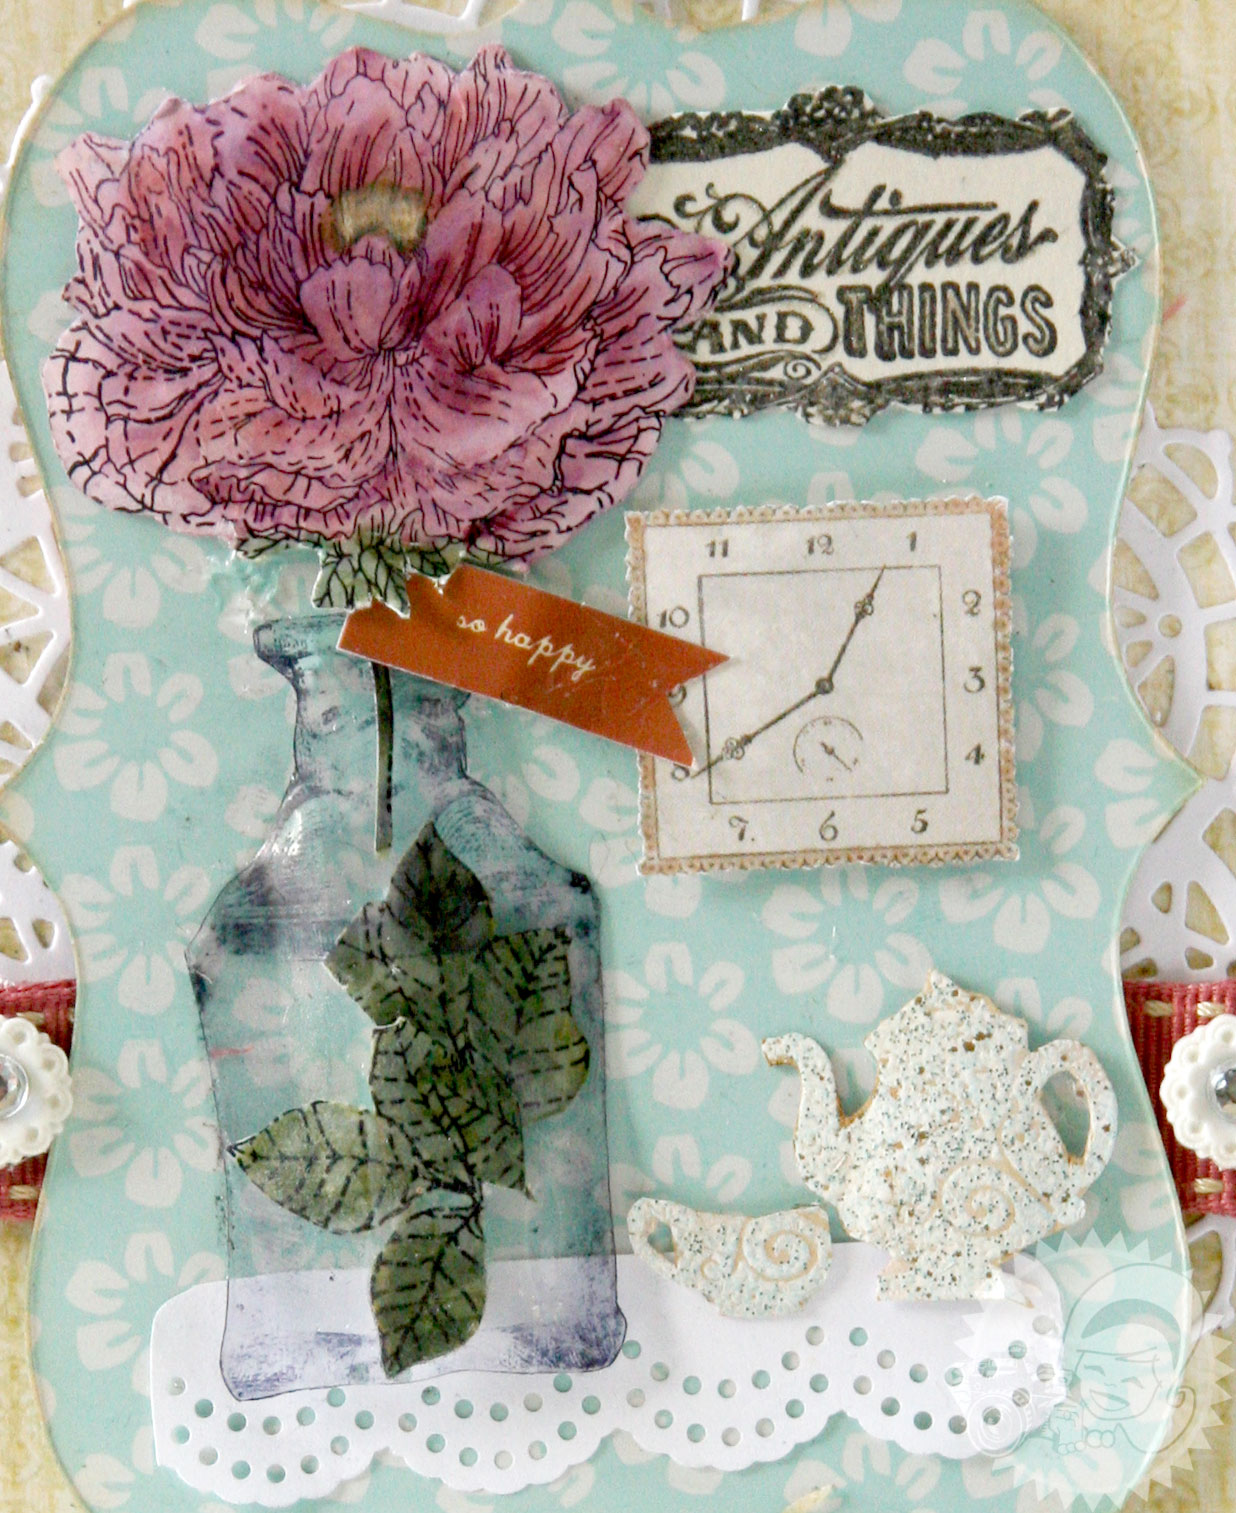
The flower on this card is a Prima stamp that I colored with the TH markers on the Ranger stamping paper. Coloring took some getting used to, but I like how the design looks like I colored it with my Copic markers.

I decided to use the image on a card.

From Flamingo Scraps: Ranger: Tim Holtz Distress Markers, Ornamental Die, Distress inks: Tea Dye; Prima: Rose Stamp, Antques Stamp, packaging (So Happy banner); Graphic 45: Bottle Stamps; Webster's Pages: Trims, Misc. Laces; Pink Paislee Packaging, Frame stamp - Soree, Stampendous: Frantage - Shabby Blue.
Other: Tonic Punch: dotted scallop, Cherry Lynn Designs: Doily Die, Studio G: Stamp "Delight in the Little Things", Spellbinders: Label 5, My Mind's Eye: Tea Pot stamp.


I used the packaging from a Pink Paislee stamp set as the background, I also used packaging from the Rose Prima stamp set for the banner that says "So happy". I love upcycling the packaging when I can.

The bottle is from Graphic 45's new stamp Curosity Shoppe Perfume Bottles. I stamped it with Archival Ink on transparency, then warped it with my heat gun to make it look dimensional.

The tea pot was a My Mind's Eye stamp that was embossed with the new Frantage Embossing Enamel, and the cup was actually another stamped image from the tea pot, but I cut it down to make it into a cup.

To create the sign behind the vase I layered a Prima Printery stamp for the words and the Frame from a Pink Paislee - Soree stamp set.

The clock was cut from a piece of scrap paper on my desk. The table cloth was a punch scrap.

Then I added Lace and Trims to the bottom, and stamp that says "Delight in the little things" as the sentiment.

I hope you enjoy this card share today,

Thanks for stopping in,

Read More »

Thursday, October 6, 2011

Steampunk Mini Album

0
My good friend, Amy Rodriguez, designs unique mini album dies and has shared her Hot Air Balloon and Dress Form Dies with me. I was so excited to get the opportunity to play with these dies. I wanted to share with you guys today the mini that I created.

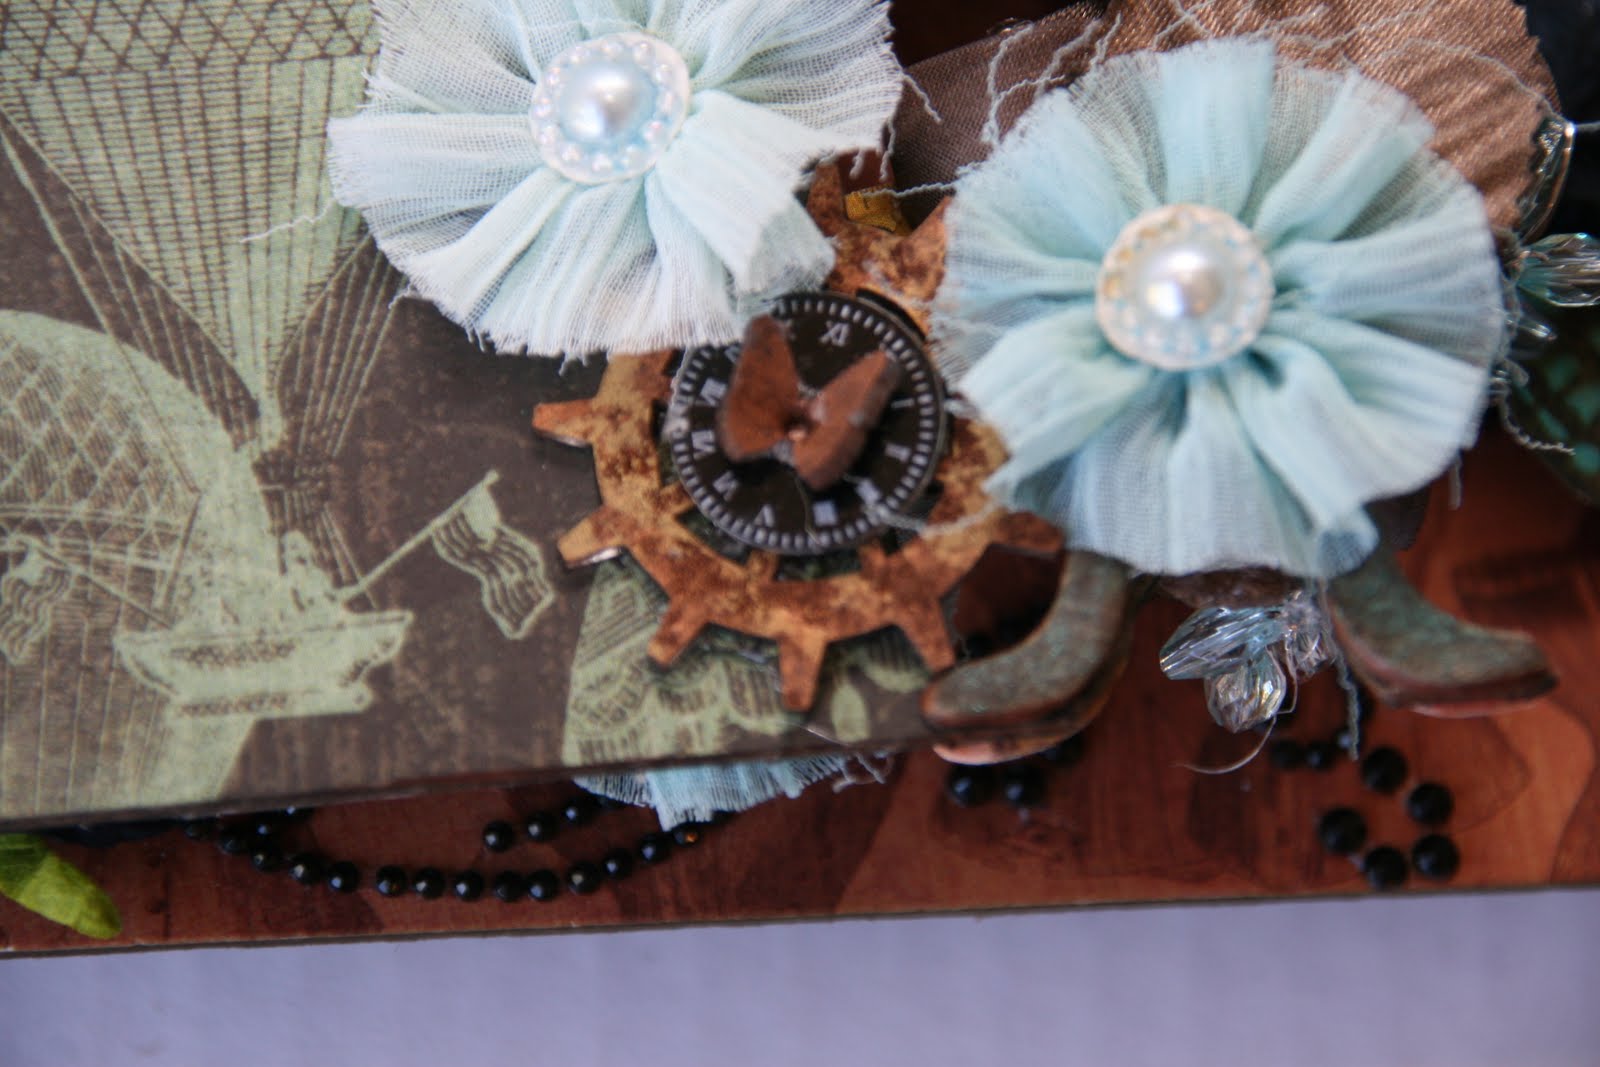
From day one I knew I would use the Steampunk Debutant Line from Graphic 45 on this mini. I wanted it to be tiered so that behind every dressform there was a hot air balloon. I also wanted the pages to be vibrant, elegant, but most of all interactive!


Here is a video with a complete walk through of the concepts and details on each page.

Thanks for stoping by today,
Tonya Gibbs
http://www.psychomoms.com
Read More »
I love seeing things you create using my tutorials or project shares. Please use the following handles/tags in social media to insure that I get to see your creations:

INSTAGRAM: #FollowingTonyaGibbs    |   TWITTER:  @gibbst    #FollowingTonyaGibbs   |      FACEBOOK:Tag  Tonya Gibbs   #FollowingTonyaGibbs

I Design for:

    http://www.yvonneblair.com

Guest Artist: Click icon to see post!

http://www.teresacollinsdesignteam.blogspot.com/2013/10/family-stories-layout-and-video-by.html#comment-form   http://canvascorp.com/2013/03/21/easter-treat-baskets/


Past Teams

http://www.die-namites.com/     marion